The Web Beans is being developed at the Seam project. You can download the latest developer release of Web Beans from the the downloads page.
Web Beans comes with a two deployable example applications: webbeans-numberguess, a war example, containing only simple beans, and webbeans-translator an ear example, containing enterprise beans. There are also two variations on the numberguess example, the tomcat example (suitable for deployment to Tomcat) and the jsf2 example, which you can use if you are running JSF2. To run the examples you'll need the following:
the latest release of Web Beans,
JBoss AS 5.0.1.GA, or
Apache Tomcat 6.0.x, and
Ant 1.7.0.
You'll need to download JBoss AS 5.0.1.GA from jboss.org, and unzip it. For example:
$ cd /Applications
$ unzip ~/jboss-5.0.1.GA.zip
Next, download Web Beans from seamframework.org, and unzip it. For example
$ cd ~/
$ unzip ~/webbeans-$VERSION.zip
다음으로, JBoss가 위치해 있는 곳을 Web Beans에게 알려야 합니다. jboss-as/build.properties를 편집하고 jboss.home 속성을 설정합니다. 예:
jboss.home=/Applications/jboss-5.0.1.GA
To install Web Beans, you'll need Ant 1.7.0 installed, and the ANT_HOME environment variable set. For example:
참고
JBoss 5.1.0 comes with Web Beans built in, so there is no need to update the server.
$ unzip apache-ant-1.7.0.zip
$ export ANT_HOME=~/apache-ant-1.7.0
Then, you can install the update. The update script will use Maven to download Web Beans automatically.
$ cd webbeans-$VERSION/jboss-as
$ ant update
이제, 첫번째 예제를 배치할 준비가 되었습니다!
작은 정보
The build scripts for the examples offer a number of targets for JBoss AS, these are:
ant restart- exploded 형식으로 예제를 배치합니다ant explode- 배치 버전을 다시 시작하지 않고 exploded 예제를 업데이트합니다ant deploy- 압축된 jar 포맷으로 예제를 배치합니다ant undeploy- 서버에서 예제를 제거합니다ant clean- 예제를 지웁니다
numberguess 예제를 배치하려면:
$ cd examples/numberguess
ant deploy
Start JBoss AS:
$ /Application/jboss-5.0.0.GA/bin/run.sh
작은 정보
If you use Windows, use the run.batscript.
애플리케이션이 배치되면 http://localhost:8080/webbeans-numberguess에서 살펴보시기 바랍니다!
Web Beans includes a second simple example that will translate your text into Latin. The numberguess example is a war example, and uses only simple beans; the translator example is an ear example, and includes enterprise beans, packaged in an EJB module. To try it out:
$ cd examples/translator
ant deploy
애플리케이션이 배치되면 http://localhost:8080/webbeans-translator에 가보십시오!
You'll need to download Tomcat 6.0.18 or later from tomcat.apache.org, and unzip it. For example:
$ cd /Applications
$ unzip ~/apache-tomcat-6.0.18.zip
Next, download Web Beans from seamframework.org, and unzip it. For example
$ cd ~/
$ unzip ~/webbeans-$VERSION.zip
Next, we need to tell Web Beans where Tomcat is located. Edit jboss-as/build.properties and set the tomcat.home property. For example:
tomcat.home=/Applications/apache-tomcat-6.0.18
작은 정보
The build scripts for the examples offer a number of targets for Tomcat, these are:
ant tomcat.restart- deploy the example in exploded formatant tomcat.explode- update an exploded example, without restarting the deploymentant tomcat.deploy- deploy the example in compressed jar formatant tomcat.undeploy- remove the example from the serverant tomcat.clean- clean the example
To deploy the numberguess example for tomcat:
$ cd examples/tomcat
ant tomcat.deploy
Start Tomcat:
$ /Applications/apache-tomcat-6.0.18/bin/startup.sh
작은 정보
If you use Windows, use the startup.batscript.
애플리케이션이 배치되면 http://localhost:8080/webbeans-numberguess에서 살펴보시기 바랍니다!
numberguess 애플리케이션에서 1에서 100사이의 숫자를 알아내기 위해 주어진 10 번을 시도하게 됩니다. 각각 시도한 후 숫자가 너무 높은지 또는 너무 낮은지를 알려주게 됩니다.
numberguess 예제는 여러 Web Beans, 설정 파일, Facelet JSF 페이지로 구성되어 있으며, war로 패키지되어 있습니다 설정 파일부터 시작합시다.
예제에 해당하는 모든 설정 파일은 WEB-INF/에 위치해 있으며, 이는 소스 트리에 있는 WebContent에 저장되어 있습니다. 먼저, faces-config.xml을 사용하여, Facelets를 사용할 JSF를 알려주게 됩니다:
<?xml version='1.0' encoding='UTF-8'?>

<faces-config version="1.2"

              xmlns="http://java.sun.com/xml/ns/javaee"

              xmlns:xsi="http://www.w3.org/2001/XMLSchema-instance"

              xsi:schemaLocation="http://java.sun.com/xml/ns/javaee http://java.sun.com/xml/ns/javaee/web-facesconfig_1_2.xsd">


    <application>

        <view-handler

>com.sun.facelets.FaceletViewHandler</view-handler>

    </application>


</faces-config

>
여기에는 빈 web-beans.xml 파일이 있어, 이는 Web Beans 애플리케이션으로 애플리케이션을 표시합니다.
마지막으로, web.xml 파일이 있습니다:
<?xml version="1.0" encoding="UTF-8"?>
<web-app version="2.5"
xmlns="http://java.sun.com/xml/ns/javaee"
xmlns:xsi="http://www.w3.org/2001/XMLSchema-instance"
xsi:schemaLocation="http://java.sun.com/xml/ns/javaee http://java.sun.com/xml/ns/javaee/web-app_2_5.xsd">
<display-name>Web Beans Numbergues example</display-name>
<!-- JSF -->
<servlet>  <servlet-name>Faces Servlet</servlet-name>
<servlet-class>javax.faces.webapp.FacesServlet</servlet-class>
<load-on-startup>1</load-on-startup>
</servlet>
<servlet-ma
<servlet-name>Faces Servlet</servlet-name>
<servlet-class>javax.faces.webapp.FacesServlet</servlet-class>
<load-on-startup>1</load-on-startup>
</servlet>
<servlet-ma pping>
<servlet-name>Faces Servlet</servlet-name>
<url-pattern>*.jsf</url-pattern>
</servlet-mapping>
<context-pa
pping>
<servlet-name>Faces Servlet</servlet-name>
<url-pattern>*.jsf</url-pattern>
</servlet-mapping>
<context-pa ram>
<param-name>javax.faces.DEFAULT_SUFFIX</param-name>
<param-value>.xhtml</param-value>
</context-param>
<session-co
ram>
<param-name>javax.faces.DEFAULT_SUFFIX</param-name>
<param-value>.xhtml</param-value>
</context-param>
<session-co nfig>
<session-timeout>10</session-timeout>
</session-config>
</web-app>
nfig>
<session-timeout>10</session-timeout>
</session-config>
</web-app> | Enable and load the JSF servlet |
| Configure requests to |
| Tell JSF that we will be giving our source files (facelets) an extension of |
| Configure a session timeout of 10 minutes |
참고
Whilst this demo is a JSF demo, you can use Web Beans with any Servlet based web framework.
Let's take a look at the Facelet view:
<!DOCTYPE html PUBLIC "-//W3C//DTD XHTML 1.0 Transitional//EN" "http://www.w3.org/TR/xhtml1/DTD/xhtml1-transitional.dtd">
<html xmlns="http://www.w3.org/1999/xhtml"
xmlns:ui="http://java.sun.com/jsf/facelets"
xmlns:h="http://java.sun.com/jsf/html"
xmlns:f="http://java.sun.com/jsf/core"
xmlns:s="http://jboss.com/products/seam/taglib">
<ui:composition template="template.xhtml">
<ui:define name="content">
<h1>Guess a number...</h1>
<h:form id="NumberGuessMain">
<div style="color: red">
<h:messages id="messages" globalOnly="false"/>
<h:outputText id="Higher" value="Higher!" rendered="#{game.number gt game.guess and game.guess ne 0}"/>
<h:outputText id="Lower" value="Lower!" rendered="#{game.number lt game.guess and game.guess ne 0}"/>
</div>
<div>
I'm thinking of a number between #{game.smallest} and #{game.biggest}.
You have #{game.remainingGuesses} guesses.
</div>
<div>
Your guess:
<h:inputText id="inputGuess"
value="#{game.guess}"
required="true"
size="3"
disabled="#{game.number eq game.guess}">
 <f:validateLongRange maximum="#{game.biggest}"
minimum="#{game.smallest}"/>
</h:inputText>
<h
<f:validateLongRange maximum="#{game.biggest}"
minimum="#{game.smallest}"/>
</h:inputText>
<h :commandButton id="GuessButton"
value="Guess"
action="#{game.check}"
disabled="#{game.number eq game.guess}"/>
</div>
<div>
<h:commandButton id="RestartButton" value="Reset" action="#{game.reset}" immediate="true" />
</div>
</h:form>
</ui:define>
</ui:composition>
</html>
:commandButton id="GuessButton"
value="Guess"
action="#{game.check}"
disabled="#{game.number eq game.guess}"/>
</div>
<div>
<h:commandButton id="RestartButton" value="Reset" action="#{game.reset}" immediate="true" />
</div>
</h:form>
</ui:define>
</ui:composition>
</html> | Facelets is a templating language for JSF, here we are wrapping our page in a template which defines the header. |
| There are a number of messages which can be sent to the user, "Higher!", "Lower!" and "Correct!" |
| As the user guesses, the range of numbers they can guess gets smaller - this sentance changes to make sure they know what range to guess in. |
| This input field is bound to a Web Bean, using the value expression. |
| A range validator is used to make sure the user doesn't accidentally input a number outside of the range in which they can guess - if the validator wasn't here, the user might use up a guess on an out of range number. |
| And, of course, there must be a way for the user to send their guess to the server. Here we bind to an action method on the Web Bean. |
예제에는 4 개의 클래스가 존재합니다, 첫 번째 두 개는 바인딩 유형입니다. 먼저, 임의의 숫자를 삽입하기 위해 사용되는 @Random 바인딩 유형이 있습니다:
@Target( { TYPE, METHOD, PARAMETER, FIELD })

@Retention(RUNTIME)

@Documented

@BindingType

public @interface Random {}
삽입될 수 있는 최대 번호 삽입하기 위해 사용되는 @MaxNumber 바인딩 유형도 있습니다:
@Target( { TYPE, METHOD, PARAMETER, FIELD })

@Retention(RUNTIME)

@Documented

@BindingType

public @interface MaxNumber {}
Generator 클래스는 생산자 방식을 통해 임의의 숫자를 생성해야 할 책임이 있습니다. 또한 이는 생산자 방식을 통하여 가능한 최대 숫자를 나타냅니다:
@ApplicationScoped

public class Generator {


   private java.util.Random random = new java.util.Random( System.currentTimeMillis() );


   private int maxNumber = 100;


   java.util.Random getRandom()

   {

      return random;

   }


   @Produces @Random int next() {

      return getRandom().nextInt(maxNumber);

   }


   @Produces @MaxNumber int getMaxNumber()

   {

      return maxNumber;

   }


}
Generator는 애플리케이션 범위로 되어 있음을 발견하실 것입니다; 따라서 매번 다른 임의 숫자를 갖지 않게 됩니다.
애플리케이션에 있는 마지막 Web Bean은 Game 범위 세션입니다.
@Named 어노테이션이 사용되므로 JSF 페이지에서 EL을 통해 bean을 사용할 수 있음을 인지하실 것입니다. 마지막으로 생성자 삽입을 사용하여 임의의 숫자로 게임을 초기화합니다. 물론, 게임 플레이어에게 언제 게임에어 이겼는지를 알려주어야 하므로, FacesMessage로 피드백을 제공합니다.
package org.jboss.webbeans.examples.numberguess;


import javax.annotation.PostConstruct;

import javax.faces.application.FacesMessage;

import javax.faces.context.FacesContext;

import javax.webbeans.AnnotationLiteral;

import javax.webbeans.Current;

import javax.webbeans.Initializer;

import javax.webbeans.Named;

import javax.webbeans.SessionScoped;

import javax.webbeans.manager.Manager;


@Named

@SessionScoped

public class Game

{

   private int number;


   private int guess;

   private int smallest;

   private int biggest;

   private int remainingGuesses;


   @Current Manager manager;


   public Game()

   {

   }


   @Initializer

   Game(@MaxNumber int maxNumber)

   {

      this.biggest = maxNumber;

   }


   public int getNumber()

   {

      return number;

   }


   public int getGuess()

   {

      return guess;

   }


   public void setGuess(int guess)

   {

      this.guess = guess;

   }


   public int getSmallest()

   {

      return smallest;

   }


   public int getBiggest()

   {

      return biggest;

   }


   public int getRemainingGuesses()

   {

      return remainingGuesses;

   }


   public String check()

   {

      if (guess

>number)

      {

         biggest = guess - 1;

      }

      if (guess<number)

      {

         smallest = guess + 1;

      }

      if (guess == number)

      {

         FacesContext.getCurrentInstance().addMessage(null, new FacesMessage("Correct!"));

      }

      remainingGuesses--;

      return null;

   }


   @PostConstruct

   public void reset()

   {

      this.smallest = 0;

      this.guess = 0;

      this.remainingGuesses = 10;

      this.number = manager.getInstanceByType(Integer.class, new AnnotationLiteral<Random

>(){});

   }


}
The numberguess for Tomcat differs in a couple of ways. Firstly, Web Beans should be deployed as a Web Application library in WEB-INF/lib. For your convenience we provide a single jar suitable for running Web Beans in any servlet container webbeans-servlet.jar.
작은 정보
Of course, you must also include JSF and EL, as well common annotations (jsr250-api.jar) which a JEE server includes by default.
Secondly, we need to explicitly specify the servlet listener (used to boot Web Beans, and control it's interaction with requests) in web.xml:
<listener>
   <listener-class>org.jboss.webbeans.environment.servlet.Listener</listener-class>
</listener>
Whilst JSR-299 specifies integration with Java ServerFaces, Web Beans allows you to inject into Wicket components, and also allows you to use a conversation context with Wicket. In this section, we'll walk you through the Wicket version of the numberguess example.
참고
You may want to review the Wicket documentation at http://wicket.apache.org/.
Like the previous example, the Wicket WebBeans examples make use of the webbeans-servlet module. The use of the Jetty servlet container is common in the Wicket community, and is chosen here as the runtime container in order to facilitate comparison between the standard Wicket examples and these examples, and also to show how the webbeans-servlet integration is not dependent upon Tomcat as the servlet container.
These examples make use of the Eclipse IDE; instructions are also given to deploy the application from the command line.
To generate an Eclipse project from the example:
cd examples/wicket/numberguess
mvn -Pjetty eclipse:eclipse
Then, from eclipse, choose File -> Import -> General -> Existing Projects into Workspace, select the root directory of the numberguess example, and click finish. Note that if you do not intend to run the example with jetty from within eclipse, omit the "-Pjetty." This will create a project in your workspace called webbeans-wicket-numberguess
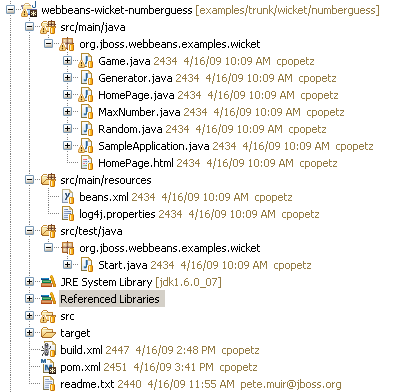
This project follows the wicket-quickstart approach of creating an instance of Jetty in the Start class. So running the example is as simple as right-clicking on that Start class in src/test/java in the Package Explorer and choosing Run as Java Application. You should see console output related to Jetty starting up; then visit able http://localhost:8080 to view the app. To debug choose Debug as Java Application.
This example can also be deployed from the command line in a (similar to the other examples). Assuming you have set up the build.properties file in the examples directory to specify the location of JBoss AS or Tomcat, as previously described, you can run ant deploy from the examples/wicket/numberguess directory, and access the application at http://localhost:8080/webbeans-numberguess-wicket.
JSF uses Unified EL expressions to bind view layer components in JSP or Facelet views to beans, Wicket defines it's components in Java. The markup is plain html with a one-to-one mapping between html elements and the view components. All view logic, including binding of components to models and controlling the response of view actions, is handled in Java. The integration of Web Beans with Wicket takes advantage of the same binding annotations used in your business layer to provide injection into your WebPage subclass (or into other custom wicket component subclasses).
The code in the wicket numberguess example is very similar to the JSF-based numberguess example. The business layer is identical!
Differences are:
Each wicket application must have a
WebApplicationsubclass, In our case, our application class isSampleApplication:public class SampleApplication extends WebBeansApplication { @Override public Class getHomePage() { return HomePage.class; } }This class specifies which page wicket should treat as our home page, in our case,
HomePage.classIn
HomePagewe see typical wicket code to set up page elements. The bit that is interesting is the injection of theGamebean:@Current Game game;
The
Gamebean is can then be used, for example, by the code for submitting a guess:final Component guessButton = new AjaxButton("GuessButton") { protected void onSubmit(AjaxRequestTarget target, Form form) { if (game.check()) {참고
All injections may be serialized; actual storage of the bean is managed by JSR-299. Note that Wicket components, like the HomePage and it subcomponents, are not JSR-299 beans.
Wicket components allow injection, but they cannot use interceptors, decorators and lifecycle callbacks such as
@PostConstructor@Initializermethods.The example uses AJAX for processing of button events, and dynamically hides buttons that are no longer relevant, for example when the user has won the game.
In order to activate wicket for this webapp, the Wicket filter is added to web.xml, and our application class is specified:
<filter>
   <filter-name>wicket.numberguess-example</filter-name>
   <filter-class>org.apache.wicket.protocol.http.WicketFilter</filter-class>
   <init-param>
      <param-name>applicationClassName</param-name>
      <param-value>org.jboss.webbeans.examples.wicket.SampleApplication</param-value>
   </init-param>
</filter>

<filter-mapping>
   <filter-name>wicket.numberguess-example</filter-name>
   <url-pattern>/*</url-pattern>
</filter-mapping>

<listener>
   <listener-class>org.jboss.webbeans.environment.servlet.Listener</listener-class>
</listener>
Note that the servlet listener is also added, as in the Tomcat example, in order to boostrap Web Beans when Jetty starts, and to hook Web Beans into the Jetty servlet request and session lifecycles.
This example can be found in the examples/se/numberguess folder of the Web Beans distribution.
To run this example:
Open a command line/terminal window in the
examples/se/numberguessdirectoryEnsure that Maven 2 is installed and in your PATH
Ensure that the
JAVA_HOMEenvironment variable is pointing to your JDK installationexecute the following command
mvn -Drun
There is an empty beans.xml file in the root package (src/main/resources/beans.xml), which marks this application as a Web Beans application.
The game's main logic is located in Game.java. Here is the code for that class, highlighting the changes made from the web application version:
public class Game implements Serializable
{
private int number;
private int guess;
private int smallest;
@MaxNumber
private int maxNumber;
private int biggest;
private int remainingGuesses;
private boolean validNumberRange = true;
@Current Generator rndGenerator;
...
public boolean isValidNumberRange()
{
return validNumberRange;
}
public boolean isGameWon()
return guess == number;
}
public boolean isGameLost()
{
return guess != number && remainingGuesses <= 0;
}
public boolean check()
{
boolean result = false;
{
if ( guess > number )
{
biggest = guess - 1;
}
if ( guess < number )
{
smallest = guess + 1;
}
if ( guess == number )
{
result = true;
}
remainingGuesses--;
}
return result;
}
private boolean checkNewNumberRangeIsValid()
{
return validNumberRange = ( ( guess >= smallest ) && ( guess <= biggest ) );
}
@PostConstruct
{
this.smallest = 0;
...
this.number = rndGenerator.next();
}
}
| The bean is application scoped instead of session scoped, since an instance of the application represents a single 'session'. |
| The bean is not named, since it doesn't need to be accessed via EL |
| There is no JSF
This allows the Swing UI to query the state of the game, which it does indirectly via a class called |
| Validation of user input is performed during the |
| The |
The MessageGenerator class depends on the current instance of Game, and queries its state in order to determine the appropriate messages to provide as the prompt for the user's next guess and the response to the previous guess. The code for MessageGenerator is as follows:
public class MessageGenerator
{
{
StringBuilder challengeMsg = new StringBuilder( "I'm thinking of a number between " );
challengeMsg.append( game.getSmallest() );
challengeMsg.append( " and " );
challengeMsg.append( game.getBiggest() );
challengeMsg.append( ". Can you guess what it is?" );
return challengeMsg.toString();
}
{
if ( game.isGameWon() )
{
return "You guess it! The number was " + game.getNumber();
} else if ( game.isGameLost() )
{
return "You are fail! The number was " + game.getNumber();
} else if ( ! game.isValidNumberRange() )
{
return "Invalid number range!";
} else if ( game.getRemainingGuesses() == Game.MAX_NUM_GUESSES )
{
return "What is your first guess?";
} else
{
String direction = null;
if ( game.getGuess() < game.getNumber() )
{
direction = "Higher";
} else
{
direction = "Lower";
}
return direction + "! You have " + game.getRemainingGuesses() + " guesses left.";
}
}
}
| The instance of |
| The |
| And again to determine whether to congratulate, console or encourage the user to continue. |
Finally we come to the NumberGuessFrame class which provides the Swing front end to our guessing game.
public class NumberGuessFrame extends javax.swing.JFrame
{
{
java.awt.EventQueue.invokeLater( new Runnable()
{
public void run()
{
initComponents();
setVisible( true );
}
} );
}
buttonPanel = new javax.swing.JPanel();
mainMsgPanel = new javax.swing.JPanel();
mainLabel = new javax.swing.JLabel();
messageLabel = new javax.swing.JLabel();
guessText = new javax.swing.JTextField();
...
mainLabel.setText(msgGenerator.getChallengeMessage());
mainMsgPanel.add(mainLabel);
messageLabel.setText(msgGenerator.getResultMessage());
mainMsgPanel.add(messageLabel);
...
}
{
int guess = Integer.parseInt(guessText.getText());
game.setGuess( guess );
game.check();
refreshUI();
}
{
game.reset();
refreshUI();
}private void refreshUI()
{
mainLabel.setText( msgGenerator.getChallengeMessage() );
messageLabel.setText( msgGenerator.getResultMessage() );
guessText.setText( "" );
guessesLeftBar.setValue( game.getRemainingGuesses() );
guessText.requestFocus();
}
// swing components
private javax.swing.JPanel borderPanel;
...
private javax.swing.JButton replayBtn;
}
| The injected instance of the game (logic and state). |
| The injected message generator for UI messages. |
| This application is started in the usual Web Beans SE way, by observing the |
| This method initialises all of the Swing components. Note the use of the |
|
|
| |
| |
번역 예제는 입력하신 아무 문장을 가져가 이를 라틴어로 번역합니다.
번역 예제는 ear로 작성되며, EJB가 들어있게 됩니다. 따라서, 문장 구조가 numberguess 예보다 훨씬 복잡합니다.
참고
EJB 3.1 및 Jave EE 6는 EJB를 war로 패키지하게 하여, 이러한 문장을 보다 간단하게 만들게 됩니다!
먼저, webbeans-translator-ear 모듈에 있는 ear aggregator를 살펴봅시다. Maven은 자동으로 application.xml을 생성합니다:
<plugin>

   <groupId

>org.apache.maven.plugins</groupId>

   <artifactId

>maven-ear-plugin</artifactId>

   <configuration>

      <modules>

         <webModule>

            <groupId

>org.jboss.webbeans.examples.translator</groupId>

            <artifactId

>webbeans-translator-war</artifactId>

            <contextRoot

>/webbeans-translator</contextRoot>

         </webModule>

      </modules>

   </configuration>

</plugin

>
url (http://localhost:8080/webbeans-translator)을 제공하는 컨텍스트 경로를 설정합니다.
작은 정보
Maven을 사용하여 이러한 파일을 생성할 경우, META-INF/application.xml이 필요합니다:
<?xml version="1.0" encoding="UTF-8"?>

<application xmlns="http://java.sun.com/xml/ns/javaee"

             xmlns:xsi="http://www.w3.org/2001/XMLSchema-instance"

             xsi:schemaLocation="http://java.sun.com/xml/ns/javaee http://java.sun.com/xml/ns/javaee/application_5.xsd"

             version="5">

  <display-name

>webbeans-translator-ear</display-name>

  <description

>Ear Example for the reference implementation of JSR 299: Web Beans</description>


  <module>

    <web>

      <web-uri

>webbeans-translator.war</web-uri>

      <context-root

>/webbeans-translator</context-root>

    </web>

  </module>

  <module>

    <ejb

>webbeans-translator.jar</ejb>

  </module>

</application

>
Next, lets look at the war. Just as in the numberguess example, we have a faces-config.xml (to enable Facelets) and a web.xml (to enable JSF) in WebContent/WEB-INF.
텍스트를 번역하데 facelet이 사용됩니다. numberguess 예제에서와 같이 양식으로된 템플릿이 있습니다 (간결하게 하기 위해 여기서는 생략됨):
<h:form id="NumberGuessMain">


   <table>

      <tr align="center" style="font-weight: bold" >

         <td>

            Your text

         </td>

         <td>

            Translation

         </td>

      </tr>

      <tr>

         <td>

            <h:inputTextarea id="text" value="#{translator.text}" required="true" rows="5" cols="80" />

         </td>

         <td>

            <h:outputText value="#{translator.translatedText}" />

         </td>

      </tr>

   </table>

   <div>

      <h:commandButton id="button" value="Translate" action="#{translator.translate}"/>

   </div>


</h:form

>
사용자는 왼쪽 텍스트 부분에 텍스트를 입력할 수 있으며, 번역하기 버튼을 누르면 오른쪽에 번역 결과가 나타나게 됩니다.
마지막으로, ejb 모듈인 webbeans-translator-ejb를 살펴봅시다. src/main/resources/META-INF에는 Web Beans가 들어 있는 것으로 아카이브를 표시하기 위해 사용되는 빈 web-beans.xml이 있습니다.
가장 흥미로운 코드 부분은 마지막을 위해 남겨두겠습니다! 프로젝트에는 두 개의 심플 beans인 SentenceParser 및 TextTranslator와 두 개의 엔터프라이즈 beans인 TranslatorControllerBean 및 SentenceTranslator가 있습니다. 이제 Web Bean에 관해 보다 많이 알고 계실 것이므로, 가장 중요한 부분만 여기서 다루겠습니다.
SentenceParser 및 TextTranslator는 beans에 의존하며, TextTranslator는 생성자 초기화를 사용합니다:
public class TextTranslator {

   private SentenceParser sentenceParser;

   private Translator sentenceTranslator;


   @Initializer

   TextTranslator(SentenceParser sentenceParser, Translator sentenceTranslator)

   {

      this.sentenceParser = sentenceParser;

      this.sentenceTranslator = sentenceTranslator;
TextTranslator는 무상태 세션빈으로 (로컬 비지니스 인터페이스와 함께), 완전한 번역기를 개발할 수는 없지만, 잘 작동하고 있습니다!
마지막으로, UI 기반 제어기가 있어, 이는 사용자로 부터 텍스트를 수집하여 번역기에 이를 보냅니다. 이는 요청 범위, 이름, 상태 유지 세션빈으로 번역기에 삽입되어 있습니다.
@Stateful

@RequestScoped

@Named("translator")

public class TranslatorControllerBean implements TranslatorController

{


   @Current TextTranslator translator;
bean은 페이지에 있는 모든 영역에 대해 getter 및 setter를 갖습니다.
이는 상태 유지 세션 빈이므로, 제거 방식을 갖고 있어야 합니다:
   @Remove

   public void remove()

   {


   }
Web Beans 관리자는 bean이 삭제될 때 제거 방식을 호출하게 됩니다; 이러한 경우 요청 마지막에 호출하게 됩니다.
That concludes our short tour of the Web Beans examples. For more on Web Beans , or to help out, please visit http://www.seamframework.org/WebBeans/Development.
버그 수정, 새로운 기능 작성, 예세 작성, 참조 가이드 번역과 같이 모든 영역에서 도움이 필요합니다.