A Web Beans está sendo desenvolvida no projeto Seam. Você pode baixar a última versão da Web Beans na página de downloads.
A Web Beans vem com duas aplicações de exemplo: webbeans-numberguess - um war, contendo apenas beans simples (simple beans) e webbeans-translator, e um ear, contendo beans corporativos (enterprise beans) -. Existem ,ainda, duas variações do exemplo numberguess: o exemplo tomcat (adequado para a implantação no Tomcat) e o exemplo jsf2, que você pode usar se estiver utilizando JSF2. Para executar os exemplos, você precisará do seguinte:
a última versão da Web Beans,
JBoss AS 5.0.1.GA, e
Apache Tomcat 6.0.x, e
Ant 1.7.0.
Você precisará fazer o download do JBoss AS 5.0.1.GA em jboss.org e descompactá-lo. Por exemplo:"
$ cd /Applications
$ unzip ~/jboss-5.0.1.GA.zip
Depois, faça o download da Web Beans em seamframework.org e descompacte-o. Por exemplo
$ cd ~/
$ unzip ~/webbeans-1.0.0.ALPHA1.zip
Em seguida, temos de dizer aos Web Beans onde o JBoss está localizado. Editar o jboss-as/build.properties e definir a propriedade jboss.home. Por exemplo:
jboss.home=/Applications/jboss-5.0.1.GA
Para instalar a Web Beans, você precisará do Ant 1.7.0 instalado e a variável de ambiente ANT_HOME setada. Por exemplo:
Nota
JBoss 5.1.0 comes with Web Beans built in, so there is no need to update the server.
$ unzip apache-ant-1.7.0.zip
$ export ANT_HOME=~/apache-ant-1.7.0
Então, você pode instalar a atualização. O script de atualização utilizará o Maven para fazer o download da Web Beans automaticamente.
$ cd webbeans-1.0.0.ALPHA1/jboss-as
$ ant update
Agora, você está pronto para fazer a publicação do seu primeiro exemplo!
Dica
Os scripts para criar os exemplos oferecem uma série de alvos para JBoss AS, entre eles:
ant restart- implanta o exemplo no formato explodidoant explode- atualiza o exemplo explodido, sem reiniciarant deploy- implanta o exemplo no formato jar compactadoant undeploy- remove o exemplo do servidorant clean- limpa o exemplo
Para implantar o exemplo numberguess:
$ cd examples/numberguess
ant deploy
Inicializando o JBoss AS:
$ /Application/jboss-5.0.0.GA/bin/run.sh
Dica
Se você utiliza o Windows, utilize o script run.bat.
Aguarde até que a aplicação seja implantada, e desfrute de horas de diversão em http://localhost:8080/webbeans-numberguess!
Web Beans inclui um segundo exemplo simples que irá traduzir o seu texto para o Latim. O exemplo numberguess é um war e usa apenas beans simples; o exemplo translator é um exemplo ear e inclui benas corporativos, empacotados em um módulo EJB. Para experimentá-lo:
$ cd examples/translator
ant deploy
Aguarde até que a aplicação seja implantada, e acesse http://localhost:8080/webbeans-translator!
Depois, faça o download do Tomcat 6.0.18 ou posterior em tomcat.apache.org, e descompacte-o. Por exemplo
$ cd /Applications
$ unzip ~/apache-tomcat-6.0.18.zip
Depois, faça o download da Web Beans em seamframework.org e descompacte-o. Por exemplo
$ cd ~/
$ unzip ~/webbeans-1.0.0.ALPHA1.zip
Em seguida, temos de dizer aos Web Beans onde o Tomcat está localizado. Editar o jboss-as/build.properties e definir a propriedade tomcat.home. Por exemplo:
tomcat.home=/Applications/apache-tomcat-6.0.18
Dica
Os scripts para criar os exemplos oferecem uma série de alvos para Tomcat. São eles:
ant tomcat.restart- publica o exemplo no formato explodidoant tomcat.explode- atualiza o exemplo explodido, sem reiniciarant tomcat.deploy- publica o exemplo no formato jar compactadoant tomcat.undeploy- remove o exemplo do servidorant tomcat.clean- clean the example
Para implantar o exemplo numberguess no tomcat:
$ cd examples/tomcat
ant tomcat.deploy
Inicializando o Tomcat:
$ /Applications/apache-tomcat-6.0.18/bin/startup.sh
Dica
Se você utiliza o Windows, utilize o script startup.bat.
Aguarde até que a aplicação seja implantada, e desfrute de horas de diversão em http://localhost:8080/webbeans-numberguess!
Na aplicação numberguess você terá 10 tentativas para adivinhar um número entre 1 e 100. Após cada tentativa, você será informado se você disse muito acima, ou muito abaixo.
O exemplo numberguess é composto de um número de Web Beans, arquivos de configuração e páginas Facelet JSF , empacotados como um war. Vamos começar com os arquivos de configuração.
Todos os arquivos de configuração para este exemplo estão localizados no WEB-INF/, que é armazenado no WebContent na árvore de fontes. Primeiro, temos faces-config.xml, onde dizemos para o JSF usar o Facelets:
<?xml version='1.0' encoding='UTF-8'?>

<faces-config version="1.2"

              xmlns="http://java.sun.com/xml/ns/javaee"

              xmlns:xsi="http://www.w3.org/2001/XMLSchema-instance"

              xsi:schemaLocation="http://java.sun.com/xml/ns/javaee http://java.sun.com/xml/ns/javaee/web-facesconfig_1_2.xsd">


    <application>

        <view-handler

>com.sun.facelets.FaceletViewHandler</view-handler>

    </application>


</faces-config

>
Existe um arquivo web-beans.xml vazio, que assinala essa aplicação como uma aplicação Web Beans.
Finalmente no web.xml:
<?xml version="1.0" encoding="UTF-8"?>
<web-app version="2.5"
xmlns="http://java.sun.com/xml/ns/javaee"
xmlns:xsi="http://www.w3.org/2001/XMLSchema-instance"
xsi:schemaLocation="http://java.sun.com/xml/ns/javaee http://java.sun.com/xml/ns/javaee/web-app_2_5.xsd">
<display-name>Web Beans Numbergues example</display-name>
<!-- JSF -->
<servlet>  <servlet-name>Faces Servlet</servlet-name>
<servlet-class>javax.faces.webapp.FacesServlet</servlet-class>
<load-on-startup>1</load-on-startup>
</servlet>
<servlet-ma
<servlet-name>Faces Servlet</servlet-name>
<servlet-class>javax.faces.webapp.FacesServlet</servlet-class>
<load-on-startup>1</load-on-startup>
</servlet>
<servlet-ma pping>
<servlet-name>Faces Servlet</servlet-name>
<url-pattern>*.jsf</url-pattern>
</servlet-mapping>
<context-pa
pping>
<servlet-name>Faces Servlet</servlet-name>
<url-pattern>*.jsf</url-pattern>
</servlet-mapping>
<context-pa ram>
<param-name>javax.faces.DEFAULT_SUFFIX</param-name>
<param-value>.xhtml</param-value>
</context-param>
<session-co
ram>
<param-name>javax.faces.DEFAULT_SUFFIX</param-name>
<param-value>.xhtml</param-value>
</context-param>
<session-co nfig>
<session-timeout>10</session-timeout>
</session-config>
</web-app>
nfig>
<session-timeout>10</session-timeout>
</session-config>
</web-app> | Enable and load the JSF servlet |
| Configure requests to |
| Tell JSF that we will be giving our source files (facelets) an extension of |
| Configure a session timeout of 10 minutes |
Nota
Whilst this demo is a JSF demo, you can use Web Beans with any Servlet based web framework.
Let's take a look at the Facelet view:
<!DOCTYPE html PUBLIC "-//W3C//DTD XHTML 1.0 Transitional//EN" "http://www.w3.org/TR/xhtml1/DTD/xhtml1-transitional.dtd">
<html xmlns="http://www.w3.org/1999/xhtml"
xmlns:ui="http://java.sun.com/jsf/facelets"
xmlns:h="http://java.sun.com/jsf/html"
xmlns:f="http://java.sun.com/jsf/core"
xmlns:s="http://jboss.com/products/seam/taglib">
<ui:composition template="template.xhtml">
<ui:define name="content">
<h1>Guess a number...</h1>
<h:form id="NumberGuessMain">
<div style="color: red">
<h:messages id="messages" globalOnly="false"/>
<h:outputText id="Higher" value="Higher!" rendered="#{game.number gt game.guess and game.guess ne 0}"/>
<h:outputText id="Lower" value="Lower!" rendered="#{game.number lt game.guess and game.guess ne 0}"/>
</div>
<div>
I'm thinking of a number between #{game.smallest} and #{game.biggest}.
You have #{game.remainingGuesses} guesses.
</div>
<div>
Your guess:
<h:inputText id="inputGuess"
value="#{game.guess}"
required="true"
size="3"
disabled="#{game.number eq game.guess}">
 <f:validateLongRange maximum="#{game.biggest}"
minimum="#{game.smallest}"/>
</h:inputText>
<h
<f:validateLongRange maximum="#{game.biggest}"
minimum="#{game.smallest}"/>
</h:inputText>
<h :commandButton id="GuessButton"
value="Guess"
action="#{game.check}"
disabled="#{game.number eq game.guess}"/>
</div>
<div>
<h:commandButton id="RestartButton" value="Reset" action="#{game.reset}" immediate="true" />
</div>
</h:form>
</ui:define>
</ui:composition>
</html>
:commandButton id="GuessButton"
value="Guess"
action="#{game.check}"
disabled="#{game.number eq game.guess}"/>
</div>
<div>
<h:commandButton id="RestartButton" value="Reset" action="#{game.reset}" immediate="true" />
</div>
</h:form>
</ui:define>
</ui:composition>
</html> | Facelets is a templating language for JSF, here we are wrapping our page in a template which defines the header. |
| There are a number of messages which can be sent to the user, "Higher!", "Lower!" and "Correct!" |
| As the user guesses, the range of numbers they can guess gets smaller - this sentance changes to make sure they know what range to guess in. |
| This input field is bound to a Web Bean, using the value expression. |
| A range validator is used to make sure the user doesn't accidentally input a number outside of the range in which they can guess - if the validator wasn't here, the user might use up a guess on an out of range number. |
| And, of course, there must be a way for the user to send their guess to the server. Here we bind to an action method on the Web Bean. |
No exemplo, existem 4 classes: as duas primeiras são tipos de binding. Primeiro, há o tipo de binding @Random, utilizado para a injeção de um número aleatório:
@Target( { TYPE, METHOD, PARAMETER, FIELD })

@Retention(RUNTIME)

@Documented

@BindingType

public @interface Random {}
Há também o binding type @MaxNumber, utilizado para injetar o número máximo que pode ser injetado:
@Target( { TYPE, METHOD, PARAMETER, FIELD })

@Retention(RUNTIME)

@Documented

@BindingType

public @interface MaxNumber {}
A classe Generator é responsável por criar um número aleatório, através de um método produtor. Ela também expõe o número máximo possível através de um método produtor:
@ApplicationScoped

public class Generator {


   private java.util.Random random = new java.util.Random( System.currentTimeMillis() );


   private int maxNumber = 100;


   java.util.Random getRandom()

   {

      return random;

   }


   @Produces @Random int next() {

      return getRandom().nextInt(maxNumber);

   }


   @Produces @MaxNumber int getMaxNumber()

   {

      return maxNumber;

   }


}
Você perceberá que o Generator está no escopo de aplicação; portanto, não obtemos um número aleatório diferente a cada vez.
O Web Bean final da aplicação é o Game em escopo de sessão.
Você notará que nós utilizamos a anotação @Named, para que possamos utilizar o bean através EL na página JSF. Finalmente, utilizamos injeção de construtor para inicializar o jogo com um número aleatório. E, claro, precisamos de dizer ao jogador quando ele venceu. Por isso, informaremos através do FacesMessage.
package org.jboss.webbeans.examples.numberguess;


import javax.annotation.PostConstruct;

import javax.faces.application.FacesMessage;

import javax.faces.context.FacesContext;

import javax.webbeans.AnnotationLiteral;

import javax.webbeans.Current;

import javax.webbeans.Initializer;

import javax.webbeans.Named;

import javax.webbeans.SessionScoped;

import javax.webbeans.manager.Manager;


@Named

@SessionScoped

public class Game

{

   private int number;


   private int guess;

   private int smallest;

   private int biggest;

   private int remainingGuesses;


   @Current Manager manager;


   public Game()

   {

   }


   @Initializer

   Game(@MaxNumber int maxNumber)

   {

      this.biggest = maxNumber;

   }


   public int getNumber()

   {

      return number;

   }


   public int getGuess()

   {

      return guess;

   }


   public void setGuess(int guess)

   {

      this.guess = guess;

   }


   public int getSmallest()

   {

      return smallest;

   }


   public int getBiggest()

   {

      return biggest;

   }


   public int getRemainingGuesses()

   {

      return remainingGuesses;

   }


   public String check()

   {

      if (guess

>number)

      {

         biggest = guess - 1;

      }

      if (guess<number)

      {

         smallest = guess + 1;

      }

      if (guess == number)

      {

         FacesContext.getCurrentInstance().addMessage(null, new FacesMessage("Correct!"));

      }

      remainingGuesses--;

      return null;

   }


   @PostConstruct

   public void reset()

   {

      this.smallest = 0;

      this.guess = 0;

      this.remainingGuesses = 10;

      this.number = manager.getInstanceByType(Integer.class, new AnnotationLiteral<Random

>(){});

   }


}
The numberguess for Tomcat differs in a couple of ways. Firstly, Web Beans should be deployed as a Web Application library in WEB-INF/lib. For your convenience we provide a single jar suitable for running Web Beans in any servlet container webbeans-servlet.jar.
Dica
Claro, você também deve incluir JSF e EL, bem como anotações comuns (common annotations) (jsr250-api.jar), que um servidor JEE inclui por padrão.
Secondly, we need to explicitly specify the servlet listener (used to boot Web Beans, and control it's interaction with requests) in web.xml:
<listener>
   <listener-class>org.jboss.webbeans.environment.servlet.Listener</listener-class>
</listener>
Whilst JSR-299 specifies integration with Java ServerFaces, Web Beans allows you to inject into Wicket components, and also allows you to use a conversation context with Wicket. In this section, we'll walk you through the Wicket version of the numberguess example.
Nota
You may want to review the Wicket documentation at http://wicket.apache.org/.
Like the previous example, the Wicket WebBeans examples make use of the webbeans-servlet module. The use of the Jetty servlet container is common in the Wicket community, and is chosen here as the runtime container in order to facilitate comparison between the standard Wicket examples and these examples, and also to show how the webbeans-servlet integration is not dependent upon Tomcat as the servlet container.
These examples make use of the Eclipse IDE; instructions are also given to deploy the application from the command line.
To generate an Eclipse project from the example:
cd examples/wicket/numberguess
mvn -Pjetty eclipse:eclipse
Then, from eclipse, choose File -> Import -> General -> Existing Projects into Workspace, select the root directory of the numberguess example, and click finish. Note that if you do not intend to run the example with jetty from within eclipse, omit the "-Pjetty." This will create a project in your workspace called webbeans-wicket-numberguess
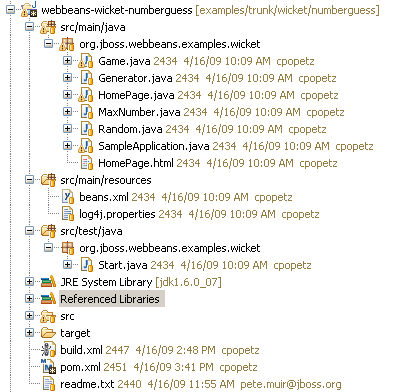
This project follows the wicket-quickstart approach of creating an instance of Jetty in the Start class. So running the example is as simple as right-clicking on that Start class in src/test/java in the Package Explorer and choosing Run as Java Application. You should see console output related to Jetty starting up; then visit able http://localhost:8080 to view the app. To debug choose Debug as Java Application.
This example can also be deployed from the command line in a (similar to the other examples). Assuming you have set up the build.properties file in the examples directory to specify the location of JBoss AS or Tomcat, as previously described, you can run ant deploy from the examples/wicket/numberguess directory, and access the application at http://localhost:8080/webbeans-numberguess-wicket.
JSF uses Unified EL expressions to bind view layer components in JSP or Facelet views to beans, Wicket defines it's components in Java. The markup is plain html with a one-to-one mapping between html elements and the view components. All view logic, including binding of components to models and controlling the response of view actions, is handled in Java. The integration of Web Beans with Wicket takes advantage of the same binding annotations used in your business layer to provide injection into your WebPage subclass (or into other custom wicket component subclasses).
The code in the wicket numberguess example is very similar to the JSF-based numberguess example. The business layer is identical!
Differences are:
Each wicket application must have a
WebApplicationsubclass, In our case, our application class isSampleApplication:public class SampleApplication extends WebBeansApplication { @Override public Class getHomePage() { return HomePage.class; } }This class specifies which page wicket should treat as our home page, in our case,
HomePage.classIn
HomePagewe see typical wicket code to set up page elements. The bit that is interesting is the injection of theGamebean:@Current Game game;
The
Gamebean is can then be used, for example, by the code for submitting a guess:final Component guessButton = new AjaxButton("GuessButton") { protected void onSubmit(AjaxRequestTarget target, Form form) { if (game.check()) {Nota
All injections may be serialized; actual storage of the bean is managed by JSR-299. Note that Wicket components, like the HomePage and it subcomponents, are not JSR-299 beans.
Wicket components allow injection, but they cannot use interceptors, decorators and lifecycle callbacks such as
@PostConstructor@Initializermethods.The example uses AJAX for processing of button events, and dynamically hides buttons that are no longer relevant, for example when the user has won the game.
In order to activate wicket for this webapp, the Wicket filter is added to web.xml, and our application class is specified:
<filter>
   <filter-name>wicket.numberguess-example</filter-name>
   <filter-class>org.apache.wicket.protocol.http.WicketFilter</filter-class>
   <init-param>
      <param-name>applicationClassName</param-name>
      <param-value>org.jboss.webbeans.examples.wicket.SampleApplication</param-value>
   </init-param>
</filter>

<filter-mapping>
   <filter-name>wicket.numberguess-example</filter-name>
   <url-pattern>/*</url-pattern>
</filter-mapping>

<listener>
   <listener-class>org.jboss.webbeans.environment.servlet.Listener</listener-class>
</listener>
Note that the servlet listener is also added, as in the Tomcat example, in order to boostrap Web Beans when Jetty starts, and to hook Web Beans into the Jetty servlet request and session lifecycles.
This example can be found in the examples/se/numberguess folder of the Web Beans distribution.
To run this example:
Open a command line/terminal window in the
examples/se/numberguessdirectoryEnsure that Maven 2 is installed and in your PATH
Ensure that the
JAVA_HOMEenvironment variable is pointing to your JDK installationexecute the following command
mvn -Drun
There is an empty beans.xml file in the root package (src/main/resources/beans.xml), which marks this application as a Web Beans application.
The game's main logic is located in Game.java. Here is the code for that class, highlighting the changes made from the web application version:
public class Game implements Serializable
{
private int number;
private int guess;
private int smallest;
@MaxNumber
private int maxNumber;
private int biggest;
private int remainingGuesses;
private boolean validNumberRange = true;
@Current Generator rndGenerator;
...
public boolean isValidNumberRange()
{
return validNumberRange;
}
public boolean isGameWon()
return guess == number;
}
public boolean isGameLost()
{
return guess != number && remainingGuesses <= 0;
}
public boolean check()
{
boolean result = false;
{
if ( guess > number )
{
biggest = guess - 1;
}
if ( guess < number )
{
smallest = guess + 1;
}
if ( guess == number )
{
result = true;
}
remainingGuesses--;
}
return result;
}
private boolean checkNewNumberRangeIsValid()
{
return validNumberRange = ( ( guess >= smallest ) && ( guess <= biggest ) );
}
@PostConstruct
{
this.smallest = 0;
...
this.number = rndGenerator.next();
}
}
| The bean is application scoped instead of session scoped, since an instance of the application represents a single 'session'. |
| The bean is not named, since it doesn't need to be accessed via EL |
| There is no JSF
This allows the Swing UI to query the state of the game, which it does indirectly via a class called |
| Validation of user input is performed during the |
| The |
The MessageGenerator class depends on the current instance of Game, and queries its state in order to determine the appropriate messages to provide as the prompt for the user's next guess and the response to the previous guess. The code for MessageGenerator is as follows:
public class MessageGenerator
{
{
StringBuilder challengeMsg = new StringBuilder( "I'm thinking of a number between " );
challengeMsg.append( game.getSmallest() );
challengeMsg.append( " and " );
challengeMsg.append( game.getBiggest() );
challengeMsg.append( ". Can you guess what it is?" );
return challengeMsg.toString();
}
{
if ( game.isGameWon() )
{
return "You guess it! The number was " + game.getNumber();
} else if ( game.isGameLost() )
{
return "You are fail! The number was " + game.getNumber();
} else if ( ! game.isValidNumberRange() )
{
return "Invalid number range!";
} else if ( game.getRemainingGuesses() == Game.MAX_NUM_GUESSES )
{
return "What is your first guess?";
} else
{
String direction = null;
if ( game.getGuess() < game.getNumber() )
{
direction = "Higher";
} else
{
direction = "Lower";
}
return direction + "! You have " + game.getRemainingGuesses() + " guesses left.";
}
}
}
| The instance of |
| The |
| And again to determine whether to congratulate, console or encourage the user to continue. |
Finally we come to the NumberGuessFrame class which provides the Swing front end to our guessing game.
public class NumberGuessFrame extends javax.swing.JFrame
{
{
java.awt.EventQueue.invokeLater( new Runnable()
{
public void run()
{
initComponents();
setVisible( true );
}
} );
}
buttonPanel = new javax.swing.JPanel();
mainMsgPanel = new javax.swing.JPanel();
mainLabel = new javax.swing.JLabel();
messageLabel = new javax.swing.JLabel();
guessText = new javax.swing.JTextField();
...
mainLabel.setText(msgGenerator.getChallengeMessage());
mainMsgPanel.add(mainLabel);
messageLabel.setText(msgGenerator.getResultMessage());
mainMsgPanel.add(messageLabel);
...
}
{
int guess = Integer.parseInt(guessText.getText());
game.setGuess( guess );
game.check();
refreshUI();
}
{
game.reset();
refreshUI();
}private void refreshUI()
{
mainLabel.setText( msgGenerator.getChallengeMessage() );
messageLabel.setText( msgGenerator.getResultMessage() );
guessText.setText( "" );
guessesLeftBar.setValue( game.getRemainingGuesses() );
guessText.requestFocus();
}
// swing components
private javax.swing.JPanel borderPanel;
...
private javax.swing.JButton replayBtn;
}
| The injected instance of the game (logic and state). |
| The injected message generator for UI messages. |
| This application is started in the usual Web Beans SE way, by observing the |
| This method initialises all of the Swing components. Note the use of the |
|
|
| |
| |
O exemplo translator pegará qualquer frase que você fornecer e a traduzirá para o Latim.
O exemplo translator é construído como um ear e contém EJBs. Como resultado, a sua estrutura é mais complexa do que o exemplo numberguess.
Nota
EJB 3.1 e Java EE 6 permitem a você empacotar EJBs em um war, o que tornará esta estrutura muito mais simples!
Primeiro, vamos dar uma olhada no ear aggregator, que está localizado módulo webbeans-translator-ear. Maven gera automaticamente oapplication.xml para nós:
<plugin>

   <groupId

>org.apache.maven.plugins</groupId>

   <artifactId

>maven-ear-plugin</artifactId>

   <configuration>

      <modules>

         <webModule>

            <groupId

>org.jboss.webbeans.examples.translator</groupId>

            <artifactId

>webbeans-translator-war</artifactId>

            <contextRoot

>/webbeans-translator</contextRoot>

         </webModule>

      </modules>

   </configuration>

</plugin

>
Aqui nós definiremos o caminho do contexto, que nos dá uma url amigável (http://localhost:8080/webbeans-translator). ulink>) .
Dica
Se você não está usando o Maven para gerar esses arquivos, você precisaria META-INF/application.xml:
<?xml version="1.0" encoding="UTF-8"?>

<application xmlns="http://java.sun.com/xml/ns/javaee"

             xmlns:xsi="http://www.w3.org/2001/XMLSchema-instance"

             xsi:schemaLocation="http://java.sun.com/xml/ns/javaee http://java.sun.com/xml/ns/javaee/application_5.xsd"

             version="5">

  <display-name

>webbeans-translator-ear</display-name>

  <description

>Ear Example for the reference implementation of JSR 299: Web Beans</description>


  <module>

    <web>

      <web-uri

>webbeans-translator.war</web-uri>

      <context-root

>/webbeans-translator</context-root>

    </web>

  </module>

  <module>

    <ejb

>webbeans-translator.jar</ejb>

  </module>

</application

>
Em seguida, vamos ver o war. Tal como no exemplo numberguess, temos um faces-config.xml (para habilitar o Facelets) e um web.xml (para habilitar o JSF) no WebContent/WEB-INF.
Mais interessante é o facelet utilizado para traduzir texto. Tal como no exemplo numberguess, temos um template, que envolve o formulário (omitido aqui por brevitude):
<h:form id="NumberGuessMain">


   <table>

      <tr align="center" style="font-weight: bold" >

         <td>

            Your text

         </td>

         <td>

            Translation

         </td>

      </tr>

      <tr>

         <td>

            <h:inputTextarea id="text" value="#{translator.text}" required="true" rows="5" cols="80" />

         </td>

         <td>

            <h:outputText value="#{translator.translatedText}" />

         </td>

      </tr>

   </table>

   <div>

      <h:commandButton id="button" value="Translate" action="#{translator.translate}"/>

   </div>


</h:form

>
O usuário pode digitar um texto no textarea esquerdo e clicar no botão traduzir para ver o resultado à direita.
Por fim, vamos olhar o módulo EJB webbeans-translator-ejb. Em src/main/resources/META-INF existe apenas um web-beans.xml vazio, utilizado para marcar o arquivo como contendo Web Beans.
Deixamos o pedaço mais interessante para o final: o código! O projeto tem dois beans simples, SentenceParser e TextTranslator e dois beans corporativosTranslatorControllerBean e SentenceTranslator. Você deve estar bastante familiarizado com o que um Web Bean parece até agora. Então, vamos apenas destacar as partes mais interessantes aqui.
Tanto SentenceParser quanto TextTranslator são beans dependentes, e TextTranslator usa inicialização por construtor :
<h:form id="NumberGuessMain">


   <table>

      <tr align="center" style="font-weight: bold" >

         <td>

            Your text

         </td>

         <td>

            Translation

         </td>

      </tr>

      <tr>

         <td>

            <h:inputTextarea id="text" value="#{translator.text}" required="true" rows="5" cols="80" />

         </td>

         <td>

            <h:outputText value="#{translator.translatedText}" />

         </td>

      </tr>

   </table>

   <div>

      <h:commandButton id="button" value="Translate" action="#{translator.translate}"/>

   </div>


</h:form

>
TextTranslator é um bean stateless (com uma interface de negócios local), onde a mágica acontece . Obviamente, não poderíamos desenvolver um tradutor completo, mas lhe demos um bom caminho!
Finalmente, há um controlador orientado à interface, que recolhe o texto do usuário e despacha para o tradutor. Esse é um escopo de requisição, com o nome, stateful session bean, que injeta o tradutor.
@Stateful

@RequestScoped

@Named("translator")

public class TranslatorControllerBean implements TranslatorController

{


   @Current TextTranslator translator;
O bean também tem getters e setters para todos os campos da página.
Como esse é um stateful session bean, temos de ter um método de remoção:
   @Remove

   public void remove()

   {


   }
O gerenciador do Web Beans chamará o método remover para você quando o bean for destruído - neste caso, no final da requisição.
Está encerrado o nosso curto passeio pelos exemplos de Web Beans. Para mais informações sobre a Web Beans, ou para ajudar, por favor visite http://www.seamframework.org/WebBeans/Development.
Precisamos de ajuda em todas as áreas - correção de bugs, escrita de novas funcionalidades, escrita de exemplos e tradução deste guia de referência.