When we talk about security we refer to the ability to define authorization policies in order to grant or deny users access to a given resource. Therefore, we first have to define who are the target users and what are the resources we want to protect. As resources we have the following:
Workspace: A set of pages with a shared look and feel. It may contain one or more dashboards.
Page: A combination of panels spread all over the screen and tidy up according to a given layout. A dashboard is basically a page used for monitoring a set of indicators.
Panel: A reusable and configurable graphical component ready to be embedded and used. f.i: a KPI panel, a tree menu panel or an HTML panel.
As of users, the application doesn't own a user repository. Users are managed outside the application. This means the login itself is delegated to the application server. After login, the application server pass to the application both the id of the user and the roles he/she has. The full list of available roles are defined into the application's WEB-INF/web.xml file.
Let's see next how to define custom authorization policies to grant/deny access to a workspaces, pages or panels instances per role.
Below is a screenshot of the permission management screen for a given workspace:
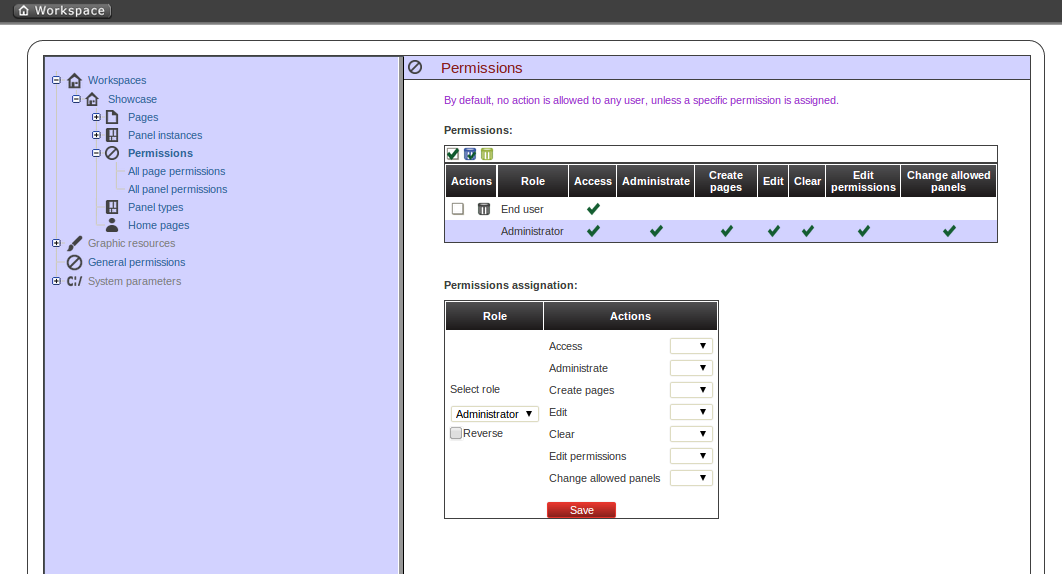
The list of allowed actions are:
Access: login into the application.
Administrate: access to the toolbar and hence to the whole system configuration features.
Create pages
Edit: change the workspace properties.
Clear: ability to delete the workspace.
Edit permissions: ability to grant/deny permissions.
Change allowed panels: restrict the type of panels that can be used in this workspace.
To assign a permission you must select the target role and the list of actions allowed over the selected resource.
Target roles (who): What user will be granted/denied with the permissions defined.
Allowed actions: depending on the type of the resource we can enable/disable what the user can do on this resource.
Reverse (optional): very useful when we have a set of roles and we want to grant/deny a permission to all the roles but one.
The above description is the common way to specify a permission regardless of its type. It applies to the definition of permissions for workspaces, pages and panels.
As you can see in the previous figure, the system grants by default the full set of permissions to the role 'admin'. That way it becomes very easy to create a user that can do everything as long as the role admin is assigned.
Below is a screenshot of the permission management screen for a given page:
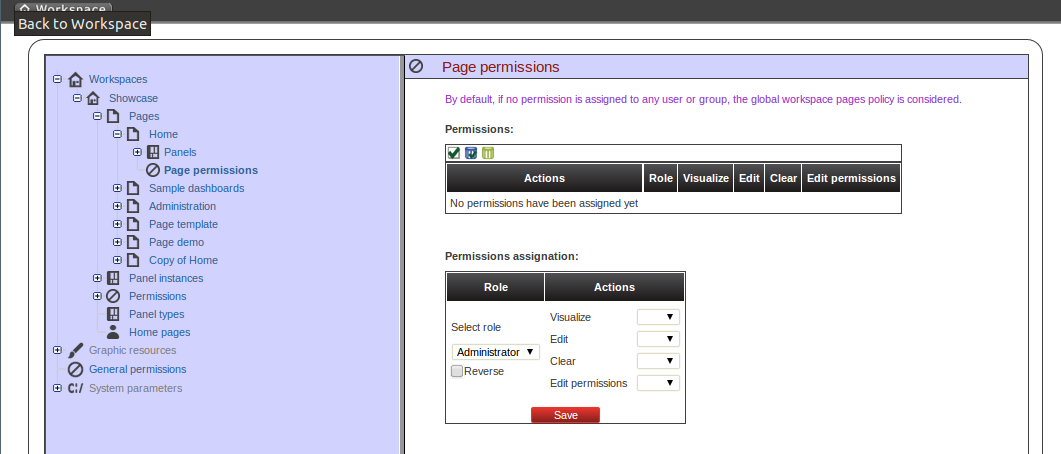
The list of allowed actions are:
Visualize: make the page visible.
Edit: change the page properties.
Clear: Ability to delete the page.
Edit permissions: ability to grant/deny permissions for this page.
Below is a screenshot of the permission management screen for a given panel:
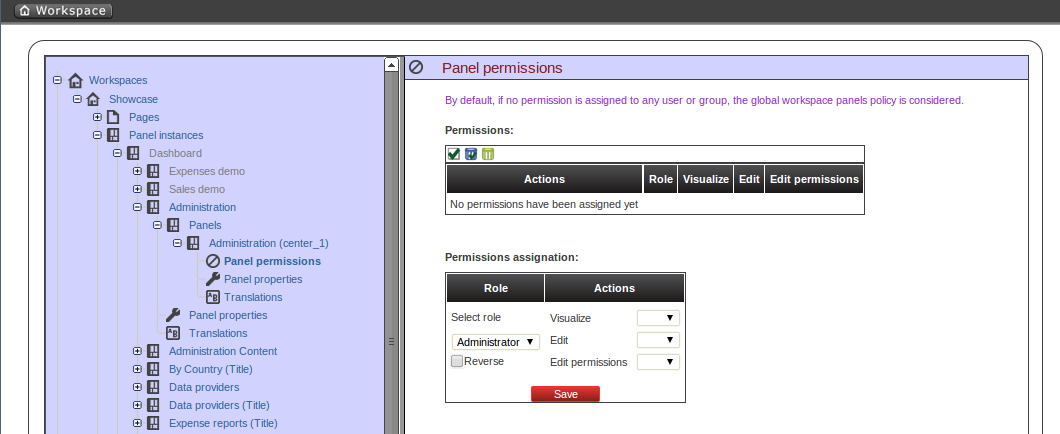
The list of allowed actions are:
Visualize: make the panel visible.
Edit: change the panel properties.
Edit permissions: ability to grant/deny permissions for this panel.
The home page is the page the user will be redirected after initializing its session. In order to get the appropriate home page for the user the security subsystem carries out the following tasks:
Just after login the security subsystem get the roles of the users and evaluates what workspaces the user is allowed to enter ('Access' action granted)
Once the list of workspace is calculated then the system selects the workspace identified as default (see workspace properties), if any then get the first in the list.
The home page settings are read for the target role and workspace. The system evaluates if the specified home page is visible for the user ('View' action granted). If not then the system takes the first visible page from the full list of pages in the workspace. The following screenshot shows the home page configuration screen.

To wrap up, it's worth to mention that thanks to the permission system we can build a workspace structure with several pages, menus and panels and start defining what pages and panels within a page will be visible for each role. We can also define special kind of users and give them restricted access to certain tooling features or even restricted access to a page subset. The chances here are infinite.