The Page Creation Wizard is available to the portal's administrators and facilitates them to create and publish portal pages quickly and easily. The whole process to create a new page can be divided into 3 specific steps:
Select a navigation node and create the page
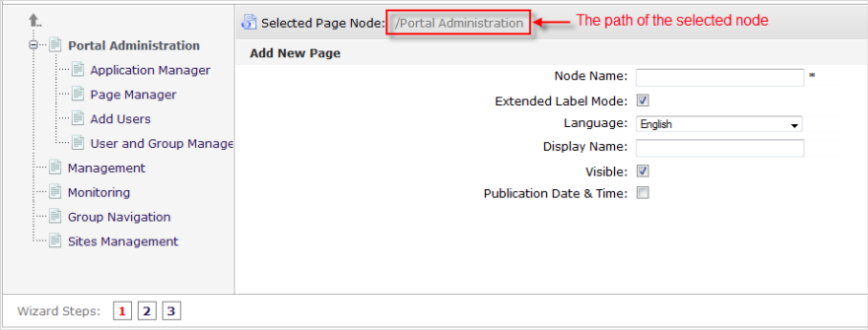
In the first step, you have to set Node Name and Display Name of your page. You are also able to decide the pages visibility and the publication period of the page.
Hover your cursor over My Sites and click one portal/site to which you want to add a new page from the drop-down menu.
You will be switched to your selected portal only after a few seconds.
Hover your cursor over Edit on the Administration bar.
Select Page --> Add Page from the drop-down menu to open the Page Creation Wizard form.
The wizard is divided into two sections.
The left pane contains existing pages/nodes displayed in the tree hierarchy. Here, you can navigate up and down the node/page structure.
The right pane displays Page Editor where you can make changes on the selected navigation node. You can input parameters for your new page in this pane.
Details:
Field Description Selected Page Node The path of the selected node to add a new sub-page. Node Name The node name of the added page. This field is required with its length between 3 and 30 characters. Extended Label Mode Tick the checkbox to show the Language field for you to select another language for your created node's display name. It means that if this checkbox is deselected, the Language field will be deactivated. Language Select your desired language for the node's display name from the drop-down menu. Display Name The display name of the node which contains the added page and must have a length between 3 and 120 characters. Visible This checkbox toggles the global visibility of this page.
If this option is checked, the page or the page node appears on the navigation bar, the page navigation and the sitemap. If "Visible" is checked, the visibility also depends on the Publication Date & Time option.
If not being unchecked, the page is hidden under any circumstances, even if the publication period is valid.
Publication Date & Time This option allows the page to be published for a given period. If this option is checked, Start Publication Date and End Publication Date will be shown. Start Publication Date The start date and time to publish the page. End Publication Date The end date and time to publish the page. Click Next or number '2' of the wizard steps to go to Step 2.
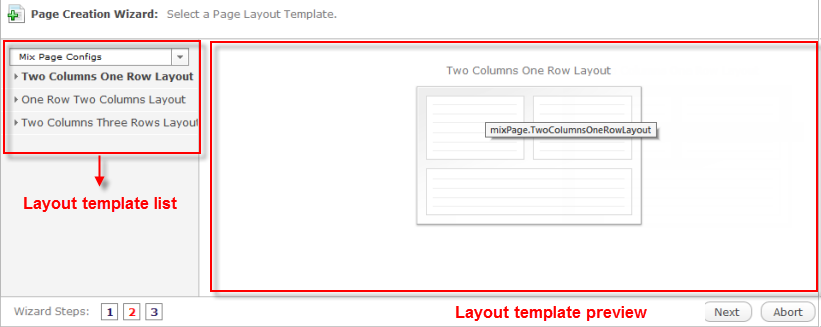
Select Empty Layout or click the down-arrow icon in the right pane to see more templates.
Click Next or number '3' of the wizard steps to go to the last step.
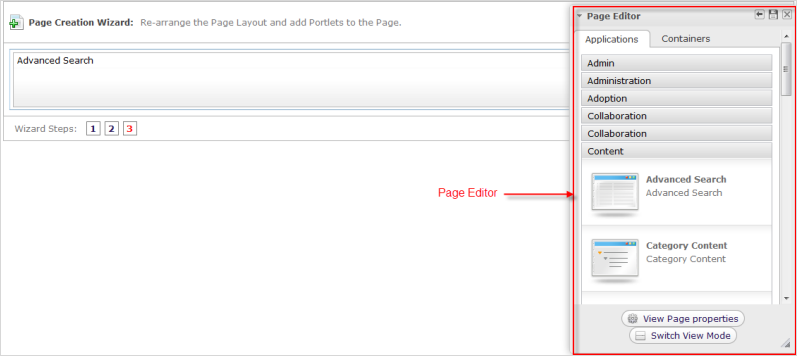
In this step, you can arrange the page's layout as follows:
Add your desired applications, containers or gadgets by dragging and dropping them from Page Editor to the main page body.
Details:
Tab Description Applications This tab lists all existing categories and their portlets that you easily can drag and drop into the container. Containers This tab contains all existing containers to build your page layout. You can add a container to your page area by dragging and dropping available containers from Page Editor to the main page body.
There are various layouts available, including Rows Layout, Columns Layout, Autofit Columns Layout, Tabs Layout, and Mixed Layout.
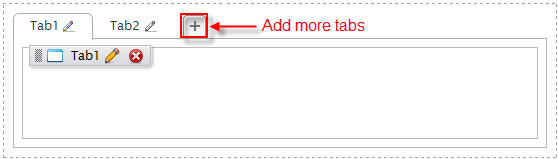
For Tabs Layout, you can add more tabs to the layout, and reorder the position of the tabs.
For each layout, you can edit different layers, from the parent container to its child containers. The parent container holds its child containers and the child containers can hold applications. You can also drag a container to another one that helps you create various layouts to your desires.
Remember that you can also drag and drop the container to another one that helps you create your own various layouts to your desires.
For any container layout, you can edit the parent container or its child containers separately. Deleting the parent container means that its child containers are removed as well.
You cannot drag and drop a child container to change its location, but can drag it outside its parent container.
Rearrange elements in the page body by dragging and dropping them into your desired positions. Also, you can edit or remove any element by hovering your cursor over it and selecting
 , or
, or
 respectively.
View page properties by clicking View Page Properties at the bottom of the Page Editor window.
Preview your changes by clicking Switch View Mode.
Note
Click
 in the
Page Editor
window to save all changes, or
in the
Page Editor
window to save all changes, or
![]() to close without saving your changes.
to close without saving your changes.