Business processes can be managed through a web console. This includes features like managing your process instances (starting/stopping/inspecting), inspecting your (human) task list and executing those tasks, and generating reports.
The jBPM console consists of two wars that must be deployed in your application server and contains the necessary libraries, the actual application, etc. One jar contains the server application, the other one the client.
The easiest way to get started with the console is probably to use the installer. This will download, install and configure all the necessary components to get the console running, including an in-memory database, a human task service, etc. Check out the chapter on the installer for more information.
The console is a separate sub-project that is shared across different projects, like for example jBPM and RiftSaw. The source code of the version that jBPM5 is currently using can be found on SVN here. The latest version of the console has been moved to Git and can be found here.
The console requires users to log in before being to use the application. The console uses normal username / password authentication. When using JBossAS for example, this can be specified in the users.properties file in the server/{profile}/conf folder. There you can specify the combination of users that can log into the console and their password.
When using the jBPM installer, a predefined users.properties file (located in the auth folder) is copied to the jbossas/server/default/conf folder automatically. This file can be edited and contains a few predefined users: admin, krisv, john, mary, and sales-rep (as these are commonly used in examples). The password associated with these users is the same as their username.
The human task service requires you to define which groups a user is part of, so that he can then claim the tasks that are assigned to one of the groups he is part of. The console uses username / group association for that. When using JBossAS for example, this can be specified in the roles.properties file in the server/{profile}/conf folder. There you can specify the combination of users and the groups they are part of.
When using the jBPM installer, a predefined roles.properties file (located in the auth folder) is copied to the jbossas/server/default/conf folder automatically. This file can be edited and contains the groups the predefined users are part of (as these are commonly used in examples): all users are part of the admin, manager and user group but john is also part of the PM (project management) group, mary is part of HR (human resources) and sales-rep is part of sales.
As explained in the chapter on domain-specific services, jBPM allows you to register your own domain-specific services as custom service tasks. The process only contains a high-level description of the service that needs to be executed, and a handler is responsible for the actual implementation, i.e. invoking the service.
You must register your handlers to be able to execute domain-specific services. You can register your handlers by dropping a configuration file in the classpath that specifies the implementation class for each of the handlers. You can specify which configuration files must be loaded in the drools.session.conf file, using the drools.workItemHandlers property (as a list of space-separated file names). These file names should contain a Map of entries, the name and the corresponding WorkItemHandler instance that should be used to execute the service. The configuration file is using the MVEL script language to specify a map of type Map<String,WorkItemHandler>.
You should also make sure that the implementation classes (and dependencies) are also available on the classpath of the server war, for example by dropping the necessary wars in the server/{profile}/lib directory of your JBossAS installation.
For example, suggest you want to use the "Email" service task (that is provided out-of-the-box as an example in the jbpm-workitems module). You should put the jbpm-workitems, javax.mail and javax.activation jars in the lib folder of the AS and the include the following two configuration files in the META-INF folder in the WEB-INF/classes folder of the server war. The drools.session.conf simply refers to the CustomWorkItemHandlers.conf file that contains the actual handlers:
drools.workItemHandlers = CustomWorkItemHandlers.conf
This configuration file then specifies which handler to register for each of the domain-specific services that are being used, using MVEL to specify a Map<String,WorkItemHandler> (with host, port, username and password replaced by a meaningful value of course):
[

  "Email": new org.jbpm.process.workitem.email.EmailWorkItemHandler(

             "host", "port", "username", "password"),

]
The installer simplifies registering your own work item handlers significantly by offering these configuration files in the jbpm-installer/conf folder already and automatically copying them to the right location when installing the demo. Simply update these files with your own entries before running ant install.demo.
Management console can be configured to suit deployment needs of the environment. Its main configuration is done via property file - default.jbpm.console.properties, which can be found in jbpm-gwt-console-server.war/WEB-INF/classes. This configuration is sample setup for default installation if there is a need to configure it differently a custom file should be provided: jbpm.console.properties that can be placed on any directory of the file system where console will have access to. Console by default will look for it inside JBoss AS configuration directory that is given as jboss.server.config.dir system property. If jBPM console is deployed to other servers or default location is not acceptable custom location can be provided as jbpm.conf.dir system property. It allows administrators to configure following aspects of management console:
- task server connectivity
- Guvnor connectivity
- console host and port numer
- console resource directory (for local process, rules, etc repository)
Each of mentioned aspects can have one or more attributes that drive their behavior, following is a complete list of supported properties for every aspect.
Management console configuration
- jbpm.console.server.host : host/ip address used to bind management console (default localhost)
- jbpm.console.server.port : port used to bind management console (default 8080)
- jbpm.console.server.context : context root that is used to bind console server web application (default gwt-console-server)
- jbpm.console.directory : local directory used as process/rules repository
Task server connectivity
- jbpm.console.task.service.strategy : transport used to connect to task server (default HornetQ and accepts Mina|HornetQ|JMS)
- jbpm.console.task.service.host : host where Task Server is deployed (default localhost) applies to all transports
- jbpm.console.task.service.port : port where Task Server is deployed (default 5153) applies to all transports
- JMSTaskClient.connectionFactory : JNDI name of connection factory only for JMS (no default)
- JMSTaskClient.acknowledgeMode : acknowledgment mode only for JMS (no default)
- JMSTaskClient.transactedQueue : transacted queue name only for JMS (no default)
- JMSTaskClient.queueName : queue name only for JMS (no default)
- JMSTaskClient.responseQueueName : response queue name only for JMS (no default)
Guvnor connectivity
- guvnor.protocol : protocol to access Guvnor (default http)
- guvnor.host : host and port number where Guvnor is deployed (default localhost:8080)
- guvnor.subdomain : subdomain/context root of Guvnor (default drools-guvnor)
- guvnor.usr : user id to authenticate in Guvnor (default admin)
- guvnor.pwd : password to authenticate in Guvnor (default admin)
- guvnor.packages : comma separated list of packages to load from Guvnor
- guvnor.connect.timeout : connect timeout (default 10000)
- guvnor.read.timeout : read timeout (default 10000)
- guvnor.snapshot.name : configure package snapshot name (default LATEST)
Once the overall configuration is done, next step is to be able to control runtime behavior of management console that consists of:
- knowledge base setup
- stateful session setup
These runtime components are configured via dedicated managers that are extensible and can be configured with system properties, note that configuration of managers is optional and required only if default managers are not suitable for particular environment
- knowledge base manager: -Djbpm.knowledgebase.manager=com.company.CustomKnowledgeBaseManager
- stateful session manager: -Djbpm.session.manager=com.company.CustomSessionManager
Be default knowledge base manager will build knowledge base according to configuration given in jbpm.console.properties (or default.jbpm.console.properties) file and stateful session will be build based on session template, that is MVEL file named session.template (default.session.template that is bundled in jBPM console). session.teplate file, same as jbpm.console.properties is an extension point to configure jBPM console without changing its internal files and can be placed on any directory on the file system. Session template is intended to provide following configuration for stateful session:
- businessKey - a unique key that will be used to get session from JNDI
- persistenceUnit - name of the persistence unit to be used
- properties - list of key value pairs of session configuration
- workItemHandlers - list of key value pairs (work item name: class name of work item handler)
- eventListeners - list of event listener classes to be registered on the session
- environmentEntries - list of key value pairs of environment entires to be put before session is created
- imported - true|false if set to true session will be looked up from JNDI using business key instead of creating new one - it means that session should be build by another application and console will use it as well
session template is dedicated to default session manager implementation and can be substituted with anyother mechanism together with custom implementation of SessionManager interface. See next section about custom managers.
new SessionTemplate().{

    businessKey = "jbpmConsole",

    imported = false,

    persistenceUnit = "org.jbpm.persistence.jpa",


    properties = ["drools.processInstanceManagerFactory":"org.jbpm.persistence.processinstance.JPAProcessInstanceManagerFactory",

                  "drools.processSignalManagerFactory" : "org.jbpm.persistence.processinstance.JPASignalManagerFactory"

                    ],


    workItemHandlers = ["Human Task" : "new org.jbpm.process.workitem.wsht.AsyncHornetQHTWorkItemHandler(\"jbpmConsoleHTHandler\", taskClient, ksession, org.jbpm.task.utils.OnErrorAction.LOG)",

                        "Service Task" : "new org.jbpm.process.workitem.bpmn2.ServiceTaskHandler(ksession)"],


    eventListeners = ["new org.jbpm.process.audit.JPAWorkingMemoryDbLogger(ksession)",

                      "new org.jbpm.integration.console.listeners.TriggerRulesEventListener(ksession)"  ]

};
Default session template is present above and configures most important elements of the environment. As you can see there are option to refer to some already existing object when registering work item handlers and event listeners:
- ksession - session instance that is being built
- taskClient - talk client that is configured based on settings given in jbpm.console.properties (default.jbpm.console.properties)
Note
Important to note is that if someone provides custom implementation of work item handler for Human Task, keep in mind that it is important to connect handler as soon as session is created to be able to receive task events and move process forward. Default manager invokes three methods on human task handler:
- setIpAddress with single String argument
- setPort with single int argument
- connect no arguments
so ensure you have them to be properly initialized
To sum up, jbpm console comes with two files inside its server component (gwt-console-server.war), these are default.jbpm.console.properties and default.session.template. These two files should not be modified but in case a change to configuration is required they should be copied and renamed to jbpm.console.properties and session.template respectively. Location of these custom files can be decided by administrator but recommended for JBoss AS is to put them into jboss configuration directory (jboss_home/standalone/configuration for AS 7). If custom location is used it must be provided as system property -Djbpm.conf.dir. Any changes applied to custom configuration will be preserved between jbpm upgrades as they do not reside inside jbpm applications.
- Custom class must implement org.jbpm.integration.console.kbase.KnowledgeBaseManager
- it must be configured with -Djbpm.knowledgebase.manager=[classname]
- Custom class must implement org.jbpm.integration.console.session.SessionManager
- Custom class must provide constructor that accepts KnowledgeBase argument
- it must be configured with -Djbpm.session.manager=[classname]
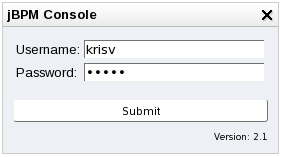
Now navigate to the following URL (replace the host and/or port depending on how the application server is configured): http://localhost:8080/jbpm-console
A login screen should pop up, asking for your user name and password. By default, the following username/password configurations are supported: krisv/krisv, admin/admin, john/john and mary/mary.
After filling these in, the process management workbench should be opened, as shown in the screenshot below. On the right you will see several tabs, related to process instance management, human task lists and reporting, as explained in the following sections.

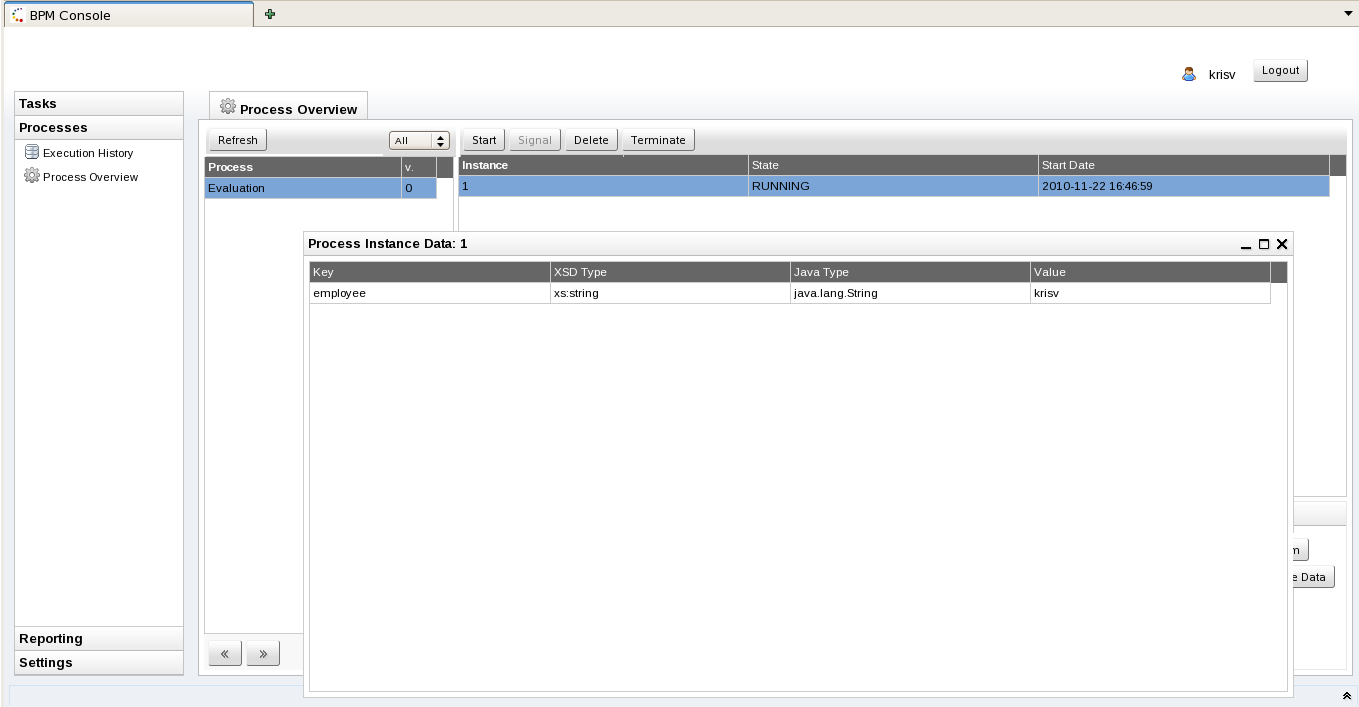
The "Processes" section allows you to inspect the process definitions that are currently part of the installed knowledge base, start new process instances and manage running process instances (which includes inspecting their state and data).
When you open the process definition list, all known process definitions are shown. You can then either inspect process instances for one specific process or start a new process instance.
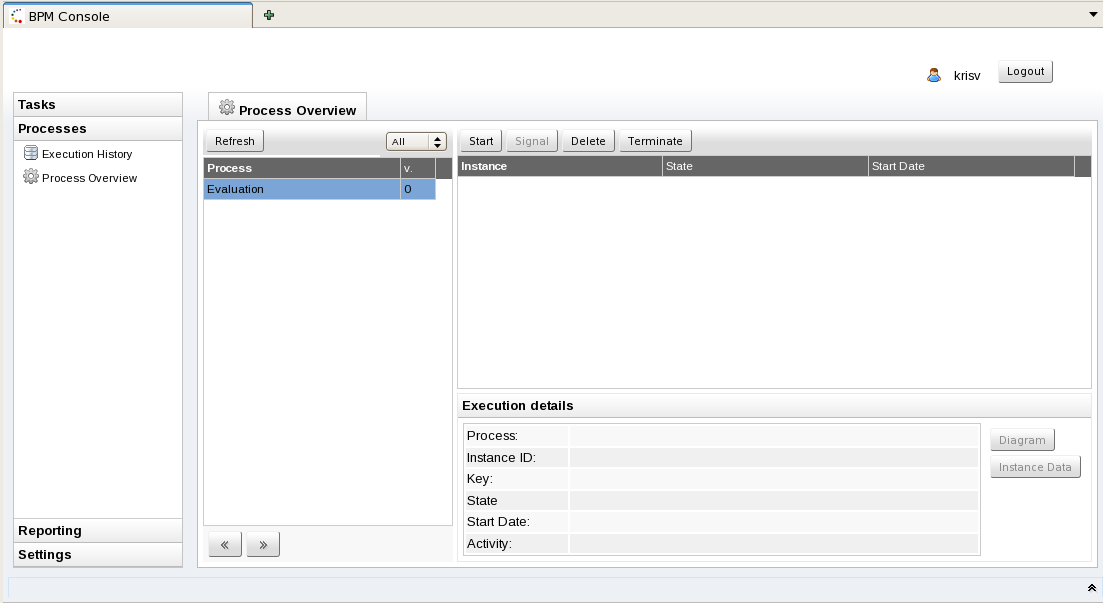
To start a new process instance for one specific process definition, select the process definition in the process definition list. Click on the "Start" button in the instances table to start a new instance of that specific process. When a form is associated with this particular process (to ask for additional information before starting the process), this form will be shown. After completing this form, the process will be started with the provided information.

The process instances table shows all running instances of that specific process definition. Select a process instance to show the details of that specific process instance.
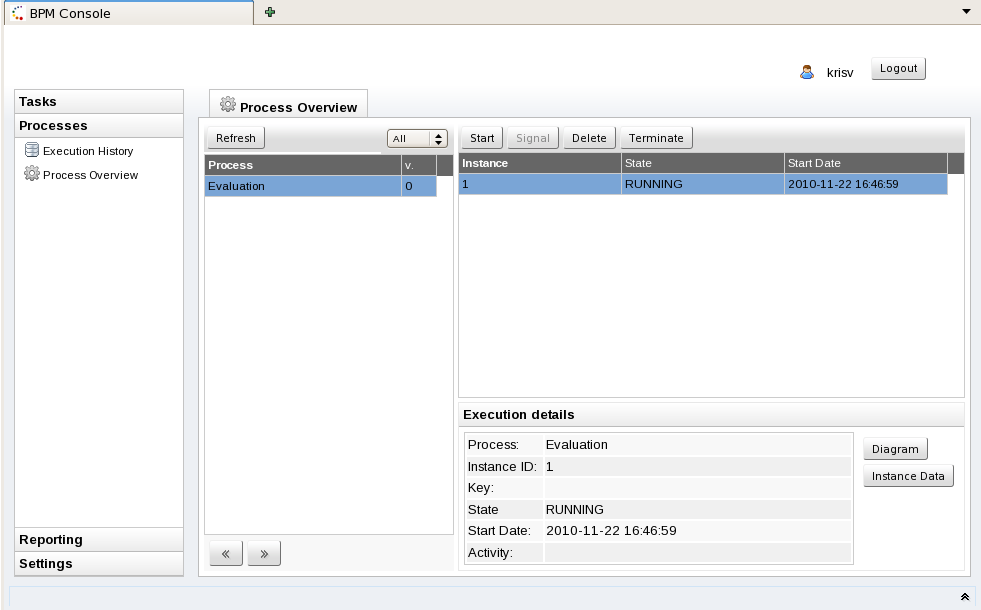
You can inspect the state of a specific process instance by clicking on the "Diagram" button. This will show you the process flow chart, where a red triangle is shown at each node that is currently active (like for example a human task node waiting for the task to be completed or a join node waiting for more incoming connections before continuing). [Note that multiple instances of one node could be executing simultaneously. They will still be shown using only one red triangle.]
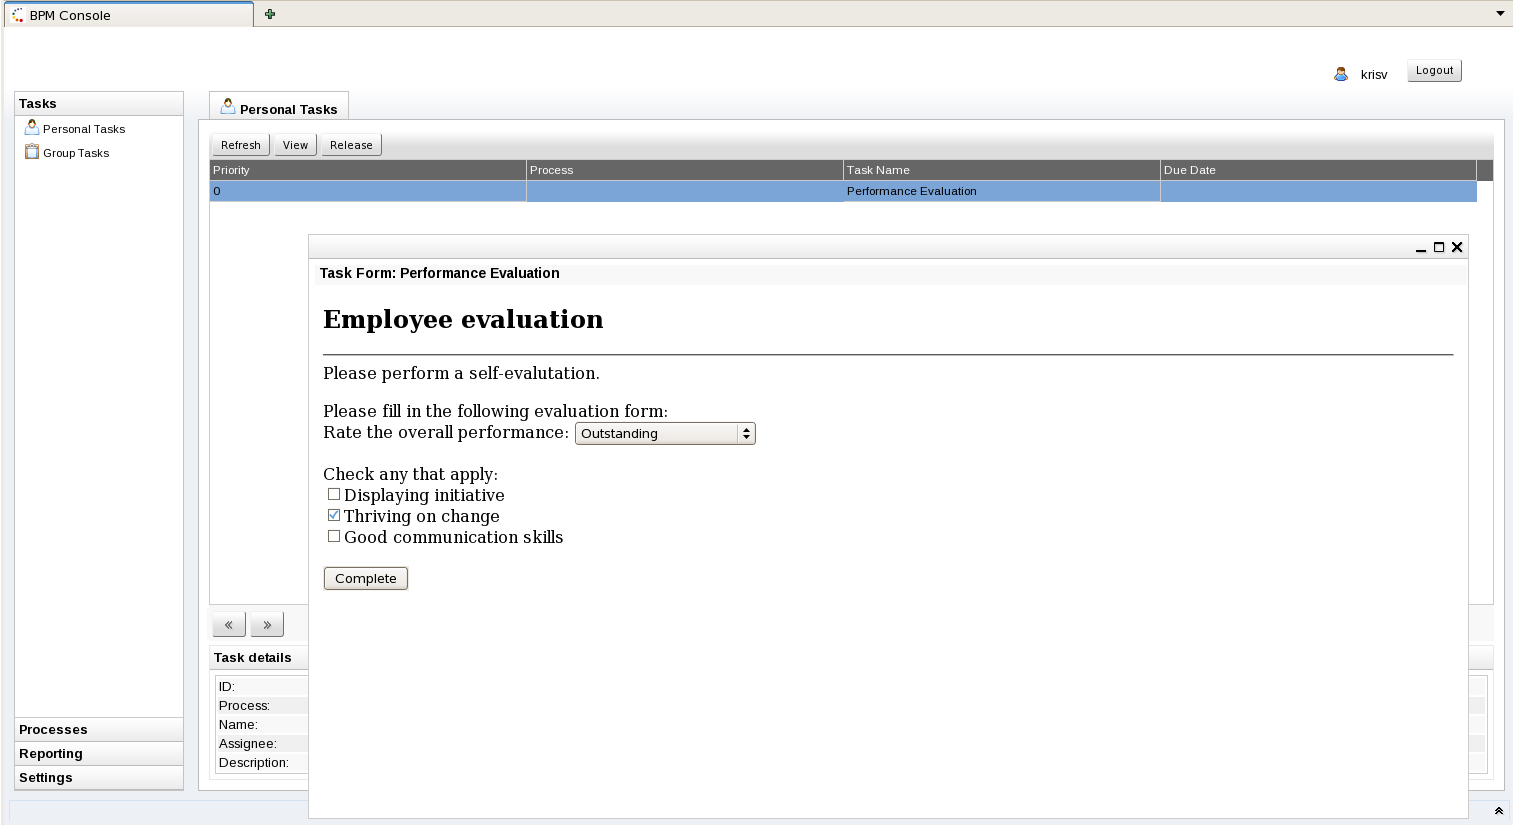
The task management section allows a user to see his/her current task list. The group task list shows all the tasks that are not yet assigned to one specific user but that the currently logged in user could claim. The personal task list shows all tasks that are assigned to the currently logged in user. To execute a task, select it in your personal task list and select "View". If a form is associated with the selected task (for example to ask for additional information), this form will be shown. After completing the form, the task will also be completed.
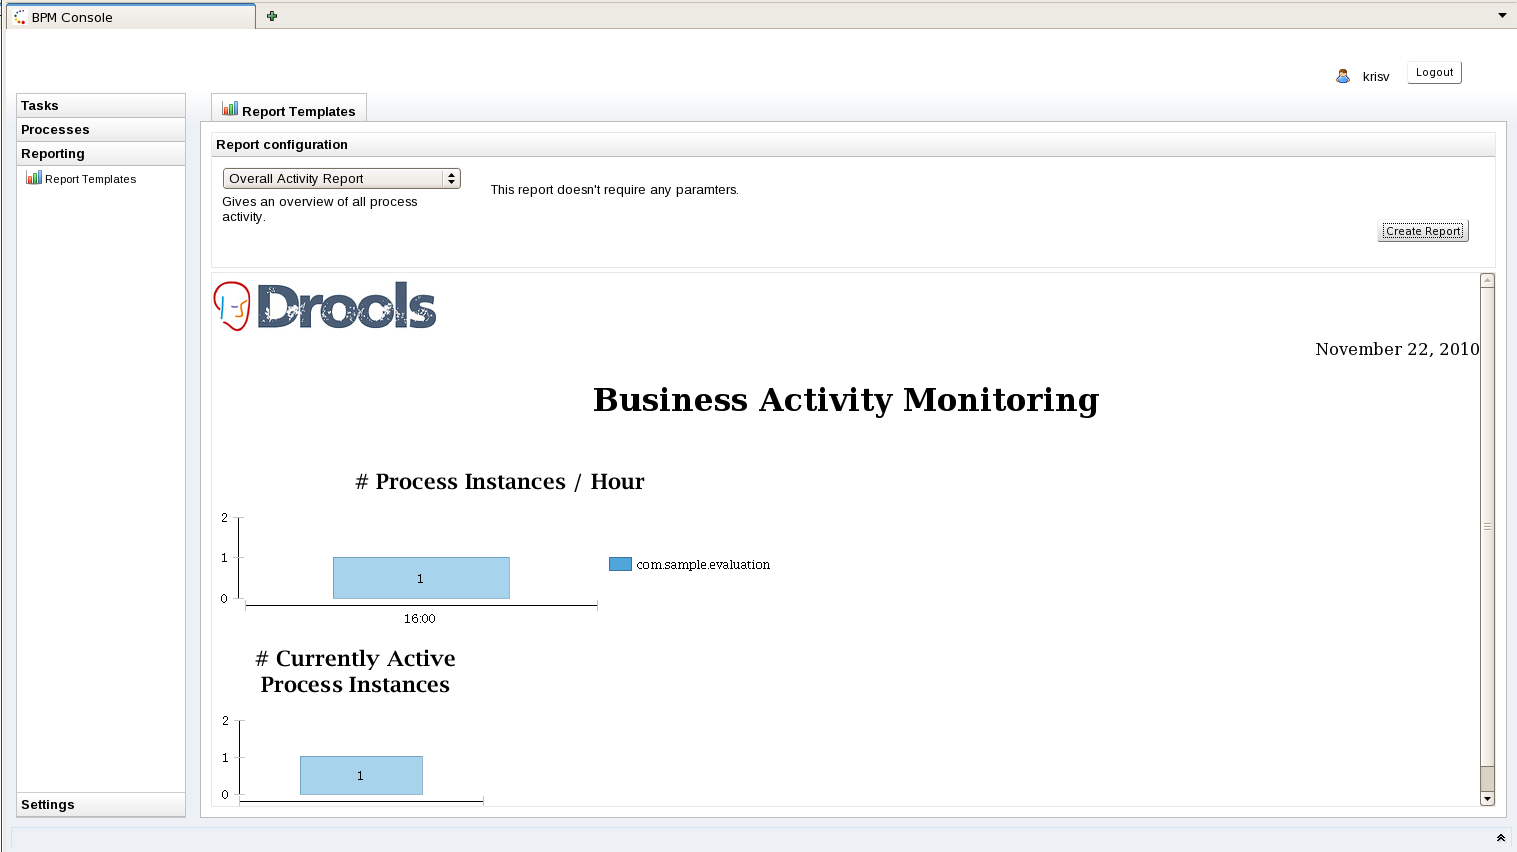
The reporting section allows you to view reports about the execution of processes. This includes an overall report showing an overview of all processes, as shown below.
A report regarding one specific process instance can also be generated.

jBPM provides some sample reports that could be used to visualize some generic execution characteristics like the number of active process instances per process etc. But custom reports could be generated to show the information your company thinks is important, by replacing the report templates in the report directory.
The jBPM installer by default does not install the reporting engine (to limit the size of the download). If you want to try out reporting, make sure to put the jBPM.birt.download property in the build.properties file to true before running the installer. If you get an exception that the report engine was not initialized correctly, please run the installer again after making sure that reporting is enabled.
Forms can be used to (1) start a new process or (2) complete a human task. We use freemarker templates to dynamically create forms. To create a form for a specific process definition, create a freemarker template with the name {processId}.ftl. The template itself should use HTML code to model the form. For example, the form to start the evaluation process shown above is defined in the com.sample.evaluation.ftl file:
<html>

<body>

<h2>Start Performance Evaluation</h2>

<hr>

<form action="complete" method="POST" enctype="multipart/form-data">

Please fill in your username: <input type="text" name="employee" /></BR>

<input type="submit" value="Complete">

</form>

</body>

</html>
Similarly, task forms for a specific type of human task (uniquely identified by its task name) can be linked to that human task by creating a freemarker template with the name {taskName}.ftl. The form has access to a "task" parameter that represents the current human task, so it allows you to dynamically adjust the task form based on the task input. The task parameter is a Task model object as defined in the jbpm-human-task module. This for example allows you to customize the task form based on the description or input data related to that task. For example, the evaluation form shown earlier uses the task parameter to access the description of the task and show that in the task form:
<html>

<body>

<h2>Employee evaluation</h2>

<hr>

${task.descriptions[0].text}<br/>

<br/>

Please fill in the following evaluation form:

<form action="complete" method="POST" enctype="multipart/form-data">

Rate the overall performance: <select name="performance">

<option value="outstanding">Outstanding</option>

<option value="exceeding">Exceeding expectations</option>

<option value="acceptable">Acceptable</option>

<option value="below">Below average</option>

</select><br/>

<br/>

Check any that apply:<br/>

<input type="checkbox" name="initiative" value="initiative">Displaying initiative<br/>

<input type="checkbox" name="change" value="change">Thriving on change<br/>

<input type="checkbox" name="communication" value="communication">Good communication skills<br/>

<br/>

<input type="submit" value="Complete">

</form>

</body>

</html>
Task forms also have access to the additional task parameters that might be mapped in the user task node from process variable using parameter mapping. Check out the chapter on human tasks for more details. These task parameters are also directly accessible inside the task form. For example, imagine that you want to make a task form for review customer requests. The user task node copies the userId (of the customer that performed the request), the comment (the description of the request) and the date (the actual date and time of the request) from the process into the task as task parameters. In that case, these parameters will then be accessible directly in the task form, as shown below:
<html>
<body>
<h2>Request Review</h2>
<hr>
UserId: ${userId} <br/>
Description: ${description} <br/>
Date: ${date?date} ${date?time}
<form action="complete" method="POST" enctype="multipart/form-data">
Comment:<BR/>
<textarea cols="50" rows="5" name="comment"></textarea></BR>
<input type="submit" name="outcome" value="Accept">
<input type="submit" name="outcome" value="Reject">
</form>
</body>
</html>
Data that is provided by the user when filling in the task form will be added as result parameters when completing the task. The name of the data element will be used as the name of the result parameter. For example, when completing the first task above, the Map of outcome parameters will include result variables called "performance", "initiative", "change" and "communication". The result parameters can be accessed in the related process by mapping these result parameters to process variables using result mapping.
Forms should either be available on the classpath (for example inside a jar in the jbossas/server/default/lib folder or added to the set of sample forms in the jbpm-gwt-form.jar in the jbpm console server war), or you could use the Guvnor process repository to store your forms as well. Check out the chapter on the process repository to get more information on how to do that.
The console also offers a REST interface for the functionality it exposes. This for example allows easy integration with the process engine for features like starting process instances, retrieving task lists, etc.
The list URLS that the REST interface exposes can be inspected if you navigate to the following URL (after installing and starting the console):
http://localhost:8080/gwt-console-server/rs/server/resources/jbpm
For example, this allows you to close a task using
/gwt-console-server/rs/task/{taskId}/close
or starting a new process instance using
/gwt-console-server/rs/process/definition/{id}/new_instance