Follow the instructions in this chapter to configure the RichFaces framework and get started with application development. RichFaces applications can be developed using JBoss Tools, as described in Section 2.3, “Creating a project with JBoss Tools”; or using Maven, as described in Section 2.4, “Creating a project with Maven”.
If you have existing projects that use a previous version of RichFaces, refer to the RichFaces Migration Guide.
The minimum technical requirements needed to get started with RichFaces are outlined below.
Java Development Kit (JDK) 1.5 or higher
JBoss Tools 3.1
A JavaServer Faces 2 (JSF 2) implementation
An application server, such as JBoss Application Server 6 or Apache Tomcat 6.
A web browser, such as Firefox 3.5 or Internet Explorer 7
RichFaces supports additional products not listed here. Refer to Section 3.1, “Full technical requirements” for a full list of technical requirements and supported envrionments, browsers, and tools.
Follow the instructions in this section to set up the RichFaces framework and begin building applications.
Download RichFaces archive
Download RichFaces from the JBoss RichFaces Downloads area at http://www.jboss.org/richfaces/download.html. The binary files (available in
.bin.zipor.bin.tar.gzarchives) contain a compiled, ready-to-use version of RichFaces with a set of basic skins.Compiling from source
Instead of downloading the pre-compiled binaries, you can download the source files and compile them yourself. Refer to Section 3.6, “Compiling from source code” for further instructions.
Unzip archive
Create a new directory named
RichFaces, then unzip the archive containing the binaries there.
Follow the procedure in this section to create a new RichFaces application with JBoss Tools.
Create a new project
Create a new project based on the JSF 2 environment. In JBoss Tools, select + → from the menu. Name the project, select JSF 2 from the JSF Environment drop-down box, and click the button to create the project.
Add the RichFaces libraries to the project
Add
core-ui.jar,richfaces-api.jar, andrichfaces-impl.jarinto your project by copying them from the location where you unzipped the RichFaces archive to theWebContent/WEB-INF/lib/directory of your project in JBoss Tools.Reference the tag libraries
The RichFaces tag libraries need to be referenced on each XHTML page in your project:
<ui:composition xmlns="http://www.w3.org/1999/xhtml"

                xmlns:ui="http://java.sun.com/jsf/facelets"

                xmlns:a4j="http://richfaces.org/a4j"

                xmlns:rich="http://richfaces.org/rich">

    ...

</ui:composition>
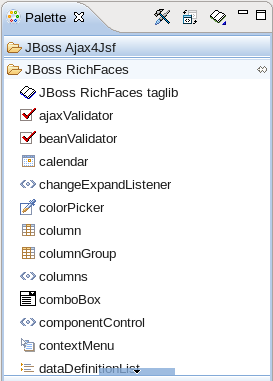
You are now ready to begin constructing your RichFaces applications. RichFaces components can be dragged and dropped into your application's XHTML pages from the RichFaces palette in JBoss Tools, shown in Figure 2.1, “RichFaces palette in JBoss Tools”
Apache Maven is a build automation and project management tool for Java projects. Follow the instructions in this section to create a Maven project for RichFaces.
Maven can be downloaded and installed from Apache's website at http://maven.apache.org/download.html. Version 2.2.1 is recommended.
Once Maven has been installed, no further configuration is required to begin building Maven projects.
A Maven archetype is a template for creating projects. Maven uses an archetype to generate a directory structure and files for a particular project, as well as creating pom.xml files that contain build instructions.
The RichFaces Component Development Kit includes a Maven archetype named richfaces-archetype-simpleapp for generating the basic structure and requirements for a RichFaces application project. Maven can obtain the archetype from the JBoss repository at https://repository.jboss.org/nexus/content/groups/public/. The archetype is also included with the RichFaces source code. Follow the procedure in this section to generate a new Maven-based RichFaces project using the archetype.
Add required repository
The details for the JBoss repository need to be added to Maven so it can access the archetype. Add a profile in the
maven_installation_folder/conf/settings.xml<profiles>element:<profiles>
...
<profile>
<id>jboss-public-repository</id>
<repositories>
<repository>
<id>jboss-public-repository-group</id>
<name>JBoss Public Maven Repository Group</name>
<url>https://repository.jboss.org/nexus/content/groups/public/</url>
<layout>default</layout>
<releases>
<enabled>true</enabled>
<updatePolicy>never</updatePolicy>
</releases>
<snapshots>
<enabled>true</enabled>
<updatePolicy>never</updatePolicy>
</snapshots>
</repository>
</repositories>
<pluginRepositories>
<pluginRepository>
<id>jboss-public-repository-group</id>
<name>JBoss Public Maven Repository Group</name>
<url>https://repository.jboss.org/nexus/content/groups/public/</url>
<layout>default</layout>
<releases>
<enabled>true</enabled>
<updatePolicy>never</updatePolicy>
</releases>
<snapshots>
<enabled>true</enabled>
<updatePolicy>never</updatePolicy>
</snapshots>
</pluginRepository>
</pluginRepositories>
</profile>
</profiles>
The profile then needs to be activated in the
<activeProfiles>element:<activeProfiles>
<activeProfile>jboss-public-repository</activeProfile>
</activeProfiles>
Generate the project from the archetype
The project can now be generated with the
richfaces-archetype-simpleapparchetype. Create a new directory for your project, then run the following Maven command in the directory:mvn archetype:generate -DarchetypeGroupId=org.richfaces.archetypes -DarchetypeArtifactId=richfaces-archetype-simpleapp -DarchetypeVersion=4.0.0-SNAPSHOT -DgroupId=
org.docs.richfaces-DartifactId=new_projectThe following parameters can be used to customize your project:
-DgroupIdDefines the package for the Managed Beans
-DartifactIdDefines the name of the project
The command generates a new RichFaces project with the following structure:
new_project├──pom.xml└──src└──main├──java│ └──org│ └──docs│ └──richfaces│ └──RichBean.java└──webapp├──index.xhtml├──templates│ └──template.xhtml└──WEB-INF├──faces-config.xml└──web.xmlAdd test dependencies (optional)
Your root directory of your project contains a project descriptor file,
pom.xml. If you wish to include modules for test-driven JSF development, add any dependencies for the tests to thepom.xmlfile. For full details on how to use the jsf-test project, refer to http://community.jboss.org/wiki/TestDrivenJSFDevelopment.Build the project
Build the project from the command line by entering the
mvn installcommand.The
BUILD SUCCESSFULmessage indicates the project has been assembled and is ready to import into an IDE (integrated development environment), such as JBoss Tools.Import the project into an IDE
Import the Maven project into your IDE. For Eclipse and JBoss Tools, you can import the project using the M2Eclipse plug-in.
To install the plug-in, choose → from the menu. Type
Mavento locate the Maven Integration for Eclipse Update Site entry, then typeMavenin the filter to show the available plug-ins. Follow the prompts to install the Maven Integration for Eclipse plug-in.With the plug-in installed, open the importing wizard by choosing → from the menu. Select → as the import source and choose the
pom.xmlfile for your project.
Your project is now ready to use. Once components and functionality have been added, you can run the application on a server and access it through a web browser at the address http://localhost:8080/.
jsf-app/
RichFaces can be added to existing JSF2 projects by adding references to the new RichFaces libraries. Refer to Step 2 and Step 3 in Section 2.3, “Creating a project with JBoss Tools” for details.