The JBoss Tools Palette allows you to:
Insert tags into a JSP page with one click
Add custom and 3rd party tags.
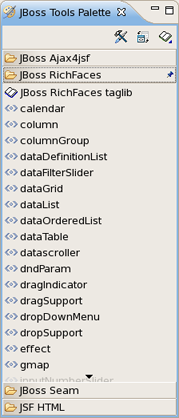
The JBoss Tools Palette provides possibility to add any tag libraries to it. Or you can choose a necessary one from the list of already existent tag libraries:
HTML
JBoss
JSF
JSTL
MyFaces
Oracle ADF Faces
Struts
XHTML
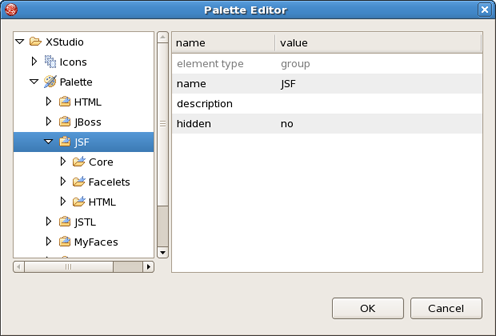
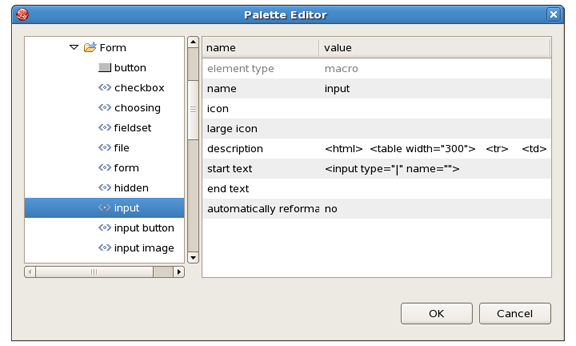
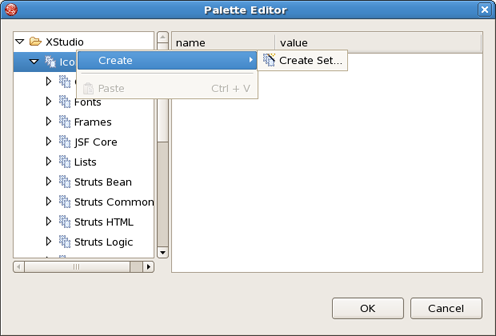
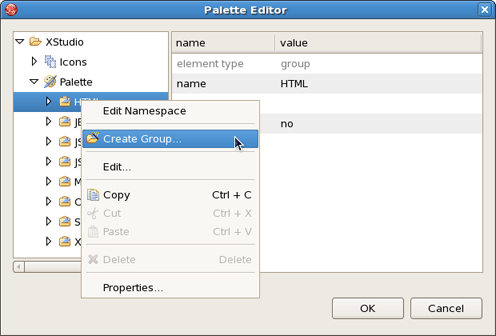
In the Palette Editor window(Figure 5.1. "Palette Editor") we can see that every group contains its own subgroups. For example, JSF includes Core, Facelets, HTML. So, in the Palette every group has the next view: <Group name> <Subgroup name>.
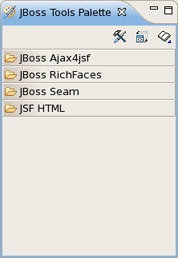
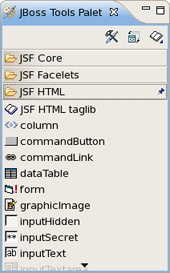
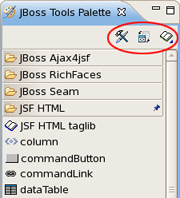
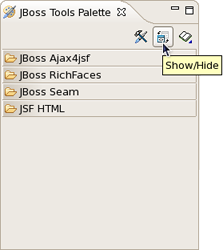
By default the Palette is represented in Web Development Perspective with four groups(Figure 5.2. "JBoss Tools Palette"). If you can't see it, select Window > Show View Other... > JBoos Tools Web > JBoss Tools Palette from the menu bar.
By using Show/Hide button you can add any predefined group of tag libraries. It's also possible to create your own group.
A new tag can be added into any text file including jsp, xhtml и htm(l).
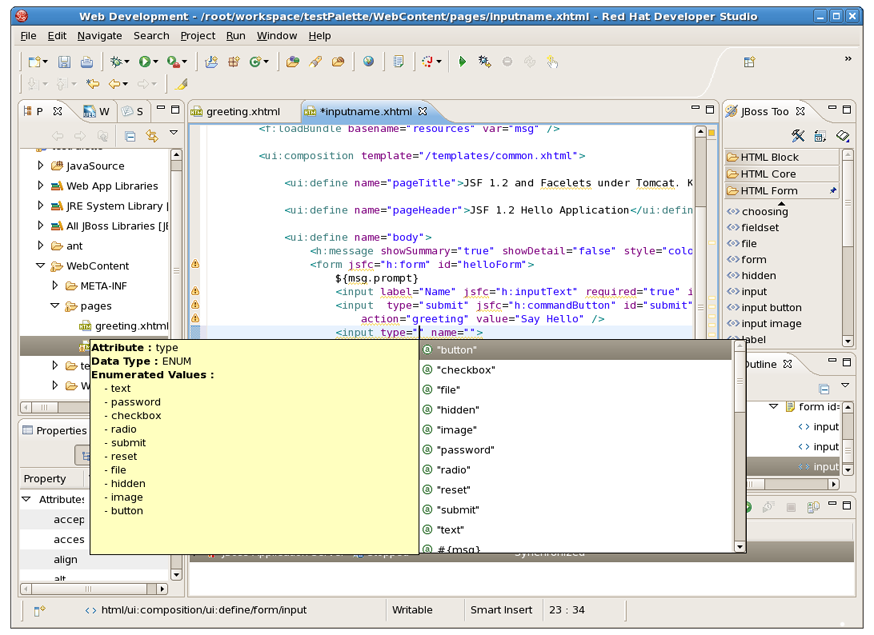
It's very simple to do this. Place the cursor in the JSP page where you want to add a tag and then click the tag in the palette. In the example below, the commandButton tag has been inserted. Notice also that if you place the cursor over any tag, a balloon tip is shown with all the "tag" attributes.
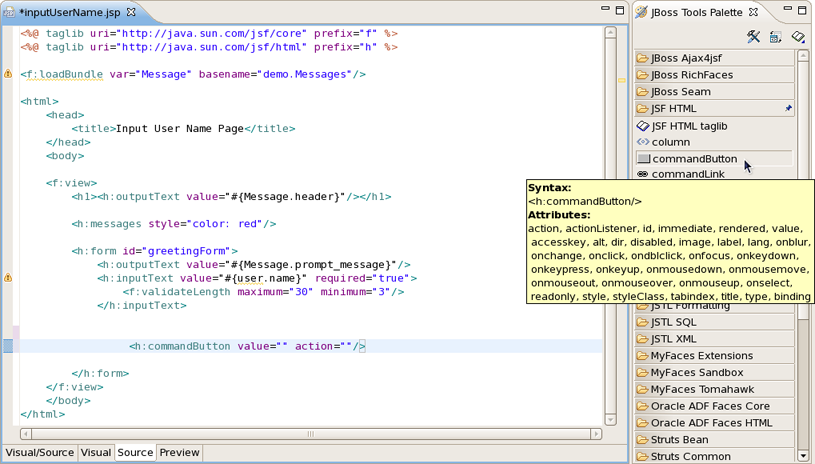
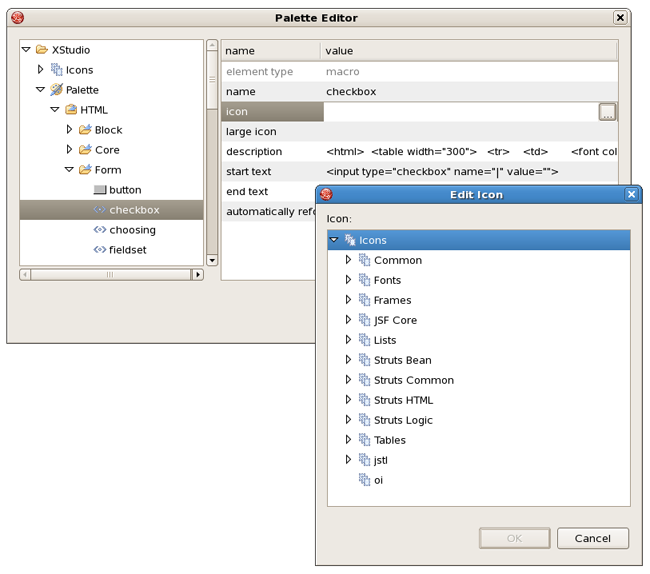
The cursor position after adding a tag into a file is specified by "|" symbol in the tag template on the right in the Palette Editor window.
Above you can see where the cursor position for HTML/Form/input is set. So, after adding this tag into your file the cursor will be in the attribute "type". Then, you can straight use the combination of buttons Ctrl + Space to inquire about a prompting.
There are two ways to add any custom or 3rd party tag library to the JBoss Tools Palette:
Drag-and-drop from the Web Projects view
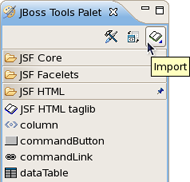
The Import button on the JBoss Tools Palette
Before you can add your custom component library, you need to make sure it is included in your project. Either place the ".tld" file or the ".jar" that includes your tag library under the lib folder in your project.
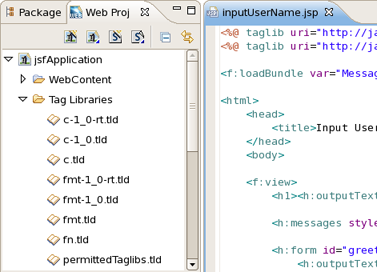
Switch to the Web Projects view and expand the Tag Libraries folder. If the view not active, select Window > Show View > Web Projects from the menu bar.
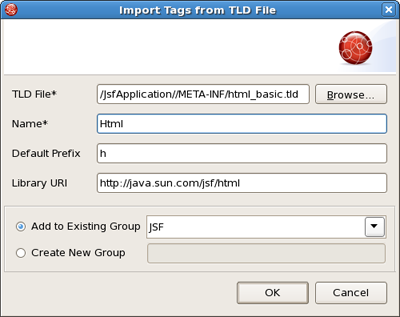
Also make sure that the JBoss Tools Palette is open. Select the tag library that you want to add and simply drag-and-drop it on to the JBoss Tools Palette.
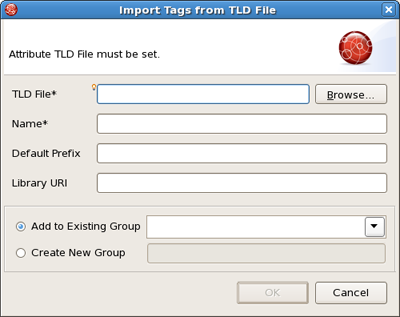
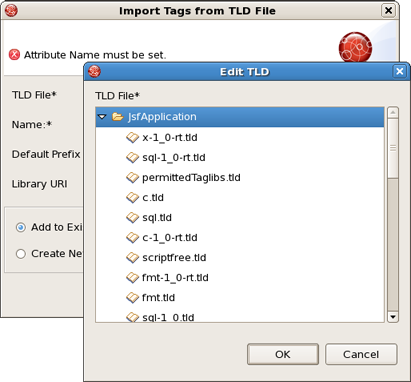
You will see the following dialog window. As you can see JBoss Developer Studio takes care of all the details. You just need to set the Group name to which to add this tag library. You can either add this tag library to an existing Group or just create a new one.
Once you are finished, you will see the new tag library added to the JBoss Tools Palette.
There is possibility to configure the JBoss Tools Palette:
to edit the palette content by adding, removing or changing the palette elements
to show/hide groups, subgroups
to import groups, subgroups
To edit the Pallete view use Edit button. The Palette Editor provides following possibilities:
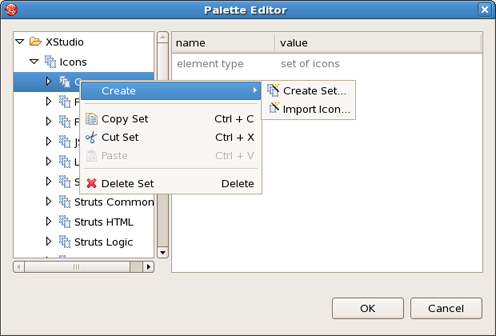
to work with set of icons.
to edit icons in the chosen set
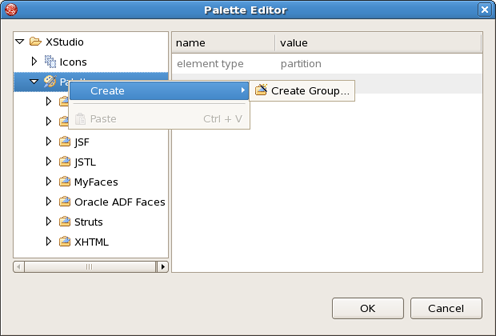
to edit a group
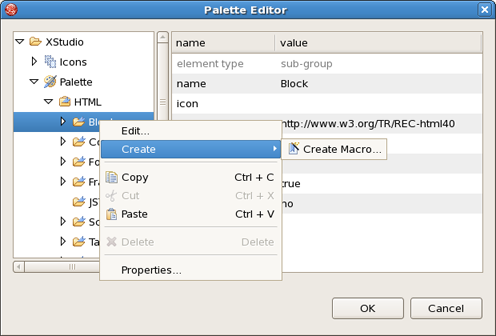
to edit a subgroup
to edit a subgroup content
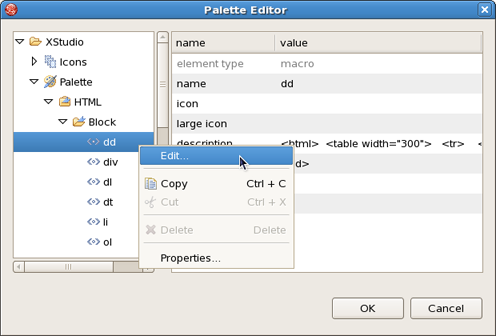
to edit the Palette element or macro
Parameters of the Palette element are put into the table on the right. Table cells are provided with editors and modal dialogue windows for choosing necessary icons. For 'start text' and 'end text'(or macro) there is possibility to control the cursor position by using "|" symbol.
Show/Hide is a very useful feature that allows you to control the number of tag groups that are shown on the palette.
Click Show/Hide button
In the dialog Show/Hide Drawers check the groups you want to be shown on the palette:
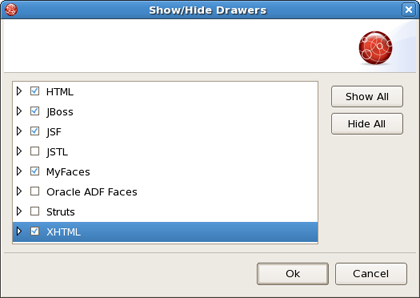
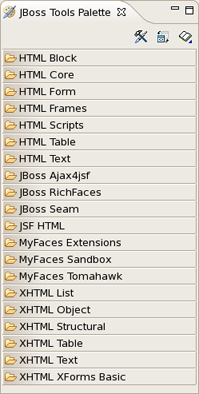
Click OK . The new groups will now be displayed on the palette:
The Import button lets you add a custom or 3rd party tag library to JBoss Tools Palette. See here how to add.