If you prefer develop web applications using Struts technology JBoss Developer Studio also meets your needs.
JBDS supports the Struts 1.1, 1.2.x versions.
When you create a brand new or import an existing project you can set which Struts version to use:
JBoss Developer Studio provides the following when working with Struts.
Create new Struts projects
Import (open) existing Struts projects
You can import any project structure
Add Struts capabilities to any existing Eclipse project
Import and add Struts capabilities to any existing project created outside Eclipse
JBoss Developer Studio includes a New Struts Project Wizard that radically simplifies the process for getting started with a new Struts project. You just need to follow these 4 steps:
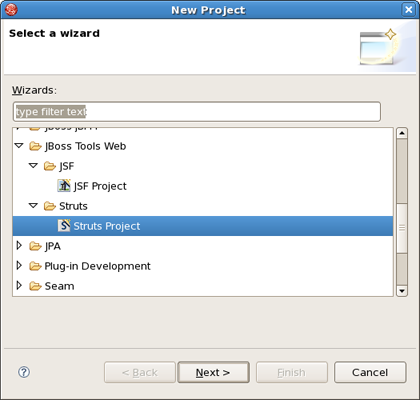
Select File > New > Project... from the menu bar. Then, select JBoss Tools Web > Struts > Struts Project in this dialog box. Click Next:
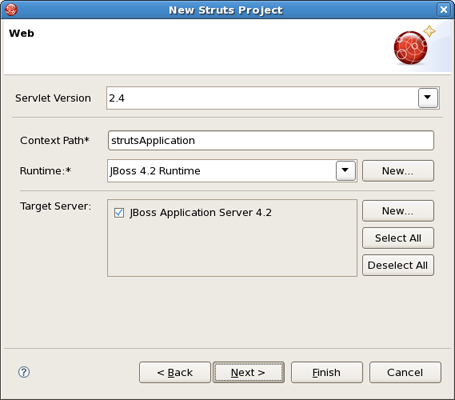
On this screen, provide the project name. You can leave all other values as they are:
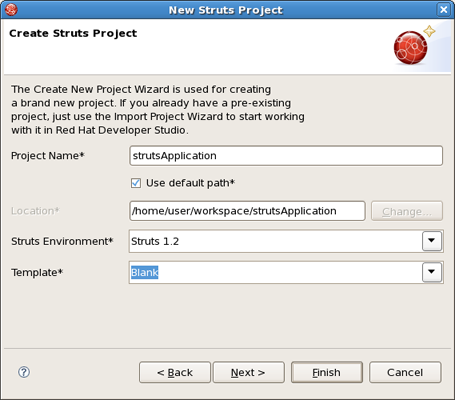
Tip:
Don't put spaces in project names.
Note:
If you select the KickStart template, then the project created will include a simple Hello World type application that is ready-to-run.
Next, you can register this application with the current servlet container defined for your workspace (JBoss AS, by default) in order to allow you to test your application more easily while still developing it. A new entry will be added in the servlet container configuration file to enable running the application in-place (called null deployment or link deployment). Uncheck the "Target Server" check box if for some reason you don't want to register your application at this point.
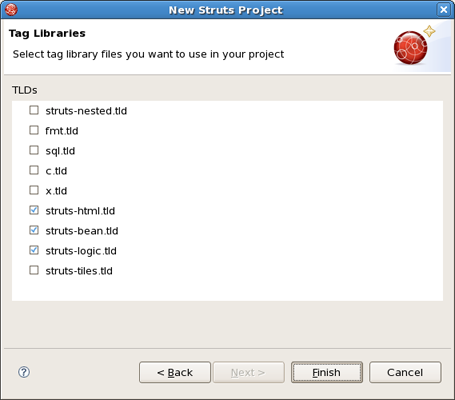
On the next screen, you can select the TLD files to include in this project:
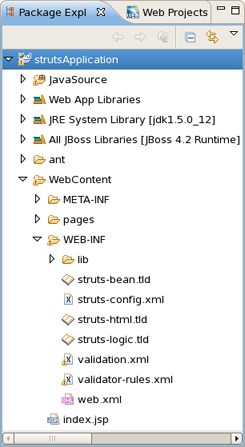
After the project is created, you should have the following project structure (if you used the KickStart template):
Tip:
If you want to hide the jar files from Web App Libraries in view, select the down-pointing arrow in the upper right corner, select Filters..., check the box next to Name filter patterns (matching names will be hidden), and type *.jar into the field. Then, click OK.
For detailed information on migration projects to JBoss Developer Studio see Migration Guide.
With JBoss Developer Studio you can add Struts capabilities (including Struts libraries, tag libraries and a Struts configuration file) to any existing Web application project in your Eclipse workspace. By adding a Struts Nature to your project, you can now edit files using JBoss Developer Studio editors, such as the Struts configuration editor and the JBoss Tools JSP editor.
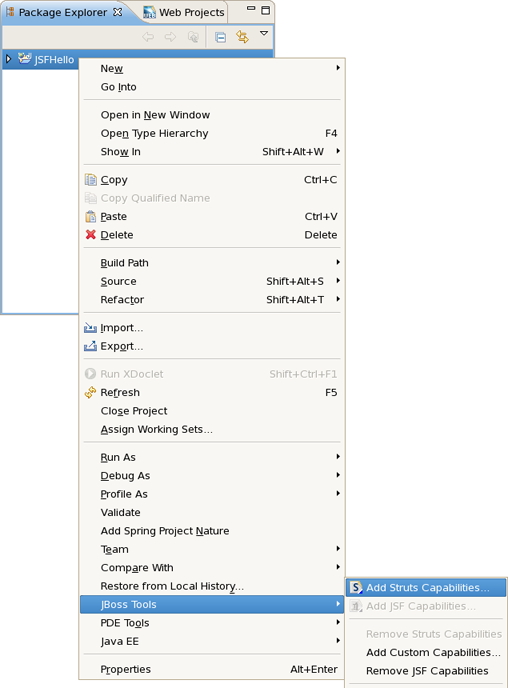
Right-click the project and select JBoss Tools > Add Struts Capabilities from the context menu. This will start the process of adding all necessary libraries and files to make this a Web JSF project.
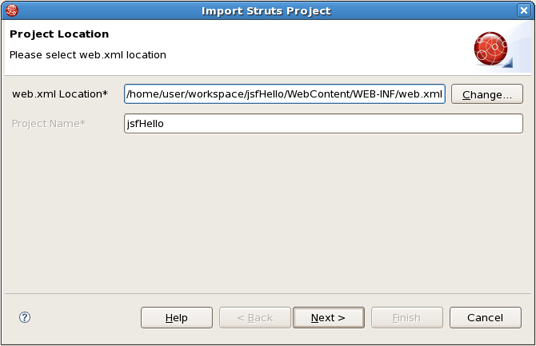
The wizard will first show you the web.xml file location and the project name.
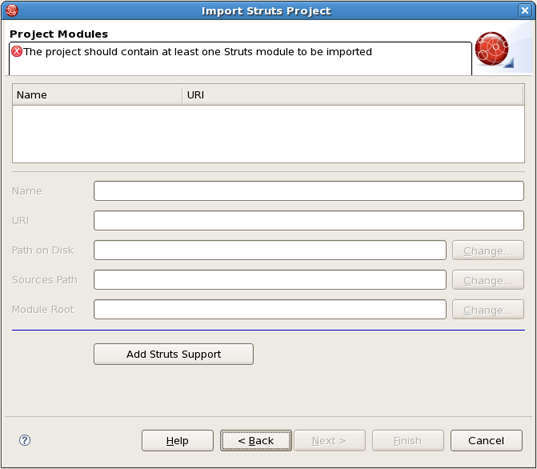
After hitting Next, you will see the following screen. This screen simply means that you need to add at least one Struts module to your project to make this project a Struts project. Adding a Struts module means that a new struts-config.xml will be added to your project and registered in the web.xml file. In addition, all required Struts libraries will be added. To add a Struts module, select the Add Struts Support button.
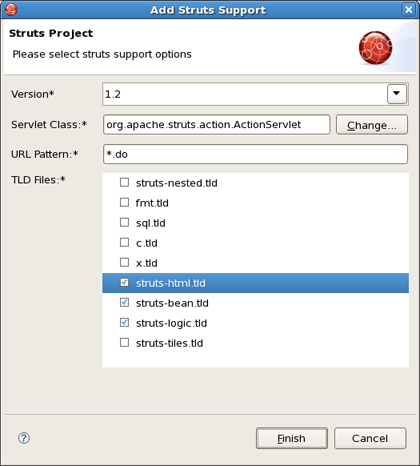
Here you can select what Struts version, Servlet class, URL pattern and TLDs to add to this project.
When done, you will see the default Struts module configuration information. See how to Edit Struts modules.
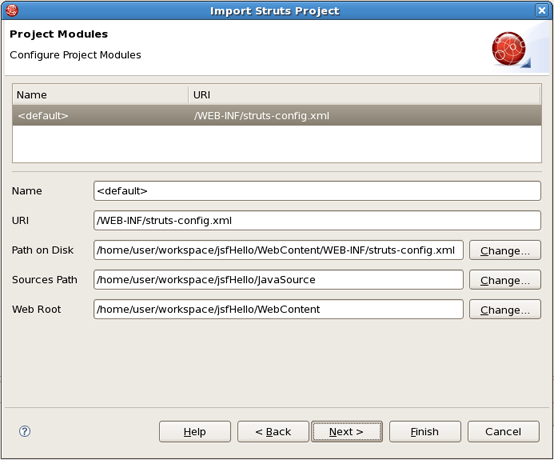
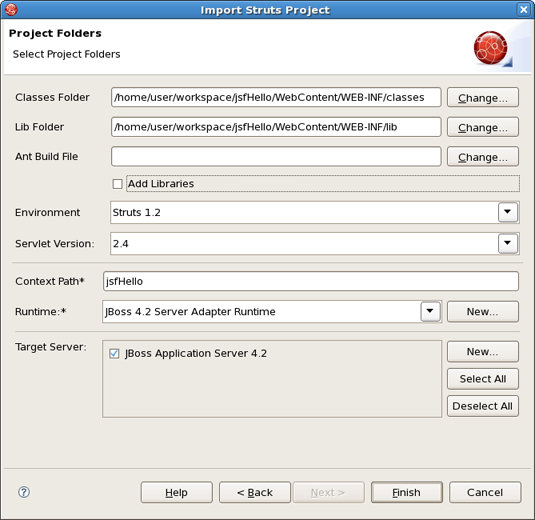
On the last screen you can set the different folders for your project as well as register this application with a servlet container.
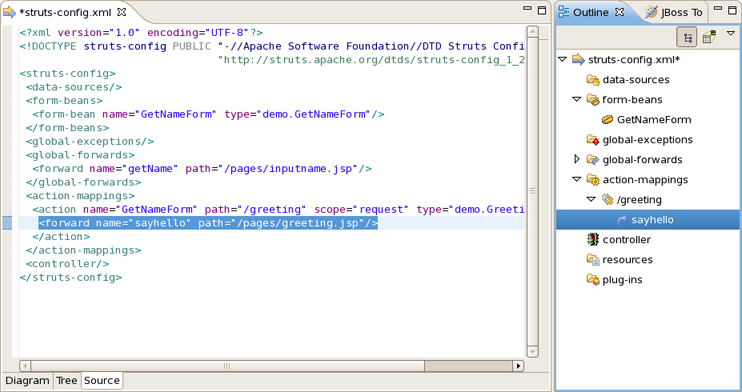
When done, you can open the struts-config.xml file. (The Struts configuration is shown below in the Tree viewer).
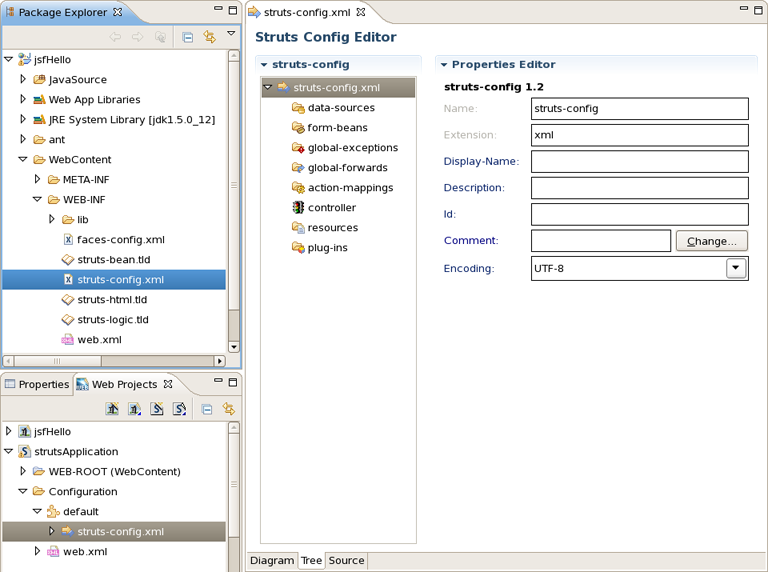
The Struts configuration file editor has three main viewers (modes): Diagram (shown), Tree and Source. The modes can be selected via the tabs at the bottom of the editor. Any changes made in one mode are immediately visible when you switch to any other mode.
When working in Source view, you always have all the following features available:
Content Assist
Open On Selection
File Folding
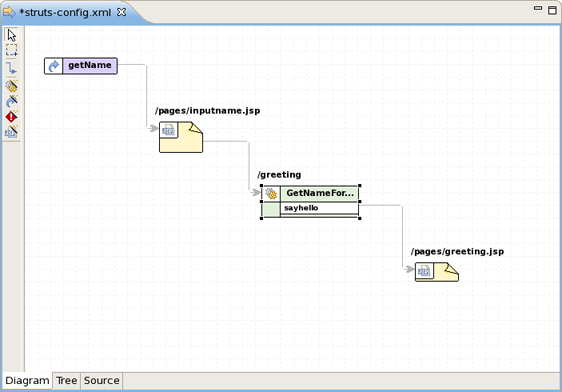
The Diagram mode graphically displays the Web flow of the application defined in the Struts configuration file.
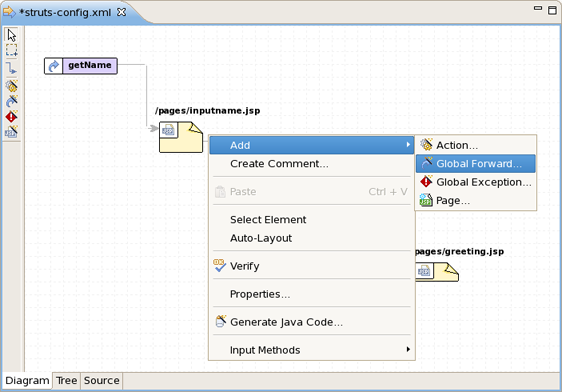
Just by right-clicking anywhere on the diagram, you can use a context menu to create the building blocks of a Struts application:
Actions
Global forwards
Global exceptions
JSP Pages
Along the upper-left side of the editor is a stack of seven icons for changing the behavior of the cursor in the diagram. The first icon switches to the default regular selection cursor, the second to the marquee selection cursor and the third to the new connection cursor. The last four icons switch the cursor to an insert cursor for each type of Struts build block listed above (and in the order listed).
For instance, clicking on the first of these four icons (the one with the gears) will switch the cursor to insert actions. Clicking anywhere in the diagram with this cursor has the same effect as right-click and selecting Add > Action... from the context menu with the regular cursor active. It's just more efficient to use this cursor if you're adding more than one action at once.

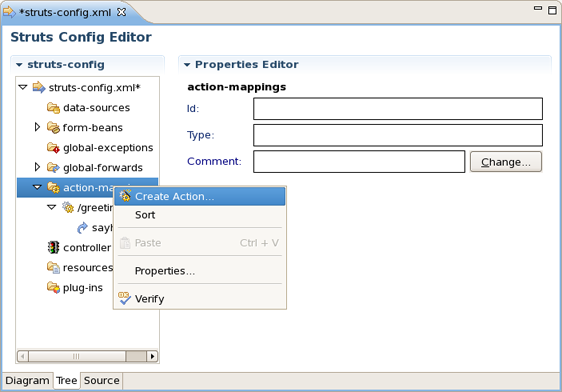
In the Tree mode, the different elements of the Struts application are organized into functional categories on the left-hand side and a form for editing the properties of currently selected items on the right-hand side.
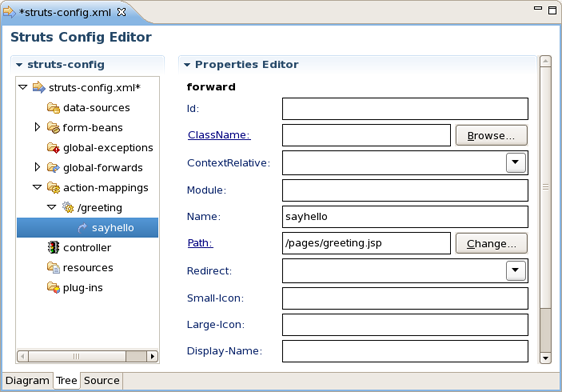
You can also right-click on any node in the category tree and perform appropriate operations through a context menu. For instance, by right-clicking on the action-mappings category node, you can add new actions to the application.
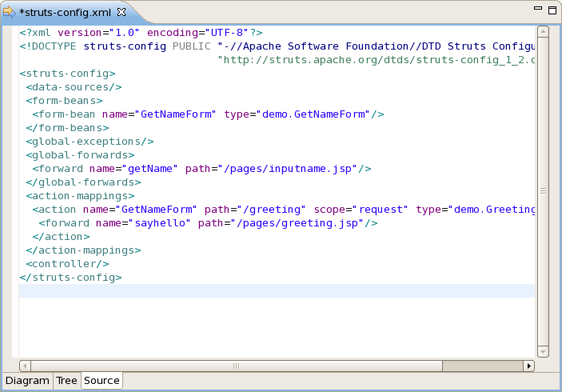
In the Source mode, you have complete editing control of the underlying XML coding:
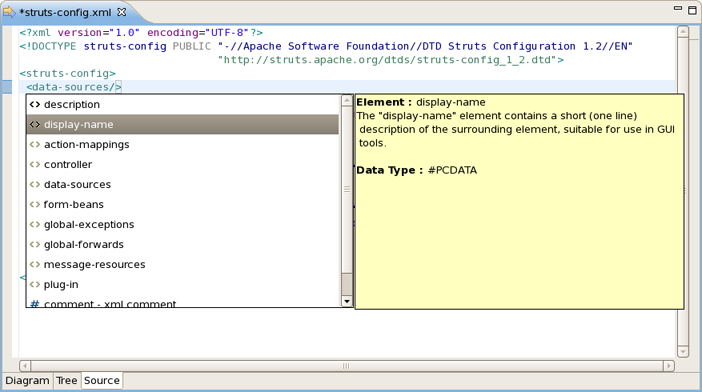
You can take advantage of code assist:
The editor will also immediately flag any errors:
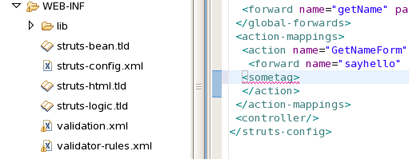
Finally, you can use the Outline view with the editor to easily navigate through the file:
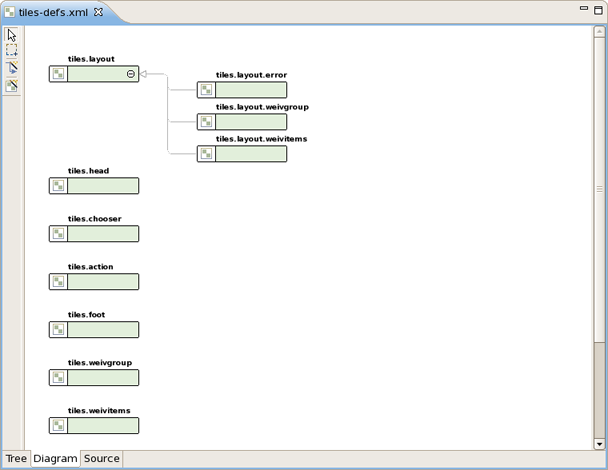
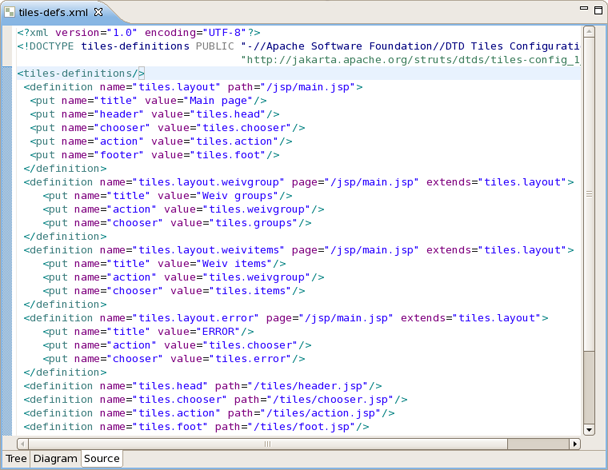
The Tiles configuration file editor has three main viewers (modes): Tree (shown), Diagram and Source. The modes can be selected via the tabs at the bottom of the editor. Any changes made in one mode are immediately visible when you switch to any other mode.
When working in Source view, you always have all following features available:
Content Assist
Open On Selection
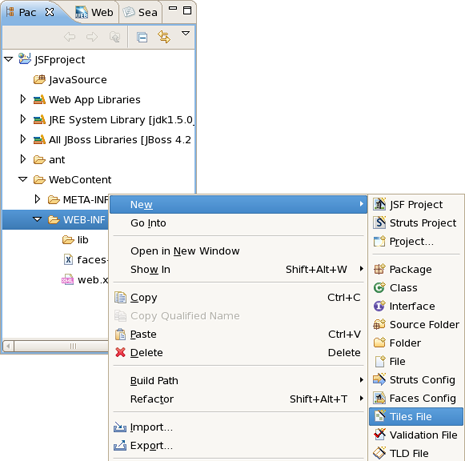
To create a new Tiles files, right click any folder and select New > Tiles File.
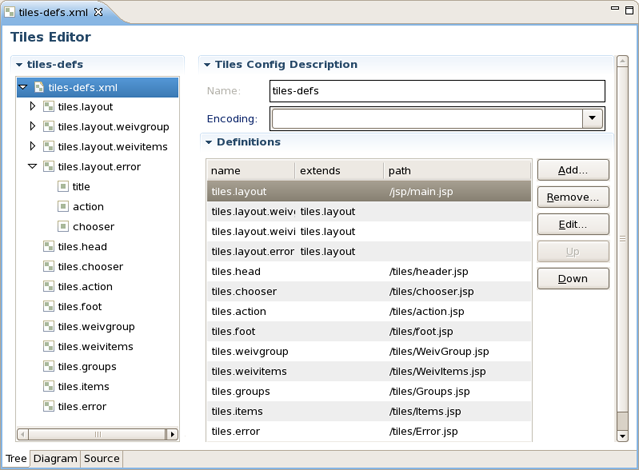
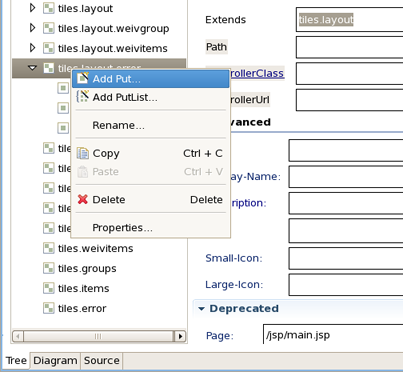
In the Tree mode, the different elements of the Tiles file are organized into functional categories on the left-hand side and a form for editing the properties of currently selected items on the right-hand side.
To edit the file, simply right click any node and select among the available actions:
The Diagram mode is shown below:
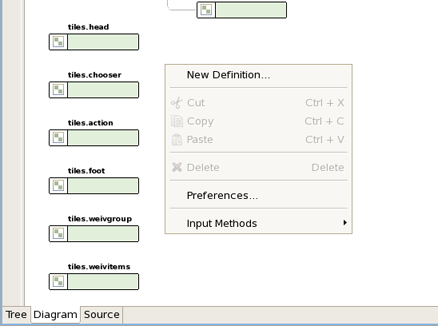
To create new definitions, simply right click anywhere in the diagram:
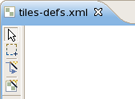
You can also use the Diagram toolbar to make editing easier:
The Tiles editor also comes with a Source view that gives you full control over the source. Any changes here will immediately appear in other viewers when you switch to them.
Content assist is available in the Source mode:

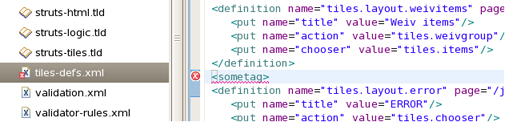
Any errors are immediately reported as shown below:
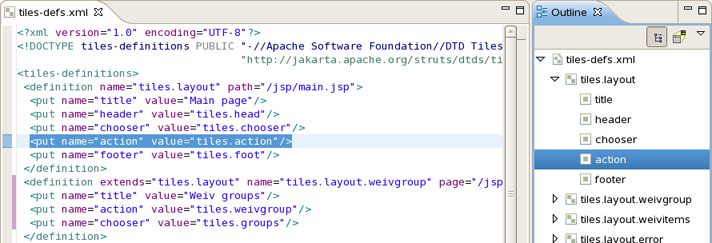
You can also use the Outline view together with the editor's Source mode. Selecting any node in the Outline view will jump to that place in the source.
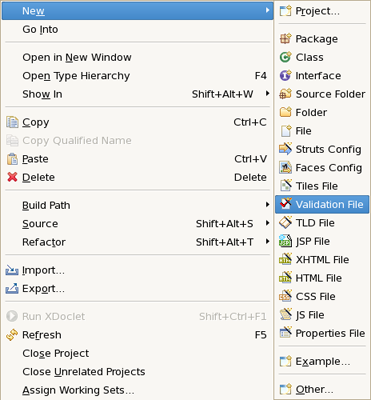
JBoss Developer Studio comes with a visual validation editor. To create a new validation file, right click any folder and select File > Validation File from the context menu.
The validation editor works through a number of viewers.
The Formsets viewer shows forms and their elements for which to define validation rules.
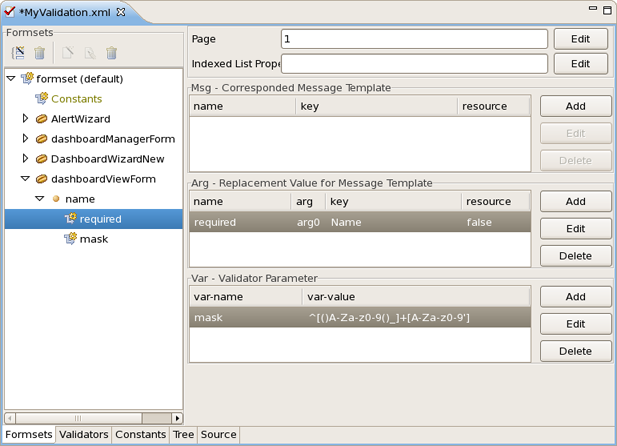
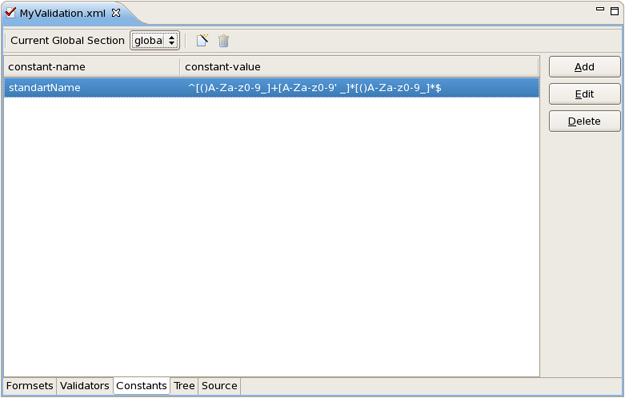
The Constants viewer lets you set constant values for your validation rules.
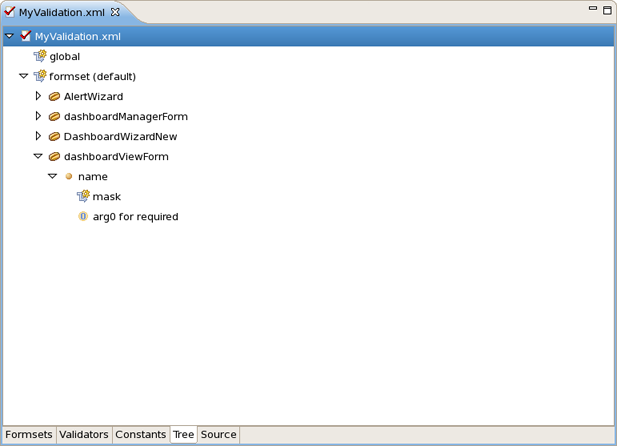
The validation file also can be viewed in a Tree viewer.
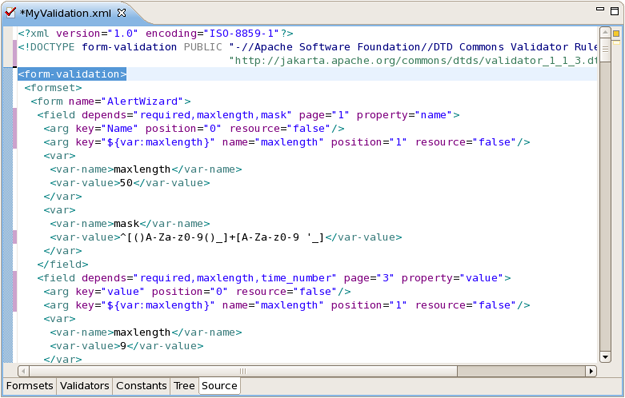
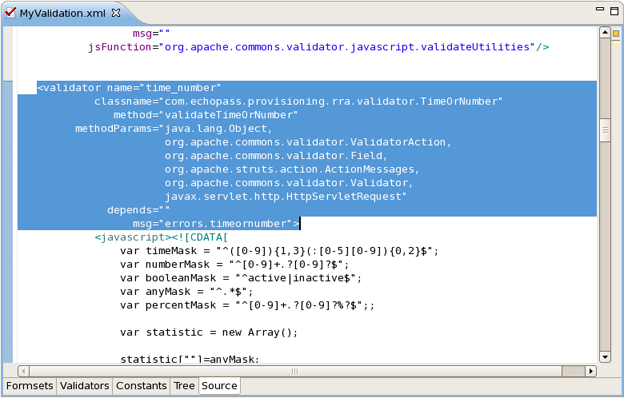
At any point you have full control over the source by switching to the Source viewer. Any editing in this viewer will immediately be available in other viewers of this editor.
You can also open your own custom or Struts-standard validation-rules.xml file.
The Validators viewer shows the validation rules for a selected validator. You can of course add your own rules.
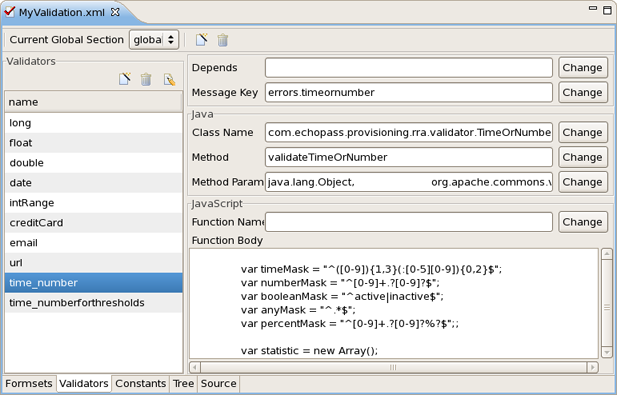
Here are the validation rules shown in the Source viewer.
JBoss Developer Studio supports working with Struts projects that have multiple modules. You can easily do the following:
Add new modules
Edit modules for an existing project or during Struts project import
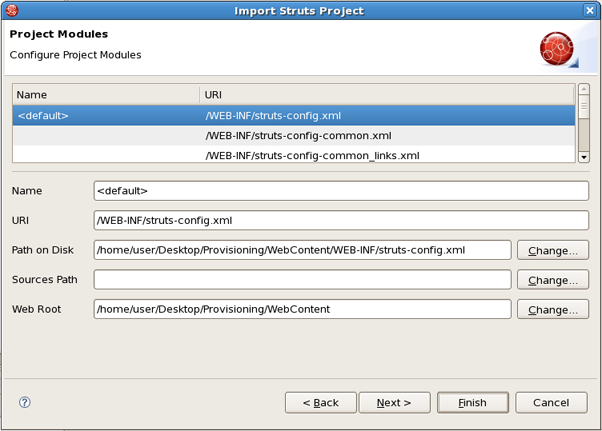
During Struts project import, if the project has multiple modules, you will see a screen with all existing modules. You can select each module and edit its details.
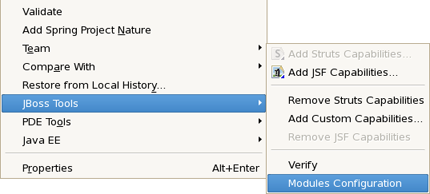
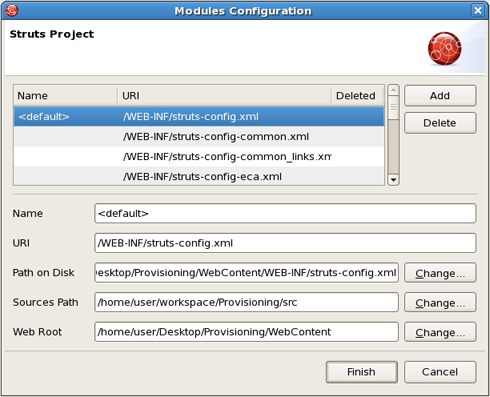
To edit modules in an existing project, right click the project and select JBoss Tools > Modules Configuration.
You will see the same screen as above where you will be able to select a module and edit its details:
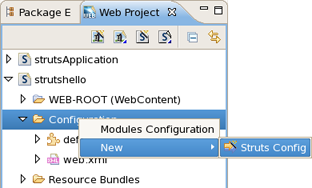
Adding a new module is very simple. First switch to Web Project view. Expand your project to the Configuration folder. Under that folder you should see the current modules. Right click on Configuration and select New > Struts Config.
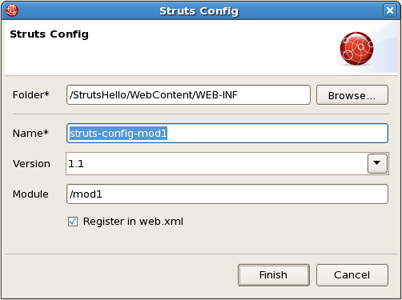
You will see the screen below. You can specify a new module name and also add the new Struts configuration file to web.xml file.
JBoss Developer Studio comes with a code generation feature. You can generate stub code for Struts Actions, FormBeans, Forwards and Exceptions.
The code generation in JBoss Developer Studio is based on Velocity templates which can be modified for your use. The templates are located at {RedHatDeveloperStudioHome} > templates > codegeneration .
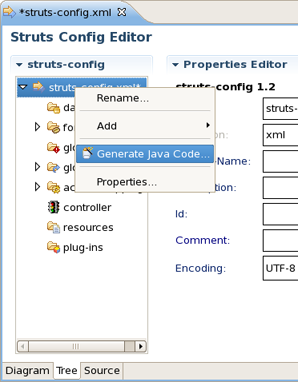
There are a number of ways to invoke code generation. One is simply right-clicking the Struts diagram and selecting Generate Java Code....

On this screen you can select for which elements to generate code. If you select Next you will be able to specify more options for each of the categories you selected.

Tip:
please be careful not to override your existing files.
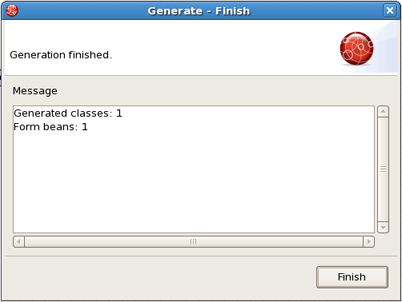
When generation is complete, a result window will appear letting you know how many classes were generated:
You don't always have to generate code for all elements at once. You can invoke generation for just an individual Struts artifact as well. Right-click an element on the diagram of the Struts configuration file and select Generate Java Code... from the context menu.
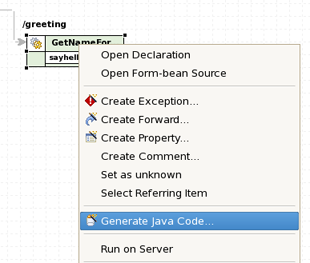
The same can be done from within the Tree viewer for the editor of the Struts configuration file.
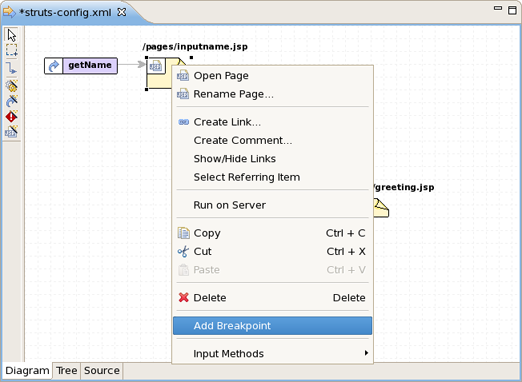
JBoss Developer Studio comes with Struts configuration file debugger. It allows you to set break points on Struts diagram and then simply launch the server in debug mode.
Simply right click an Action or a page and select Add Breakpoint.
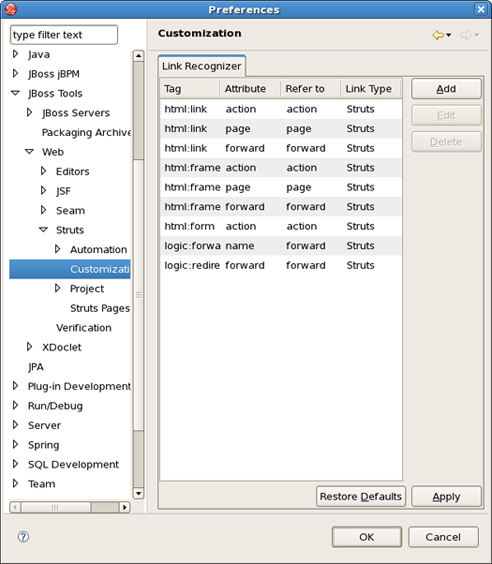
Custom page links allow you to define custom Struts page links that will be recognizable in the Struts application diagram. You can define these links by selecting Window > Preferences from the menu bar and then selecting JBoss Tools > Web > Struts > Customization from the Preferences dialog box.