Note:
We highly recommend developing in Seam. This chapter is for users who for some reason cannot use Seam.
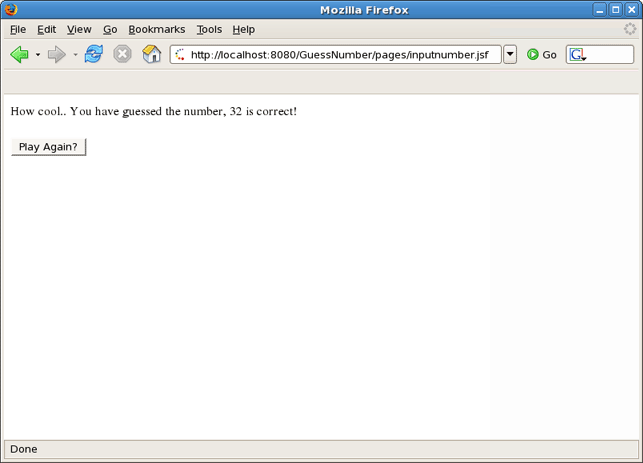
In this chapter you will see how to create a simple JSF application being based on "RAD" philosophy. We will create the familiar Guess Number application. The scenario is the following. You are asked to guess a number between 0 and 100. If the guess is correct, a success page is displayed with a link to play again. If the guess is incorrect, a message is printed notifying that a smaller or a larger number should be entered and the game continues.
We'll show you how to create such an application from scratch, along the way demonstrating powerful features of JBoss Developer Studio such as project templating, Visual Page Editor, code completion and others. You will design the JSF application and then run the application from inside JBoss Developer Studio using the bundled JBoss server.
First, you should create a JSF 1.2 project using an integrated JBDS's new project wizard and predefined templates. Follow the next steps:
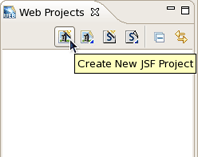
In Web Projects View (if it is not open select Window > Show View > Others > JBoss Tools Web > Web Projects View) click Create New JSF Project button.
Put GuessNumber as a project name, in JSF Environment drop down list choose JSF 1.2
Leave everything else as it is and click Finish
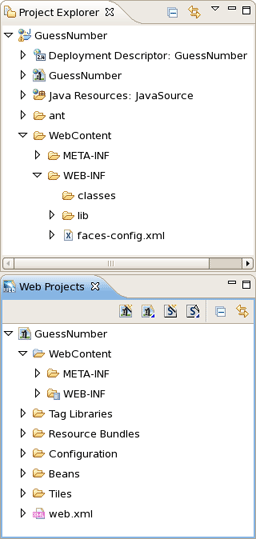
Our project will appear in Project Explorer and Web Projects Views. As you can see JBoss Developer Studio has created for us the whole skeleton for the project with all needed libraries, faces-config.xml and web.xml files.
As the project has been set up, new JSP pages should be created now.
Here, we are going to add two pages to our application. The first page is inputnumber.jsp. It prompts you to enter a number. If the guess is incorrect, the same page will be redisplayed with a message indicating whether a smaller or a larger number should be tried. The second page is success.jsp. This page will be shown after you guess the number correctly. From this page you also have the option to play the game again.
Now, we will guide you through the steps on how to do this.
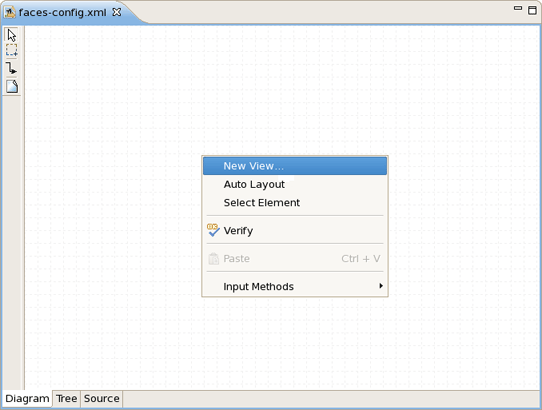
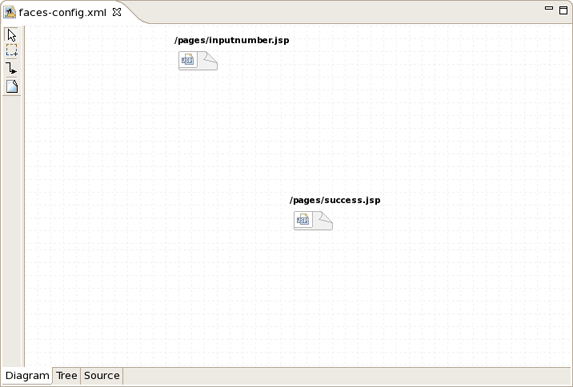
Open faces-config.xml file
Right click anywhere on the diagram mode
From the context menu select New View
Type pages/inputnumber as the value for From-view-id
Leave everything else as is and click Finish
In the same way create another jsf view. Type pages/success as the value for From-view-id
Select File > Save
On the diagram you will see two created views.
Then, we should create connection between jsp pages.
In the diagram, select the Create New Connection icon third from the top along the upper left side of the diagram to get an arrow cursor with a two-pronged plug at the arrow's bottom
Click on the pages/inputnumber page icon and then click on the pages/success page icon
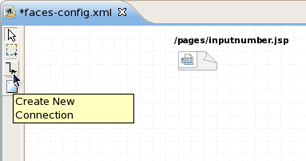
A transition should appear between the two icons of views.
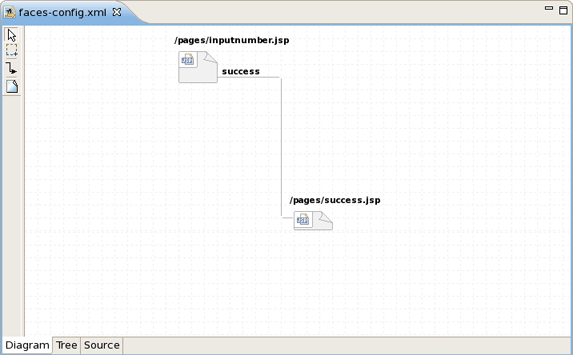
Select File > Save from the menu bar
A resource file is just a file with a .properties extension for collecting text messages in one central place. JBoss Developer Studio allows you to create quickly a resource file. The messages stored in resource file can be displayed to you on a Web page during application execution.
With resource file first, you don't hard code anything into the JSP pages. And second, it makes it easier to translate your application to other languages. All you have to do is to translate all your messages to the other language and save them in a new properties file with a name that ends with the appropriate ISO-639 language code.
It is a good idea to keep your resources inside the JavaSource folder, where you keep your .java files. Every time you build the project, all .properties files will then be copied to the classes folder by default.
Right click JavaSource folder and select New > Folder
Type game for Folder name and click Finish
Your resource file and java bean will be stored in this folder.
Right click on game folder and select New > Properties File
Type messages as the value for "name" attribute and click Finish
JBoss Developer Studio will automatically open messages.properties file for editing.
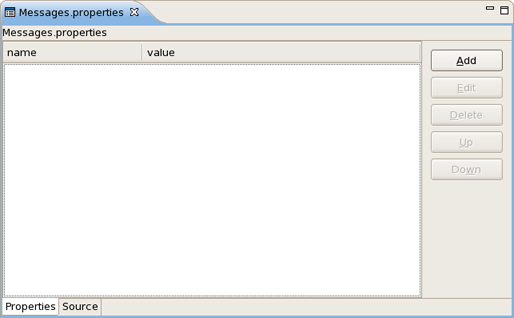
Click Add button for adding new attribute to your resource file
Type how_to_play for "name" and Please pick a number between 0 and 100. for value
Click Finish
In such a way add the next properties:
makeguess_button=Make Guess

trayagain_button=Play Again?

success_text=How cool.. You have guessed the number, {0} is correct!

tryagain_smaller=Oops..incorrect guess. Please try a smaller number.

tryagain_bigger=Oops..incorrect guess. Please try a bigger number.
Click File > Save from the menu bar
Your .properties file should now look like follows:
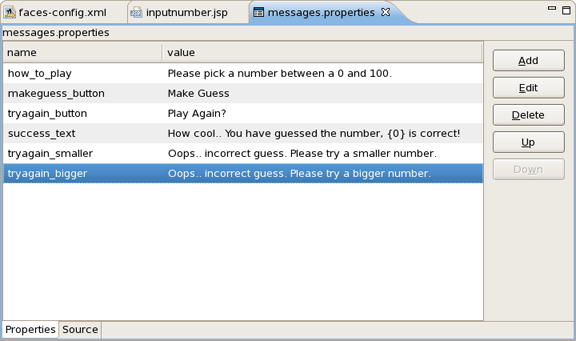
Up and Down buttons allow you to move you attribute on the list. For delete the attribute, choose it and press Delete button.
If you want to change a value or a name of your attribute, click on it and than on Edit button.
In this section you'll see how to create a Java bean that will hold business logic of our application.
Right click game folder
Select New > Class
Type NumberBean for bean name
A java bean is created.
Declare the variable of your entered number:
Integer userNumber;
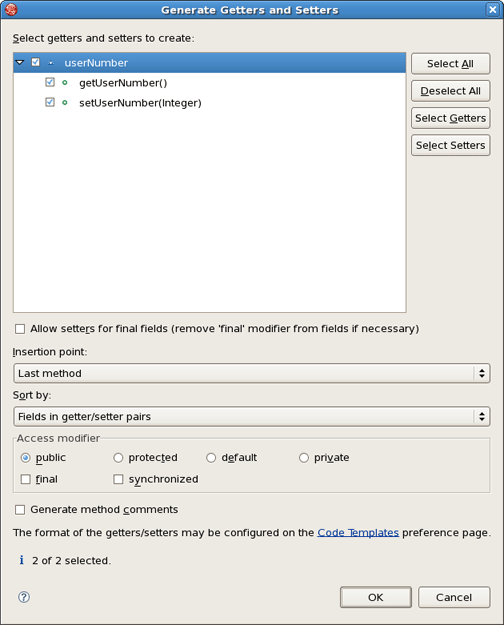
JBDS allows to quickly generate getters and setters for java bean.
Right click NumberBean.java in Package Explorer
Select Source > Generate Getters and Setters...
Check userNumber box and click OK
Add the declaration of the second variable
int randomNumber;
.. other bean methods:
public NumberBean ()

{

    randomNumber = (int)(Math.random()*100);

    System.out.println ( "Random number: "+randomNumber);

  }

  public String playagain ()

  {

    FacesContext context = FacesContext.getCurrentInstance();

    HttpSession session =

        (HttpSession) context.getExternalContext().getSession(false);

    session.invalidate();

    return "playagain";

  }

  public String checkGuess ()

  {


    // if guessed, return 'success' for navigation

    if ( userNumber.intValue() == randomNumber )

    {

      return "success";

    }

else

   {

      FacesContext context = FacesContext.getCurrentInstance();

      ResourceBundle bundle = ResourceBundle.getBundle("game.messages",

      context.getViewRoot().getLocale());

      String msg = "";

      // if number bigger, get appropriate message

      if ( userNumber.intValue() > randomNumber )

         msg = bundle.getString("tryagain_smaller");

      else // if number smaller, get appropriate message

         msg = bundle.getString("tryagain_bigger");

      // add message to be displayed on the page via <h:messages> tag

      context.addMessage (null, new FacesMessage(msg));

      // return 'tryagain' for navigation

      return "tryagain";

    }

  }
And the import declarations:
import javax.faces.context.FacesContext;

import javax.servlet.http.HttpSession;

import javax.faces.application.FacesMessage;

import java.util.Locale;

import java.util.ResourceBundle;
The whole java bean should look as follows:
import javax.faces.context.FacesContext;

import javax.servlet.http.HttpSession;

import javax.faces.application.FacesMessage;

import java.util.Locale;

import java.util.ResourceBundle;


public class NumberBean

{

  Integer userNumber;

  int randomNumber; // random number generated by application

public Integer getUserNumber ()

  {

    return userNumber;

  }

  public void setUserNumber (Integer value)

  {

     this.userNumber = value;

  }


  // constructor, generates random number

  public NumberBean ()

  {

    randomNumber = (int)(Math.random()*100);

    System.out.println (

   "Random number: " + randomNumber);

  }


  public String playagain ()

  {

    FacesContext context = FacesContext.getCurrentInstance();

    HttpSession session =

        (HttpSession) context.getExternalContext().getSession(false);

    session.invalidate();

    return "playagain";

  }


  // check if user guessed the number

  public String checkGuess ()

  {

    // if guessed, return 'success' for navigation

    if ( userNumber.intValue() == randomNumber )

    {

      return "success";

    }

    // incorrect guess

    else

   {

      // get a reference to properties file to retrieve messages

      FacesContext context = FacesContext.getCurrentInstance();

      ResourceBundle bundle =

          ResourceBundle.getBundle("game.messages",

          context.getViewRoot().getLocale());

      String msg = "";

      // if number is bigger, get appropriate message

      if ( userNumber.intValue() > randomNumber )

         msg = bundle.getString("tryagain_smaller");

      else // if number smaller, get appropriate message

         msg = bundle.getString("tryagain_bigger");


      // add message to be displayed on the page via <h:messages> tag

      context.addMessage (null, new FacesMessage(msg));

      // return 'tryagain' for navigation

      return "tryagain";

    }

  }

}
In this section you know about faces-config.xml file.
This file holds two navigation rules and defines the backing bean used.
Open faces-config.xml file in a source mode
Add here one more navigation rule and a managed bean declarations that the content of the file looks like this:
<?xml version="1.0" encoding="UTF-8"?>

<faces-config version="1.2" xmlns="http://java.sun.com/xml/ns/javaee

xmlns:xi="http://www.w3.org/2001/XInclude"

xmlns:xsi="http://www.w3.org/2001/XMLSchema-instance"

xsi:schemaLocation="http://java.sun.com/xml/ns/javaee

        http://java.sun.com/xml/ns/javaee/web-facesconfig_1_2_.xsd">


  <navigation-rule>

    <from-view-id>*</from-view-id>

    <navigation-case>

      <from-outcome>playagain</from-outcome>

      <to-view-id>/pages/inputnumber.jsp</to-view-id>

    </navigation-case>

  </navigation-rule>


  <navigation-rule>

    <from-view-id>/pages/inputnumber.jsp</from-view-id>

    <navigation-case>

      <from-outcome>success</from-outcome>

      <to-view-id>/pages/success.jsp</to-view-id>

    </navigation-case>

  </navigation-rule>


  <managed-bean>

    <managed-bean-name>NumberBean</managed-bean-name>

    <managed-bean-class>game.NumberBean</managed-bean-class>

    <managed-bean-scope>session</managed-bean-scope>

  </managed-bean>


</faces-config>
The first navigation rule states that from any page (* stands for any page) an outcome of playagain will take you to /pages/inputnumber.jsp . Outcome values are returned from backing bean methods in this example. The second navigation rule states that if you are at the page /pages/inputnumber.jsp , and the outcome is success, then navigate to the /pages/success.jsp page.
Now, we will continue editing the JSP files for our two "views" using Visual Page Editor.
First, let's dwell on how to edit inputnumber.jsp.
On this page we will have an output text component displaying a message, a text field for user's number entering and a button for input submission.
Open inputnumber.jsp by double-clicking on the /pages/inputnumber. jsp icon
The Visual Page Editor will open in a screen split between source code along the top and a WYSIWIG view along the bottom. You can see that some JSF code will be already generated as we choose a template when creating the page.
At the beginning it's necessary to create a <h:form> component where all others components are put.
Place the mouse cursor inside <f:view> </f:view>
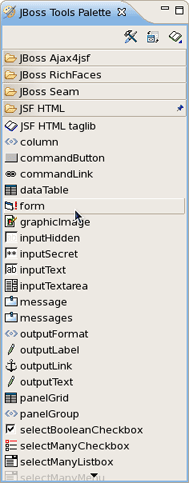
Go to JBoss Tools Palette and expand JSF HTML folder by selecting it
Click on <h:form> tag
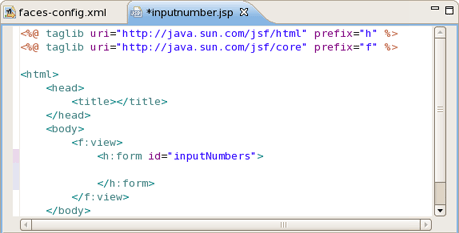
In the dialog Insert Tag select id and click on this line below the value header. A blinking cursor will appear in a input text field inviting to enter a value of id
Type inputNumbers and click Finish

In source view you can see the declaration of a form.
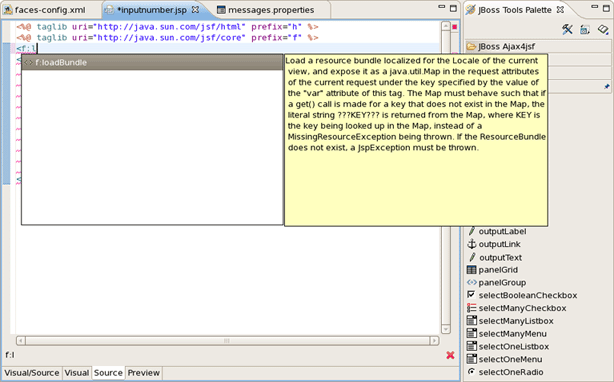
First let's declare the properties file in inputnumber.jsp page using the loadBundle JSF tag.
Put this declaration on the top of a page, right after the first two lines:
<f:loadBundle basename="game.messages" var="msg"/>
As always JBDS provides code assist:
Switch to Visual tab, so it could be possible to work with the editor completely in its WYSIWYG mode
Click on outputText, drag the cursor over to the editor, and drop it inside the blue box in the editor
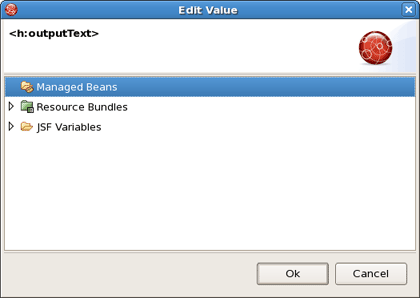
Select value and click on this line below "value" header
Click ... button next to the value field
JBDS will nicely propose you to choose within available values:
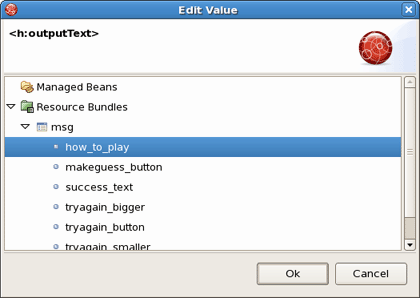
Expand Resource Bundles > msg
Select how_to_play value and click Ok. Then click Finish
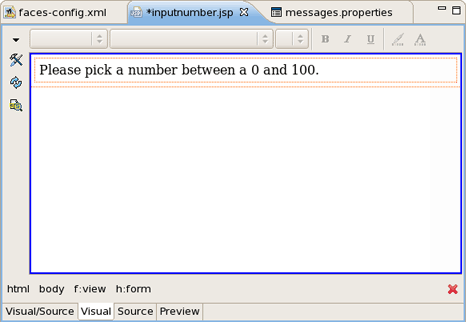
The text will appear on the page:
Switch to Source mode and insert <br/> tag after <h:outputText> component to make a new line.
Click Save button.
On the Palette click on inputText, drag the cursor over to the editor, and drop it inside the editor after the text.
Switch to a Source mode and insert <br/> tag after <h:outputText> component to make a new line
Click Save button
On the Palette click on inputText, drag the cursor over to the editor, and drop it inside the editor after the text
Select value and click on this line below "value" header
Click ... button next to the value field
Expand Managed Beans > NumberBean
Select userNumber value and click Ok
Switch Advanced tab
Select id and click on this line below "value" header
Type userNumber in text field
Select required and click on this line below "value" header
Click ... button next to the value field
Expand Enumeration and select true as a value
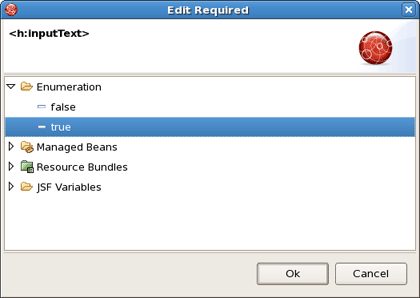
Click Ok, then click Finish
Go to Source mode
Add the validation attribute to <f:validateLongRange> for user input validation
<h:inputText id="userNumber" value="#{NumberBean.userNumber}" required="true">

           <f:validateLongRange minimum="0" maximum="100"/>

</h:inputText>
Click Save button
Again select Visual mode
On the Palette, click on commandButton, drag the cursor over to the editor, and drop it inside the editor after the inputText component.
In the editing dialog select value and click on this line below "value" header
Click ... button next to the value field
Expand Resource Bundles > msg and select makeguess_button as a value
Click Ok
Select action and click on this line below "value" header
Type NumberBean.checkGuess in text field
Click Finish
In Source mode add <br/> tags between <outputText> , <inputText> and <commandButton> components to place them on different lines
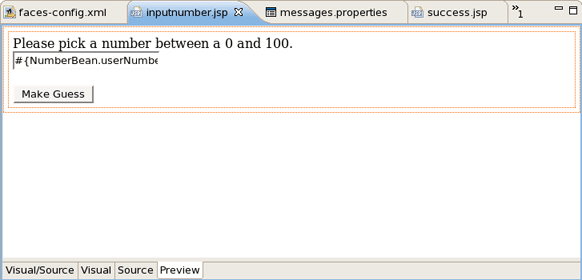
inputnumber.jsp page should look like this:
<%@ taglib uri="http://java.sun.com/jsf/html" prefix="h" %>

<%@ taglib uri="http://java.sun.com/jsf/core" prefix="f" %>

<f:loadBundle basename="game.messages" var="msg"/>


<html>

 <f:view>

     <h:form id="inputNumbers">

      <h:outputText value="#{msg.how_to_play}"/>

      <br/>

      <h:messages style="color: blue"/>

      <br/>

      <h:inputText id="userNumber" value="#{NumberBean.userNumber}" required="true">

           <f:validateLongRange minimum="0" maximum="100"/>

      </h:inputText>

     <br/><br/>

     <h:commandButton value=

             "#{msg.makeguess_button}" action="#{NumberBean.checkGuess}"/>

   </h:form>

 </f:view>

</html>
In the same way like inputnumber.jsp, edit success.jsp page. Its whole source should be the next:
<%@ taglib uri="http://java.sun.com/jsf/html" prefix="h" %>

<%@ taglib uri="http://java.sun.com/jsf/core" prefix="f" %>

<f:loadBundle basename="game.messages" var="msg"/>


<html>

 <f:view>

   <h:form id="result">

     <h:outputFormat value="#{msg.success_text}">

       <f:param value="#{NumberBean.userNumber}"/>

     </h:outputFormat>

     <br/><br/>

     <h:commandButton value=

             "#{msg.trayagain_button}" action="#{NumberBean.playagain}"/>

   </h:form>

 </f:view>

</html>
Again you can use code assist provided by JBDS when editing jsp page:

This page, success.jsp, is shown if you correctly guessed the number. The <h:outputFormat> tag will get the value of success_text from the properties file. The {0} in success_text will be substituted for by the value of the value attribute within the <f:param> tag during runtime.
At the end, you have a button which allows you to replay the game. The action value references a backing bean method. In this case, the method only terminates the current session so that when you are shown the first page, the input text box is clear and a new random number is generated.
Switch to Preview mode to see how this page will look in a browser:
Now you know how to create index.jsp page.
The index.jsp page is the entry point of our application. It's just forwarding to inputnumber.jsp page.
Right click WebContent > New > JSP File
Type index for name field and choose JSPRedirect as a template
Click Finish
The source for this page should be like the following:
<!doctype html public "-//w3c//dtd html 4.0 transitional//en">

<html>

 <body>

  <jsp:forward page="/pages/inputnumber.jsf" />

 </body>

</html>
Note the .jsf extension of a page. It means that we trigger the JSF controller servlet to handle the page according the servlet mapping in the faces-config.xml file.
Finally, we have all the pieces needed to run the application.
Start up JBoss server by clicking on the Start icon in JBoss Server view. (If JBoss is already running, stop it by clicking on the red icon and then start it again. After the messages in the Console tabbed view stop scrolling, JBoss is available)
Right-click on project Run AS > Run on Server
Play with the application by entering correct as well as incorrect values
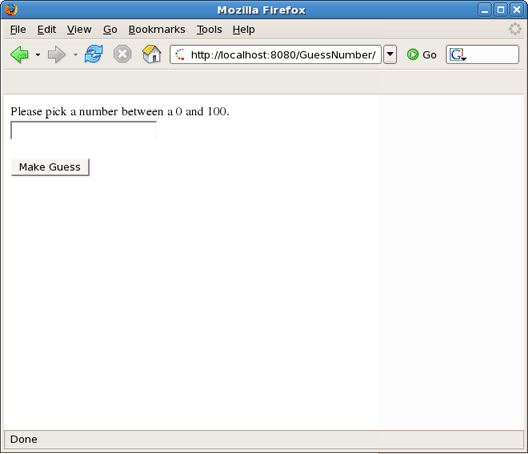
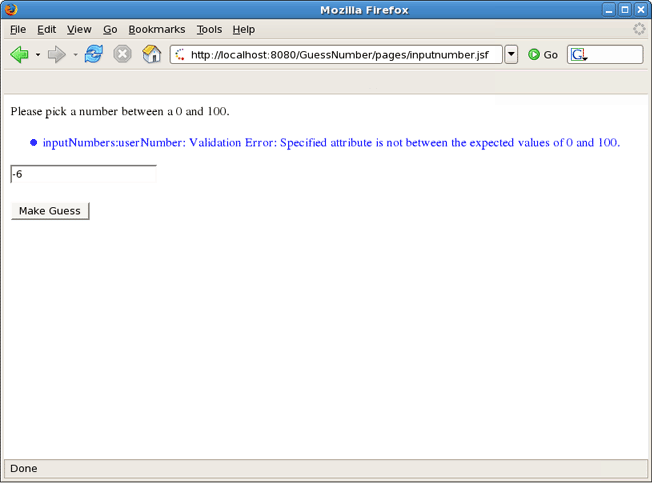
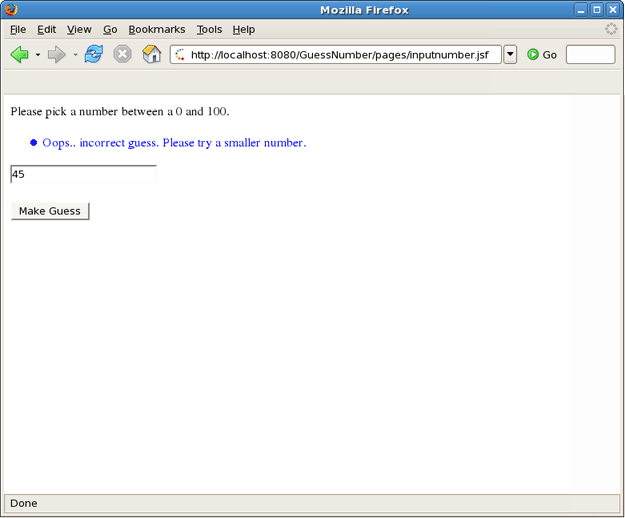
Figure 5.22. After You Enter a Guess, the Application Tells You Whether a Smaller or a Larger Number Should be Tried