The JBoss BIRT Integration feature includes the Hibernate ODA Data Source completely integrated with Hibernate Tools. You can use it in the way you use any of BIRT ODA drivers. Let's perform simple actions that demonstrate it.
First, run the Seam Generate Entities action (You can access it from File > New > Seam Generate Entities in the Seam perspective. More details on the Seam Generate Entities read in our Seam Dev Tools Reference guide). This action will create a Hibernate Console configuration.
Tip:
Before performing Seam Generate Entities, you should have a connection profile adjusted and connected to a database. How to do this see in the CRUD Database Application chapter of the Seam Dev Tools Reference guide.
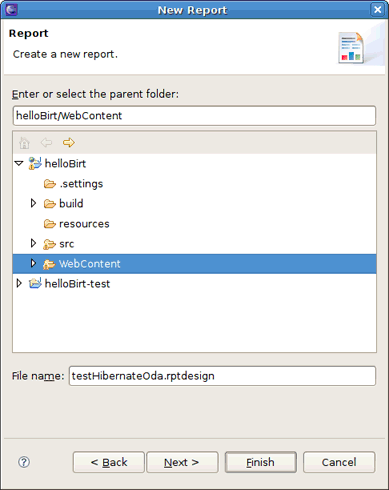
Next add a new BIRT report. To do that navigate to File > New > Other > Business Intelligence and Reporting Tools > Report. In the New Report wizard enter the report name, for instance testHibernateOda.rptdesign, then click Finish.
Now switch to the Report Design perspective.
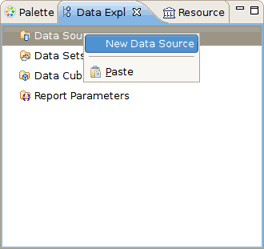
In the Data Explorer View right-click the Data Source node and choose New Data Source.
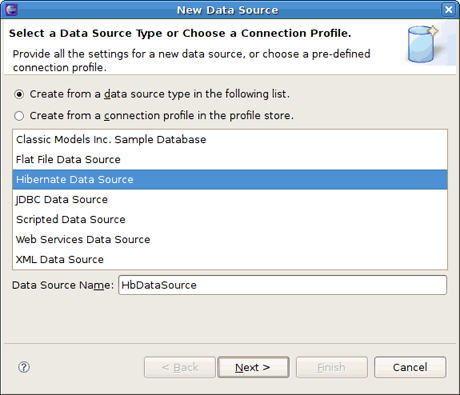
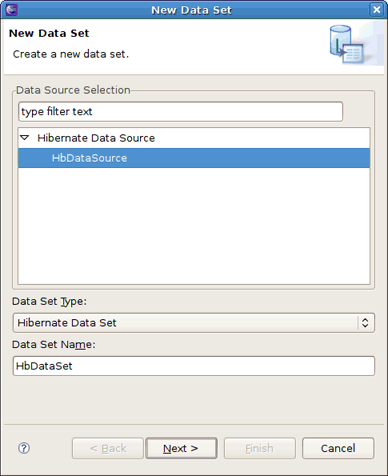
In the wizard select Hibernate Data Source and give it a proper name, HbDataSource for instance. Hit Next.
On the next wizard page leave everything as it is, just press the Test Connection button to verify the connection is successful.

Click Ok and then Finish to complete.
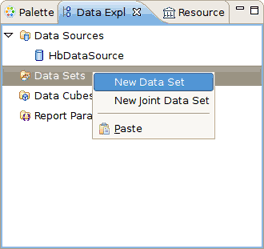
Now let's add a Hibernate ODA dataset. To do that you should bring up the New Data Set wizard. In the Data Explorer View right-click the Data Set node and select New Data Set.
In the Data Set Name section specify the name. Let's it be HbDataSet.
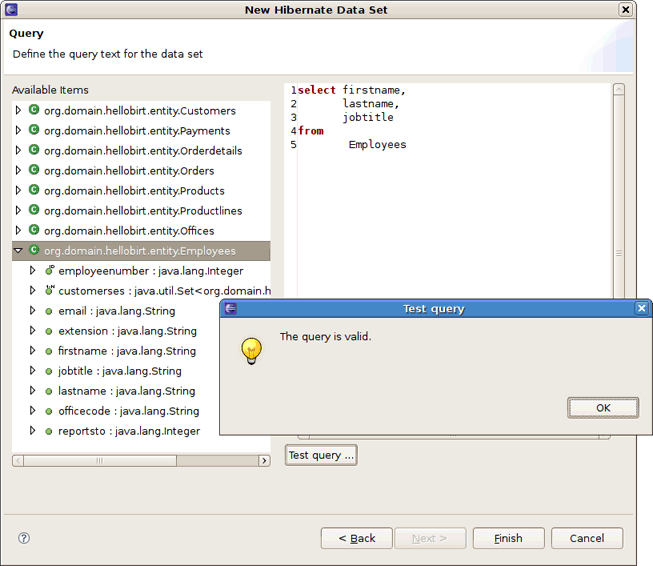
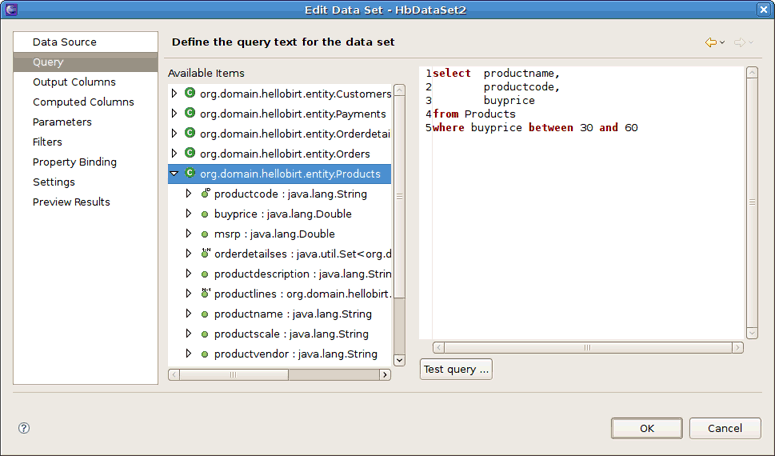
Next you'll be prompted to define the query for this data set. To validate the entered query you can press the Test query button. All the HQL features like syntax highlighting, content assist, formatting, Drag and Drop, etc., are available to you here.
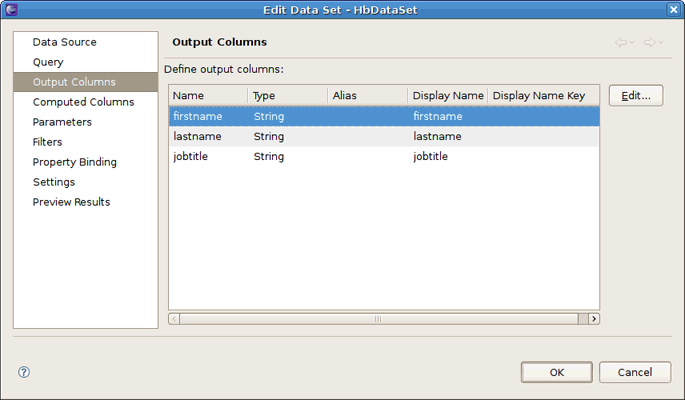
Next the output columns will be displayed. It's possible to edit them here.
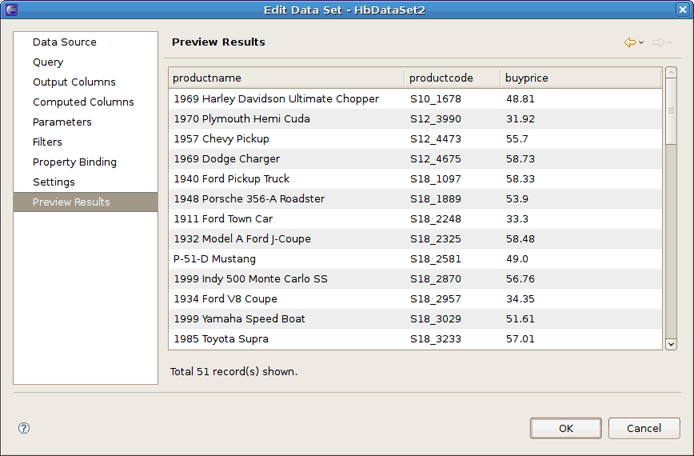
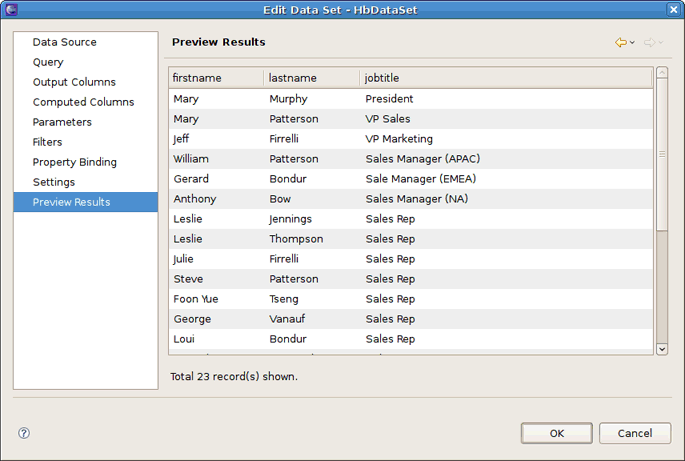
To preview the results of the defined query click the Preview Results item.
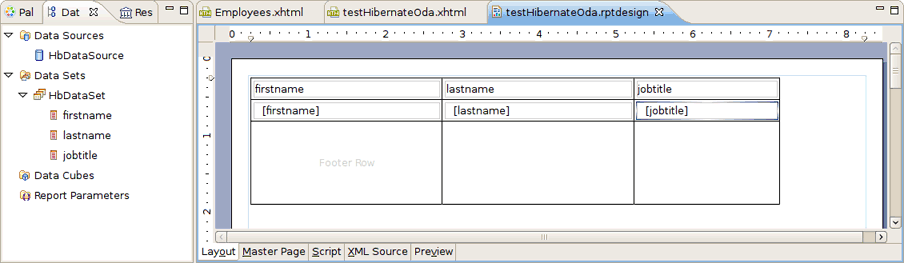
So far you have the Hibernate data source and data set defined. Now you can create a BIRT report using this data source and data set.
Tip:
If you don't know how to do this we suggest that you refer to the Eclipse BIRT Tutorial.
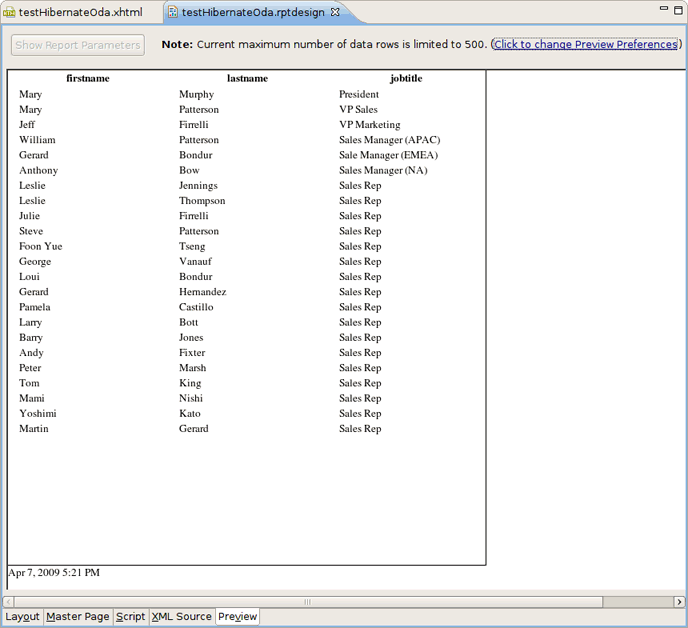
If you switch to the Preview tab, it will run your report and show the output.
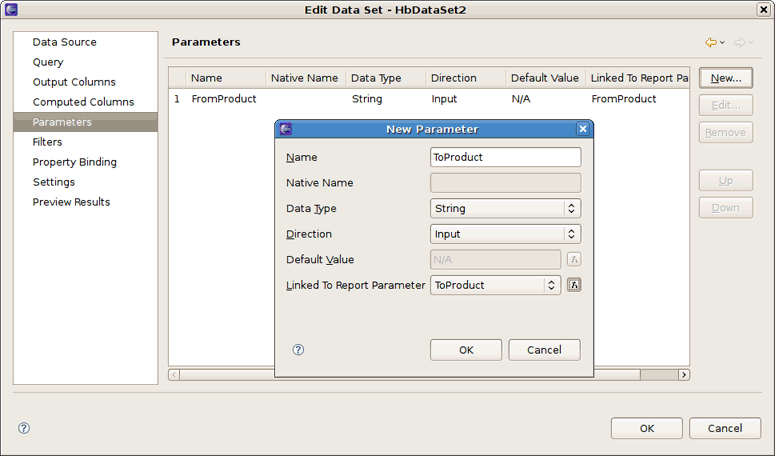
You can also use parameters within the Hibernate ODA driver.
Again, to preview the results switch to the Preview Results item.