Since v.1.0.1 Developer Studio supports xml editor for the ESB XML file used in JBoss ESB.
At this point the structured xml editor will prompt you to specify a proper ESB environment.
In this section we will focus more on all concepts that JBDS integrates for working with ESB.
This chapter will provide you with detailed information on how to install JBoss ESB.
To install the JBoss ESB plugins for Eclipse, you need the following:
Get Eclipse 3.3.1 and Web Tools 2.0.1
The quickest way to get a WTP version is to download "Eclipse IDE for Java EE Developers" via www.eclipse.org.
Note:
Remember to choose the download that matches your OS and use Java 5 when you run it.
Get the JBoss ESB build
You can also find the latest development release of JBoss ESB from JBoss ESB Downloads Site
Finally, install the build
Unzip the file(s) directly into your Eclipse plugins/features directory and it will be readily available. It might be necessary to start Eclipse with eclipse -clean to make sure it starts clean and rereads the new list of plugins.
In this chapter we suggest a step-by-step walk-through of creating your own simple file. Let's try to organize a new ESB file.
We will show you how to use the Creation wizard for creating a new ESB file.
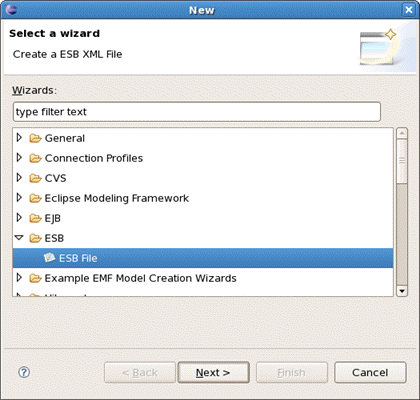
At first you should open any project. Select File >New > Other... in the main menu bar or context menu for selected project and then ESB > ESB File in the New dialog:
Clicking Next brings us to the wizard page where it's necessary to specify the folder, name and version for the file. We choose, for example, jboss-esb.xml as the name and accept the selected projects folder and default version.
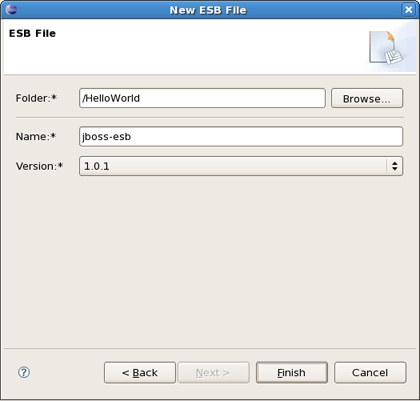
Thus, our file will be created in the selected projects folder by default. If you want to change the folder for your future file click Browse... button to set needed folder or simply type it.
Clicking on Finish results in the file being generated. The wizard creates one xml file.