This chapter shows how to create a Dynamic Web Project, add a Java Portlet to it and deploy it to the JBoss Portal.
Follow the next procedure to create a Web project with JBoss Portlet capabilities pointed to the JBoss Portal runtime.
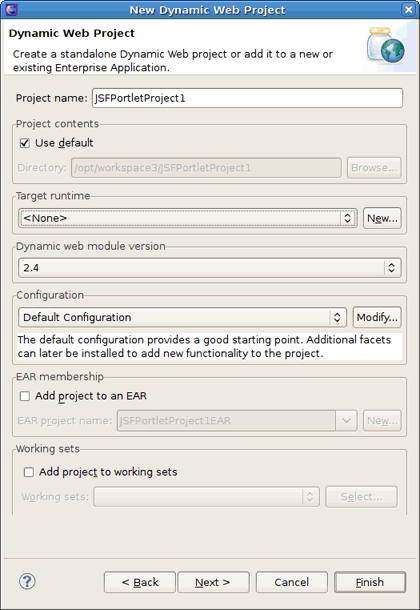
Select → → if you are in the Web perspective or select → → → → in any other perspective. This will display the New Dynamic Web Project wizard.
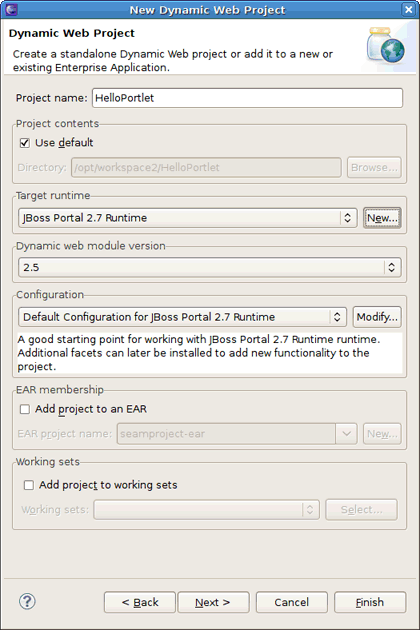
Specify the name of the project.
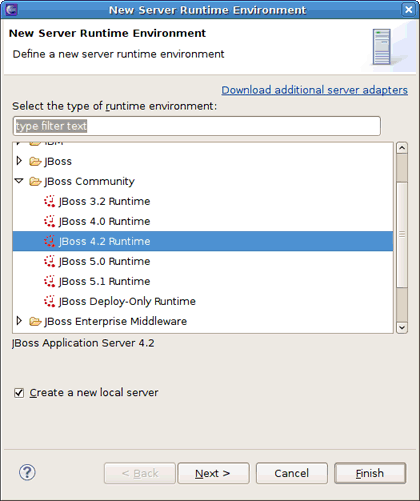
Click the in the Target Runtime area to create a JBoss Portal runtime. Choose JBoss Community > JBoss 4.2 Runtime and select the Create a new local server check box below. Click the button.
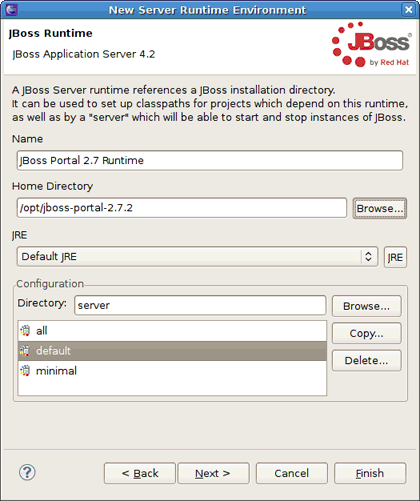
The New Server Runtime Environment wizard appears. In the Name field, type JBoss Portal 2.7 Runtime, and then use the button to point to the location of JBoss Portal + JBoss AS extracted. Click button to proceed.
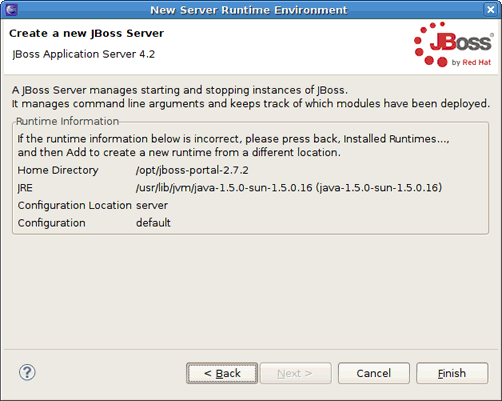
At this point a new JBoss Server instance will be created. On the next page you can verify the runtime information and configuration. If something is incorrect, press the button to return to the previous wizard page. Click the button.
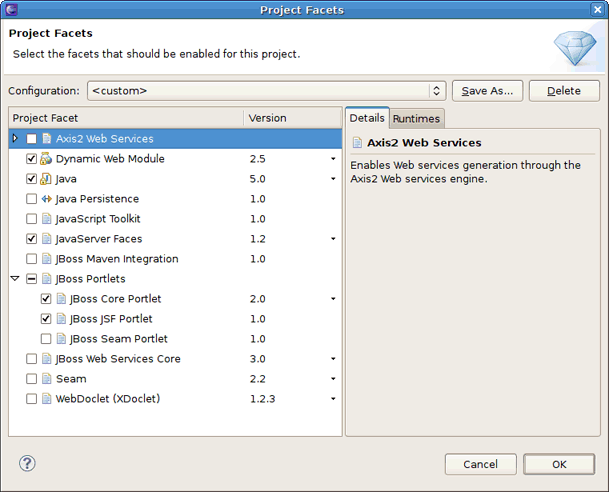
Click the button in the Configuration area to enable a portlet facet for the project.
In the Project Facets dialog, check JBoss Core Portlet and click the button.
Note:
If the portlet libraries aren't available in the runtime you targeted, JBoss Portlets facets will be hidden on this page.
To make them always visible no matter what the runtime is set, you should enable the appropriate option in Section 3.3, “JBoss Portlet Preferences”.
The Java and Web Module pages are for configuring Java and Web modules in the project. Here the default values are fine, so leave everything as it is.
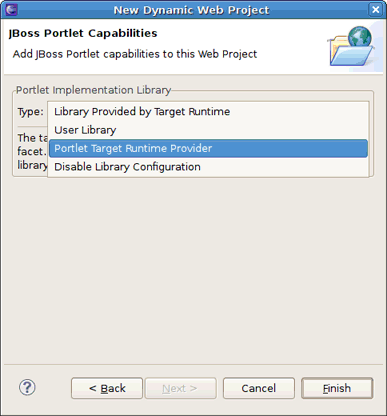
The last wizard page will ask you to add JBoss Portlet capabilities to the project. Select Portlet Target Runtime Provider and click the button to complete the project creation.
Note:
All types available under Portlet Implementation Library are fully described in the Wiki article at: http://www.jboss.org/community/wiki/PortletFacetLibraries.


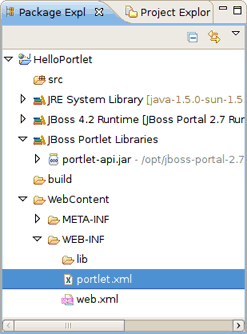
As the result, JBoss Portlet Tools adds
JBoss Core Portlet
facet to the project,
creates an empty portlet.xml file and adds the JBoss Portlet library to the project classpath.
At the previous section you have created a web project with JBoss Portlet capabilities. The next steps will show you how to add a new Java portlet to the project.
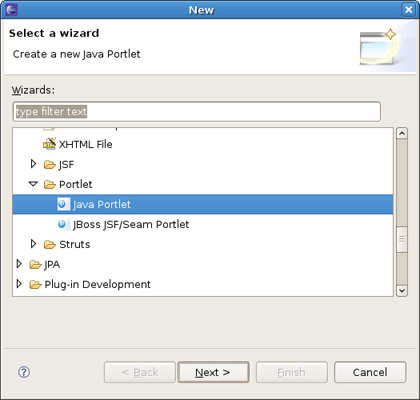
Right-click the project and select → → → → .
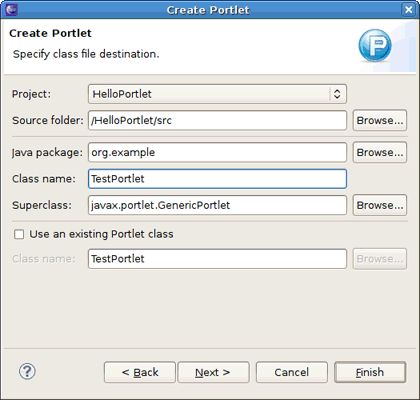
The Create Portlet wizard starts (for information about the wizard options, see Section 3.2.1, “Java Portlet Wizard” in the guide reference). The wizard fills in the Project and Source Folder fields for you. You should specify a Java package and a class name (for instance, org.example and TestPortlet). Then click the button.
You may leave the next three pages with default values, on the last one click the button.
Once a Java portlet is created, new resources are added to the project structure: a Java portlet class (TestPortlet.java), default-object.xml and portlet-instances.xml files and the portlet.xml descriptor is updated as well.
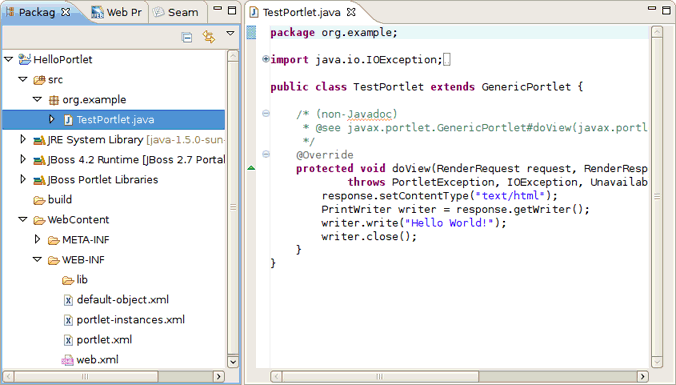
Now the project is ready to be built and deployed.
You can deploy a portlet project in the way you deploy any other web application.
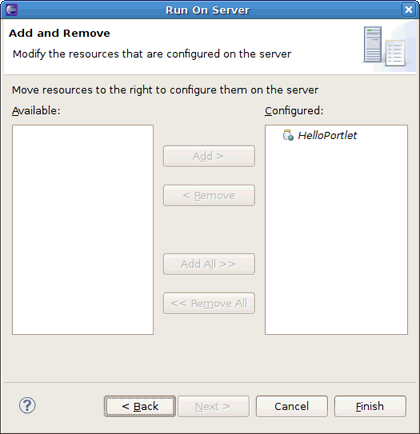
Right-click the project and select → . The Run On Server wizard starts.
Select JBoss Portal 2.7 Server created before and click the button.
On the Add and Remove page move the created project to the right and click Finish.
It will deploy the portlet application and start JBoss AS.
Use the http://localhost:8080/portal/portal/default/default URL to see your portlet in the browser.


This chapter will explain how you can configure a JSF portlet within a JSF project with JBoss Portlet capabilities and then deploy it to JBoss Portal.
You can create a JSF project with JBoss Portlet capabilities in two ways:
Create a dynamic Web project with the JavaServer Faces and JBoss JSF Portlet facets enabled (see Section 2.2.1.1, “Creating a Dynamic Web Project with the JBoss Portlet Capabilities”)
Or create a JSF project using the wizard provided by JBoss JSF Tools, then enable JSF and JBoss Portlet facets and add JBoss Portlet capabilities (see Section 2.2.1.2, “Creating a JSF Project and adding the JBoss Portlet Capabilities”)
Refer to the further sections for the procedures on how to do this.
The basic steps to create a dynamic Web project with the JBoss Portlet capabilities are as follows:
Start the Dynamic Web Project wizard navigating to → → → → .
Tip:
You can also select the Java EE perspective and then selecting → → .
Specify the project name and set the target runtime to JBoss Portal by following the points 3, 4 and 5 in the Section 2.1.1, “Creating a Web Project with JBoss Portlet Capabilities” procedure.
In the Configurationarea, click the button and enable JavaServer Faces,JBoss Core Portlet and JBoss JSF Portlet facets. Click the button.
You may leave the next two wizard pages with their defaults, just press the button to proceed.
On the JBoss Portlet Capabilities page, select Portlet Target Runtime Provider and click the button.
Tip:
All types of the portlet implementation library are described more closely in the wiki article at: http://www.jboss.org/community/wiki/PortletFacetLibraries.
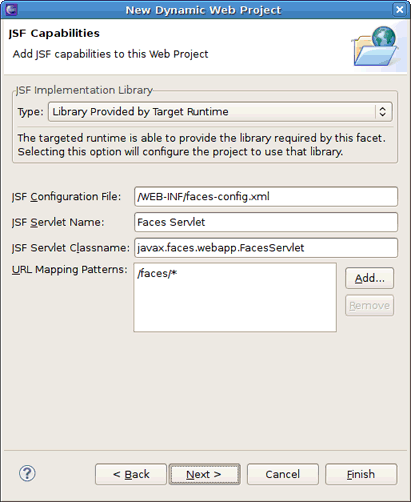
Next wizard page is for configuring JSF capabilities. You can leave everything as it is here.
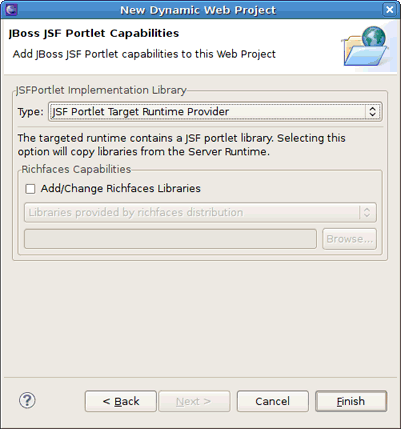
On the JBoss JSF Portlet Capabilities page, select JSF Portlet Target Runtime Provider as the JSF portlet implementation library. It will copy Portlet Bridge libraries from the server runtime to the project classpath.
Tip:
On this page, it is also possible to add the RichFaces libraries from the RichFaces distribution by checkingAdd/Change Richfaces Libraries.
Note:
You can select the JSF Portletbridge Runtime Provider type. Then it is necessary to set the home of the Portlet Bridge distribution.
For information about all the JSF Portlet facet library providers, refer to the wiki article at: http://community.jboss.org/wiki/PortletFacetLibraries.
Click the button. The project will be created in the workbench.

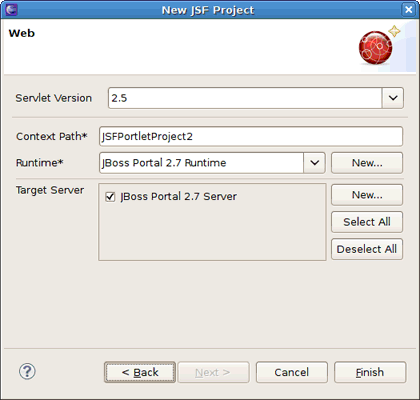
For information on how to organize a JSF project you can read the JSF Tools User Guide. Just remember to point the target runtime to JBoss Portal directory location (see how it is done for a dynamic Web project with steps 3, 4 and 5 in the Section 2.1.1, “Creating a Web Project with JBoss Portlet Capabilities” procedure).
To add the JBoss Portlet capabilities to the JSF project you should complete the next steps:
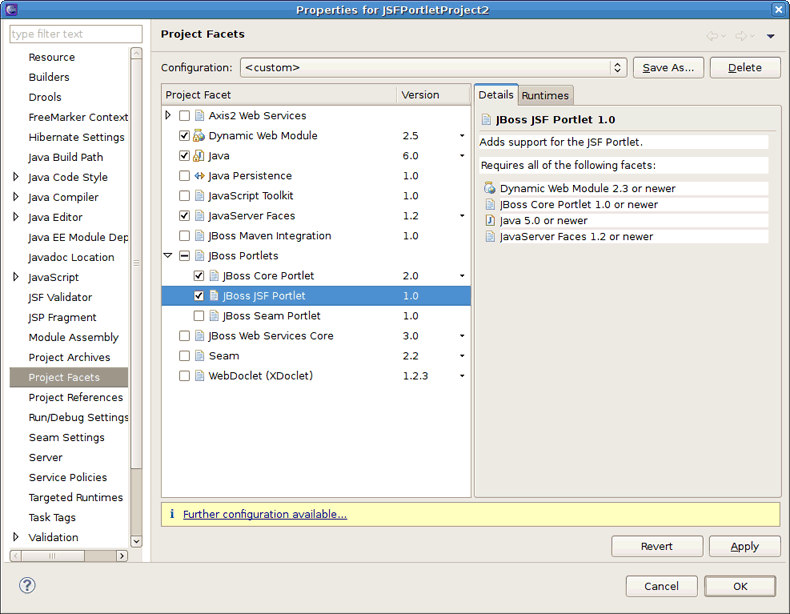
Right-click the project and click to open the project Properties sheet. Select Project Facets on the left and enable the JavaServer Faces, JBoss Core Portlet and JBoss JSF Portlet facets.
Notice that the "Further configuration available..." warning appears at the bottom of the screen. It means that next you should configure the JSF Portlet capabilities in the project. Click the link. The Modify Faceted Project wizard appears.
Complete all wizard pages the same way as described in the steps 5, 6, 7 of the Section 2.1.1, “Creating a Web Project with JBoss Portlet Capabilities” procedure. Click the button.
To apply the changes click the button and then the button to close the project Properties sheet.
The previous section demonstrated how to create a JSF project with JBoss Portlet and JSF Portlet capabilities enabled. Use the following procedure to add a JSF portlet to the created project and deploy it to JBoss Portal.
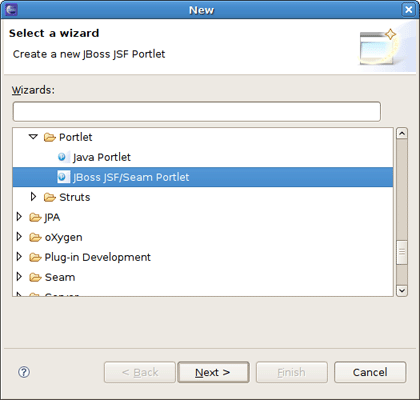
Display the Create Portlet wizard by selecting → → → → from the context menu of the project (for information about the wizard options, see Section 3.2.2, “JSF/Seam Portlet Wizard” in the guide reference).
Tip:
As you see, the JSF and Seam Portlet wizards are merged into one. We have set the JSF configuration for the project, so the default values in this wizard will be set as for a JSF portlet.
Leave all the wizard pages with default values by clicking the button, on the last one click the button to complete the JSF portlet creation.
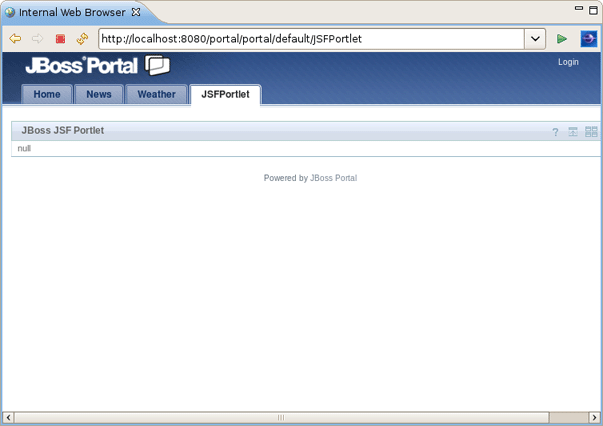
Complete the steps described in the Section 2.1.3, “Deploying a Portlet to JBoss Portal” procedure to deploy a JSF portlet to JBoss Portal. Just use the other URL to see it in the browser: http://localhost:8080/portal/portal/default/JSFPortlet.
This chapter covers the steps required to configure a Seam portlet within a Seam project with the help of the JBoss Portlet Tools features.
One of the following two procedures can be used to create a Seam project with JBoss Portlet capabilities enabled:
Create a dynamic Web project with the Seam and JBoss Portlets facets enabled (see Section 2.3.1.1, “Creating a Dynamic Web Project with Seam and JBoss Portlet Capabilities”)
Create a Seam project with the JBoss Seam portlet configuration using the wizard JBoss Seam Tools provides and follow all the wizard steps to enable JBoss Portlet capabilities (see Section 2.3.1.2, “Creating a Seam Project with JBoss Portlet Capabilities”)
To create a dynamic Web project with Seam and JBoss Portlet capabilities you should complete the following steps:
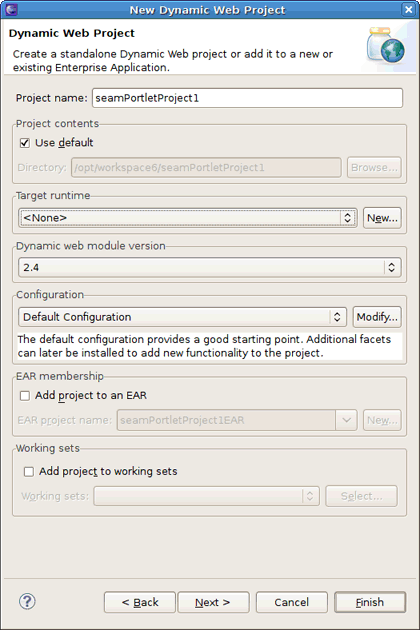
Select. → → → → . The New Dynamic Web Project wizard will then be displayed.
Give the project a name and follow the steps 3, 4, 5 of the Section 2.1.1, “Creating a Web Project with JBoss Portlet Capabilities” procedure to set the target runtime.
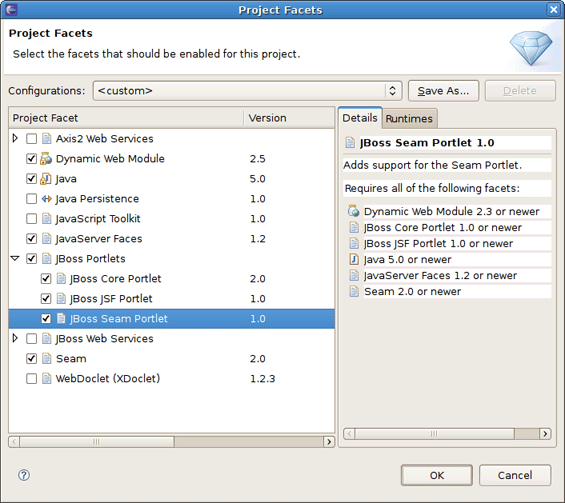
In the Configuration area of the first wizard page, select JBoss Seam Portlet Project v2.0. It will add needed facets to the project.
Tip:
If you now click the button, you should see theJavaServer Faces,Jboss Portlets and Seam facets enabled.
The next two pages are for adjusting the project Java and Web modules. They include the default values, so you can skip them by clicking the button.
On the Jboss Portlet Capabilities page, select Portlet Target Runtime Provider as the portlet implementation library.
Tip:
All types of the portlet implementation library are described more closely in the wiki article at: http://www.jboss.org/community/wiki/PortletFacetLibraries.
The next page is for configuring JSF capabilities. As it contains the default values, just click the button to proceed.
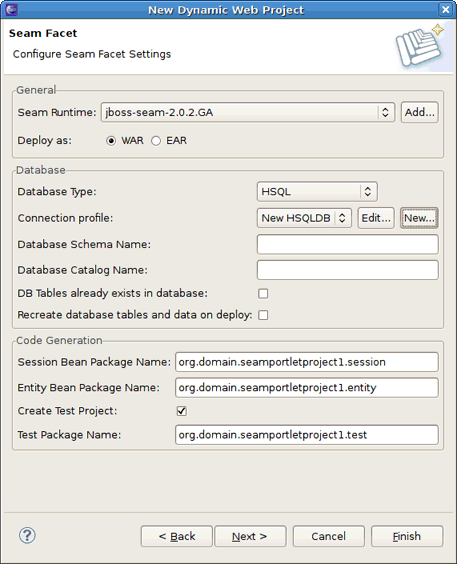
On the Seam Facet page, set a Seam runtime and a connection profile.
Tip:
For details about how to set a Seam runtime and a connection profile, see Configure Seam Facet Settings in the Chapter 2 of the Seam Dev Tools Reference Guide.
On the JBoss JSF Portlet Capabilities page, select the JSF Portlet Target Runtime Provider type of the implementation library.
Tip:
If you have JBoss Portlet Bridge downloaded, alternatively you can select JSF Portletbridge Runtime Provider and then provide a path to the JBoss Portlet Bridge distribution.
It will add JBoss Portlet Bridge libraries to the project classpath.
Click the button to complete the project creation.
The steps to create a Seam project with JBoss Portlet capabilities are as follows:
Select → → → → . The New Seam Project wizard will be displayed.
Next steps are the same as in the Section 2.3.1.1, “Creating a Dynamic Web Project with Seam and JBoss Portlet Capabilities” procedure starting from the step 2.
The previous section has demonstrated how to create a Web project with Seam and JBoss Portlet capabilities. Now you can create a Seam portlet and deploy it to JBoss Portal by following the next procedure:
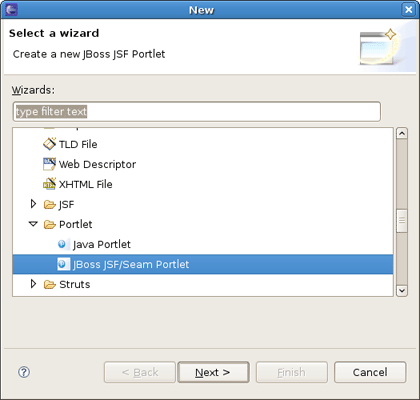
Select → → → → → .
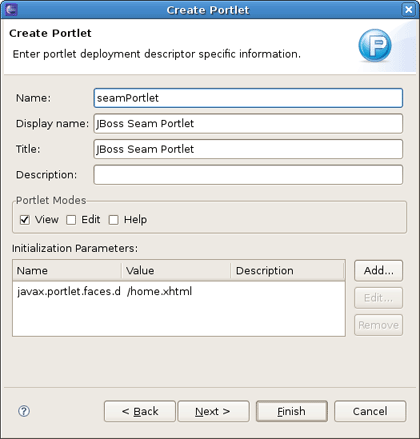
The Create Portlet wizard is displayed (for more information about wizard options, see Section 3.2.2, “JSF/Seam Portlet Wizard” in the guide reference). As the Seam configuration is set for the project, the wizard enters the values for the Seam portlet.
Next two pages are filled out with default values, just click the button to proceed. On the last one click the button to complete the procedure.
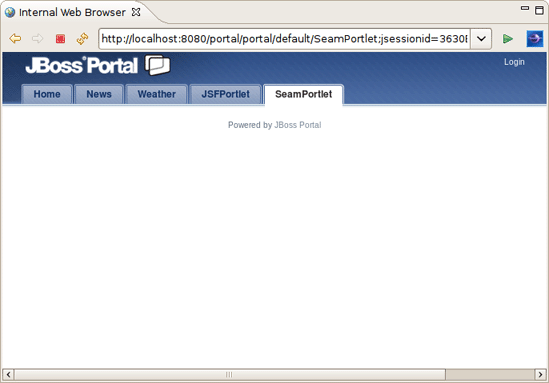
To deploy and run the portlet on JBoss Portal complete the steps described in the Section 2.1.3, “Deploying a Portlet to JBoss Portal” procedure. Just use the following URL to see it in the browser: http://localhost:8080/portal/portal/default/SeamPortlet.