The key value proposition of the lightweight development model is its simplicity. Developers can get applications to market quicker and make fewer bugs. In this chapter, we will use a concrete example to show exactly what it takes to develop a complete database-driven web application using the lightweight frameworks in JBoss.
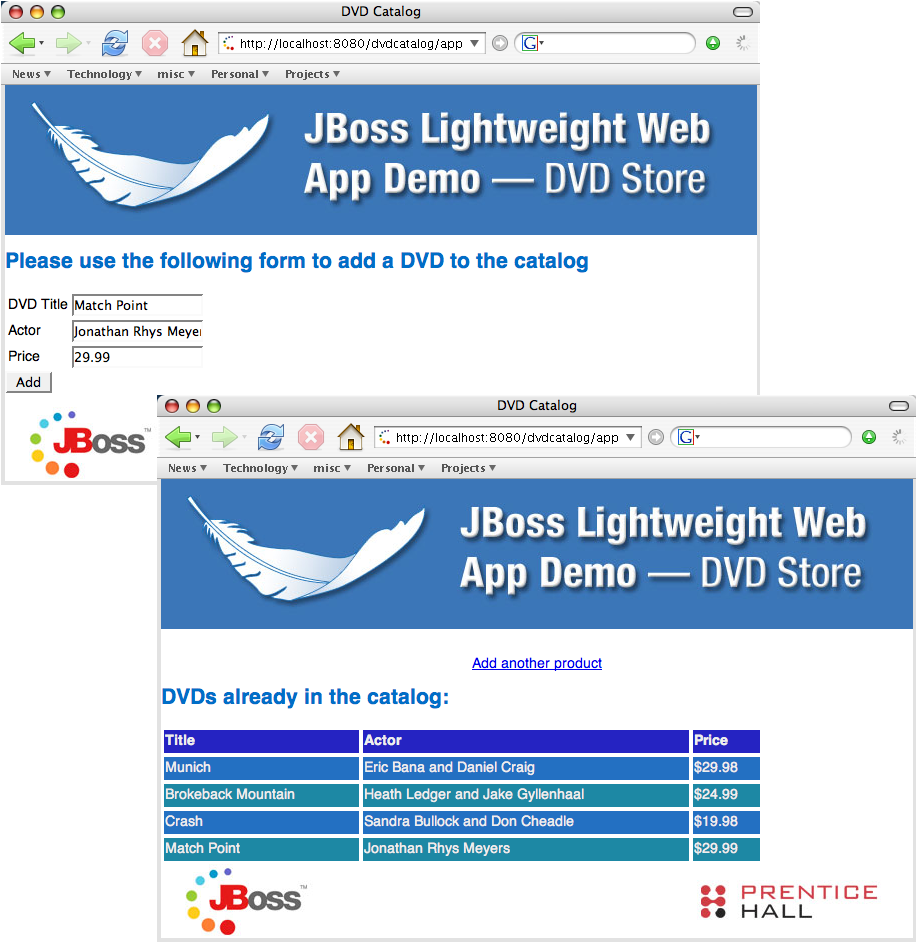
Throughout this book, we will build an online DVD store application from the ground up to illustrate various aspects of lightweight application development. In this chapter, we will build some basic functions of the DVD store --- a DVD catalog --- in the dvdcatalog project in the source code bundle. The web application allows you to enter DVDs from a web form and then save them into a relational database. The application also displays all DVDs currently in the database on a web page so that you know that the DVDs are successfully saved. See Figure 2.1, “The DVD Catalog Application in Action” for the application in action.
To build the application yourself, you first need to download the source code bundle from the book's web site. Next, run the build.bat (Windows) or build.sh (Linux / Unix / Mac OS X) script inside each individual project folder (e.g., the dvdcatalog project folder for this chapter). The build results are the deployable application files in the project's build/jars directory. Use command build deploy and build undeploy to deploy and undeploy the application to / from the JBoss Application Server (AS) instance bundled together with the source code in the jboss directory. Run the jboss_home/bin/run.bat (or run.sh) script to start the bundled JBoss AS 4.0.4 instance. The examples are designed so that they can be deployed side-by-side in a single JBoss AS instance without class or database conflicts. Please see Appendix A, Install and Deploy JBoss AS for more details on how to install and start a JBoss AS instance yourself.
You can use the dvdcatalog project as a template for your own projects. In this chapter, we will cover all the Java code and configuration files you need to fill in the template. Following the guidelines in this chapter, you can have a complete web application up and running within an hour. In Chapter 3, Customization and Agile Deployment, we will discuss how to customize the template itself for your own project names, deployment archive names, database options etc.
What is a property?
In this book, we use the term property in two ways: Most of the time, it refers to a JavaBean-style property on an object or class. For instance, the MyClass.getAbc() method defines the abc property on the MyClass class. Or, the term "property" could also refer to a name=value pair in a configuration file.
The DVD catalog is stored in a relational database, but we'd prefer not to focus on the relational model. Java developers are generally much more effective thinking in terms of Java objects than relational tables, so the first task is to develop an object data model. Then we will map the model to database tables for persistence. The EJB3 entity bean is ideal for such tasks.
The EJB3 entity bean is simply a POJO (plain old Java object) with JavaBean-style properties. The entity bean class is annotated with the @Entity annotation, which tells the EJB3 container that this class needs to be mapped to a relational database table. In the DVD catalog example, we define a Product entity bean class. The bean has three properties (title, actor and price) to model a DVD product. The id property is used by the EJB3 container to uniquely identify the Product bean instance. The id value is automatically generated when the bean is saved to the database.
Example 2.1. The Product entity bean class
@Entity
public class Product
    implements Serializable {

  long id;
  String title;
  String actor;
  float price;

  @Id
  @GeneratedValue
  public long getId() {
    return id;
  }
  public void setId(long id) {
    this.id = id;
  }

  public String getTitle() {
    return title;
  }
  public void setTitle(String title) {
    this.title = title;
  }

  // Getter and setter methods for the
  // actor and price properties ...

}
Project template
All the Java source code files, including the EJB3 entity bean, session bean and JSF backing bean, are located in the src directory of the dvdcatalog project template.
Besides what is shown here, the Product class requires no other annotations, XML configuration files, or framework artifacts. The JBoss container automatically creates a database table schema mapping based on the name of the entity bean class and the property names. For instance, the Product entity bean is mapped to the Product table with id, title, actor, and price columns. The id column, which was marked as the id field, is the primary key of the table. JBoss automatically translates all operations on instances of the Product bean to operations on the database table. JBoss could also automatically create the table if it does not exist already (see later). As an example, the following listing shows the schema of the Product database table in the MySQL database.
Example 2.2. SQL Schema for the Product table mapped from the Product bean
CREATE TABLE `PRODUCT` (
  `ID` int(11) NOT NULL auto_increment,
  `TITLE` varchar(50) NOT NULL,
  `ACTOR` varchar(50) NOT NULL,
  `PRICE` decimal(12,2) NOT NULL,
  PRIMARY KEY  (`PRODUCTID`)
);
This is the just the default schema. EJB3 follows the configuration by exception mantra, which means that you should only have to configure a behavior if you want something other than the default. If you do not like the default schema generated by the container, or if you have to map to a legacy schema, you can override the mapping with simple annotations on the entity bean class. You will learn the details of Object-Relational mapping in Chapter 4, Develop a Data Model and Chapter 10, Complex ORM.
Now that we have the data model in place, the next step is to develop the business logic of the application. The DVD catalog application needs to be able to save a new Product object into the database and retrieve all existing Product objects from the database. We use EJB3 session bean POJOs to implement the business logic.
You might be wondering about why we need a layer of session beans at all. If the lightweight model is all about simplifying application development, wouldn't it be easier to implement the business logic directly in the in web component like a Servlet or a JSF backing bean (see later in this chapter for JSF backing beans)? In some cases, that might be true, especially for very simple applications. However, EJB3 session beans are lightweight enough to fit nicely in small web applications, high-end enterprise applications and everywhere in-between. As we discussed in Chapter 1, What is a Lightweight Web Application, session beans provide important features such as dependency injection and container managed transaction.
To implement a session bean, we first determine the interface it exposes. In the DVD catalog application, this is a simple Java interface declaring all business methods.
Example 2.3. The Session Bean Interface
public interface DvdCatalog {
  public void addProduct (Product product);
  public Collection <Product> getAllProducts ();
}
The EJB3 container creates instances of the session bean based on the implementation classes. The application itself never creates session bean instances. It simply asks the container for an instance of the session bean to use, either through dependency injection or, for external components, through a JNDI lookup. The class is tagged with the @Stateless annotation, which tells the container that the bean object does not maintain any client state information between method invocations. The caller component gets a fresh and random DvdCatalogBean instance every time it makes a bean method call.
Example 2.4. Annotated Session Bean Implementation Class
@Stateless
public class DvdCatalogBean implements DvdCatalog {

  // ... ...

}
So far we have learned how to setup a EJB3 session bean component. In the next section, we will learn how to implement the session bean to access the database via entity beans. We will see how other parts of the application (i.e., the JSF backing bean) make use of the session bean later in this chapter.
As we discussed, in an EJB3 application, the data model is implemented in EJB3 entity beans, which are persisted to the database. In order to use the entity beans in the session bean, you need a special utility class called the EntityManager. The EntityManager acts as a generic DAO (Data Access Object) for all entity beans in the JAR. It translates operations on entity beans to SQL statements to the database. The easiest way to obtain an EntityManager is to let the container create one and inject it into the session bean (see "dependency injection" in Chapter 1, What is a Lightweight Web Application). Since the DVD Catalog sample application contains a single persistence context, the code just has to ask for it. The following listing shows how to do just that.
Example 2.5. Inject an EntityManager object into a Session Bean
@Stateless
public class DvdCatalogBean implements DvdCatalog {

  @PersistenceContext
  EntityManager em;

  // ... ...
}
Notice that the em variable is simply a data member in the DvdCatalogBean class. Its value is never explicitly initialized. The container assigns the right EntityManager to the em variable at runtime each time em is used.
The addProduct() and getAllProducts() methods in the DvdCatalogBean class show the EntityManager in action. The EntityManager.persist() method takes a new entity bean POJO and writes it to the database.
Example 2.6. Persist an Entity Bean Instance to Database
@Stateless
public class DvdCatalogBean implements DvdCatalog {

  public void addProduct (Product product) {
    em.persist (product);
  }

  // ... ...
}
The EntityManager.query() method takes a query string to search for entity bean objects in the database (to be more accurate, it retrieves data from the relational database and then assembles those data into entity objects). The syntax of the query string is very similar to SQL. We will cover EJB3 Query Language in more detail in Chapter 4, Develop a Data Model.
Example 2.7. Search and Retrieve Entity Bean Instances from the Database
@Stateless
public class DvdCatalogBean implements DvdCatalog {

  // ... ...

  public Collection <Product> getAllProducts () {
    return (Collection <Product>)
        em.createQuery("from Product p").getResultList();
  }
}
In this simple example, we have so far ignored the transaction services for database operations in session beans. It's not that transactions aren't important. The EJB3 defaults are exactly what we want right now. We will cover database transactions in Chapter 6, Transactions.
In the JBoss lightweight framework, we choose JavaServer Faces (JSF) to handle the web user interface. The benefits of JSF as a standard-based MVC component framework are discussed in Chapter 1, What is a Lightweight Web Application, and we will not repeat them here.
In the dvdcatalog application, there are two web pages produced by two JSP pages. The addProduct.jsp page displays the product entry form, and the catalog.jsp page displays all the DVDs in the database. Both pages are composed with the standard HTML UI components in JSF. The following listing shows the addProduct.jsp page.
Example 2.8. Web Form to Add a DVD -- the addProduct.jsp file
<h2>Add a DVD to the catalog</h2>
<h:form>
  <h:panelGrid columns="2">
    <h:outputText value="DVD Title"/>
    <h:inputText value="#{catalog.product.title}"
                 size="15"/>
    <h:outputText value="Actor"/>
    <h:inputText value="#{catalog.product.actor}"
                 size="15"/>
    <h:outputText value="Price"/>
    <h:inputText value="#{catalog.product.price}"
                 size="15"/>
  </h:panelGrid>

  <h:commandButton action="#{catalog.addProduct}"
                   value="Add" />
</h:form>
Project template
All web pages are located in the web directory of the dvdcatalog project template.
The JSF UI tags in this page are easy to understand, as they closely resemble regular HTML elements. The <h:inputText> element displays an HTML text input field. You might not be familiar with the "#{}" expression language (EL) notation used in the page. So, let's look at the EL notations in more detail here.
The EL notation references JSF managed objects known as JSF backing beans. Those objects are called "backing beans" because they have JavaBean-style properties that you can also reference in the EL notation. Each backing bean requires a literal string name. The #{} notation references backing beans by name. For instance, #{catalog} refers to the backing bean with the JSF name catalog. #{catalog.product}refers to the product property (i.e., a JavaBean-style property) of the catalog bean. In the addProduct.jsp page, the backing beans are referenced in two ways:
Each user input field is mapped to a JSF backing bean property. For instance, when you submit the form, JSF would assign the user entered data in the Actor field to the product.actor property on the backing bean named catalog.
The form's submit button is also mapped to a backing bean method. When the form is submitted, the addProduct() method on the catalog bean would be invoked to handle the user input and decide what to display next.
The catalog.jsp page displays the contents of the productList property of the catalog backing bean in a JSF data table. The JSF <h:dataTable> component can iterate through a list (i.e., the #{product} component is the iteration variable for the #{catalog.productList} list) and display all objects in the list using the specified column format.
Example 2.9. Display DVDs in the Database on a Web Page -- the catalog.jsp file
<h2>DVDs already in the catalog:</h2>
<h:dataTable
    rendered="#{!empty(catalog.productList)}"
    value="#{catalog.productList}"
    var="product"
    ... ...>

  <h:column>
    <f:facet name="header">
      <h:outputText value="Title" />
    </f:facet>
    <h:outputText value="#{product.title}"/>
  </h:column>

  ... Columns for Actor and Price ...

</h:dataTable>
URLs to the JSF pages
To access a web page via JSF, you can simply type in the JSP page's file name with the .faces suffix instead of the .jsp suffix. For instance, the DVD catalog application's main page has the URL http://localhost:8080/dvdcatalog/catalog.faces.
Now, we have the entity beans for the object data model mapped to the relational database tables, session beans for the transactional business logic, and JSF pages for capturing user input and displaying the data. We need something to tie all those components together. As we have suggested in the previous section, this glue component is the JSF backing bean. In this section, we will cover how the backing bean is mapped to an EL name for the web page; how it uses entity beans to capture user input and uses session beans to handle user events; as well as how it manages the page navigation flow.
The CatalogBean is the only JSF backing bean in the DVD catalog application. Again, its source code can be found in the src directory of the dvdcatalog project template. As discussed in the previous section, we want to refer to the CatalogBean backing bean by the name catalog in the JSP page. To do that, we add the following definition in the dd/war/faces-config.xml configuration file in the dvdcatalog project template.
Example 2.10. Backing bean configuration in the faces-config.xml file
<faces-config>

  <managed-bean>
    <description>catalog</description>
    <managed-bean-name>catalog</managed-bean-name>
    <managed-bean-class>
      dvdcatalog.web.CatalogBean
    </managed-bean-class>
    <managed-bean-scope>request</managed-bean-scope>
  </managed-bean>

  ... ...

</faces-config>
In the catalog.jsp page, #{catalog} refers to the backing bean instance, and #{catalog.product} refers to the product property in the backing bean instance. Since the scope of the backing bean is request, a new backing bean will be created each time the user reloads the page. Please see Chapter 5, Make the Application Stateful for more on JSF backing bean scopes. Now, let's examine the CatalogBean in more detail.
The CatalogBean backing bean contains two properties: The product property is in fact a Product entity bean object. It maps to all the input fields in the new DVD entry form. The backing bean's constructor sets the initial value for the product property, which are displayed in the initial data entry page. When the addProduct.jsp form is submitted, JSF automatically sets the fields of the product property to contain the input values from the form. The productList property is a collection of Product objects, retrieved from the database to be displayed in the catalog.jsp page.
Example 2.11. The CatalogBean Backing Bean
public class CatalogBean implements Serializable {

  protected Product product;
  protected Collection <Product> productList;

  ... Getter and Setter methods for the
      product and productList properties ...

  public CatalogBean () {
    // ... ...

    product = new Product ();
    // Initialize the form
    // product.setTitle("A Great Movie");
    // product.setActor("Oscar Winner");
    // product.setPrice(25.0);
  }
}
In the catalog.jsp page, we see that when the form is submitted, the server is supposed to perform action #{catalog.addProduct}. That means the server would invoke the addProduct() method on the CatalogBean backing bean. The CatalogBean.addProduct() method invokes the DvdCatalog session bean's addProduct() method and passes in the product entity bean, which is automatically constructed from the user input. It then uses the session bean to retrieve a complete list of products in the database. The following code listing shows the code for addProduct() method.
Example 2.12. Use the Session Bean to Add a DVD from the Backing Bean
public class CatalogBean
    implements Serializable {

  // ... ...

  public String addProduct() {
    DvdCatalog dvdCatalog = getCatalogBean();
    // Add the product to the database
    dvdCatalog.addProduct(product);
    // Refresh the products list
    setProductList(dvdCatalog.getAllProducts());

    return "afterAddProduct";
  }

  private DvdCatalog getCatalogBean() {
    try {
      InitialContext ctx = new InitialContext();
      return (DvdCatalog)
  ctx.lookup("dvdcatalog/DvdCatalogBean/local");
    } catch (Exception e) {
      // Handle exception ...
    }
  }
}
Now, we use the dreaded JNDI lookup in the getCatalogBean() method to obtain an EJB3 session bean instance in the JSF backing bean. What's up with that? Aren't we supposed to use dependency injection here? Well, this is in fact an integration gap between the current JSF and EJB3. The JBoss Seam framework (see side bar) bridges this gap. But for a pure JSF + EJB3 application here, We have to resort to the old JNDI lookup as a workaround. By default, the JNDI lookup string is composed of the application's name (i.e., the EAR file's base name, see Chapter 3, Customization and Agile Deployment), the session bean class name, and whether the session bean is local or remote. A local session bean runs in the same JVM as the client.
Seam eliminates the backing bean quirkiness
The JBoss Seam framework allows EJB3 entity beans and session beans themselves to become JSF backing beans. Seam eliminates the need for looking up session beans and/or using entity beans as Data Transfer Objects (DTOs). To learn more about Seam, please refer to Chapter 14, Integrate JSF with EJB3 and Chapter 15, Integrate Business Processes.
The return value of the event handler method is used by the server to determine which page to display next after processing the event. Here, the addProduct() method returns the "afterAddProduct" string, the server would load and display to the /app/catalog.jsp page after addProduct() exits, according to the following navigation rule in the faces-config.xml file.
Example 2.13. Navigation rule in the faces-config.xml file
<faces-config>

  ... ...

  <navigation-rule>
    <navigation-case>
      <from-outcome>afterAddProduct</from-outcome>
      <to-view-id>/app/catalog.jsp</to-view-id>
    </navigation-case>
    ... ...
  </navigation-rule>
</faces-config>
These rules can be as specific or as general as needed. If the event handler method returns null, the server would refresh and display the current page.
Now you have a complete web application. Just build the dvdcatalog project as we described at the beginning of this chapter, and deploy it to a running JBoss server. You can access the application from the http://localhost:8080/dvdcatalog/ URL. To use the template for your own applications, you can simply put in your own source code in the src directory, compose web pages in the web directory, and modify the faces-config.xml file in the dd/war directory.
Is this lightweight?
In this chapter, we built a simple database-driven web application with four Java classes, two JSP pages, and an XML configuration file. Obviously, you can get it done for much less code if you use a scripting language like PHP. So, why do we call this approach "lightweight"? Well, with our setup, you get automatic support for transactions, only need to deal with the object data model, get a fully componentized and expandable UI, and have the clarity of a MVC framework. Those would result in better scalability and maintainability for more complex enterprise applications. You cannot get those features in a scripting language environment. So, the Java EE 5 approach is lightweight but without sacrificing the enterprise features.
In the next chapter, we will discuss how to tweak the configuration files and customize the template, so that it builds a web application of your own name, URL, and database configurations.