There are several types of document in eXo Platform, such as File, Article, Podcast, Sample node, File Plan, Kofax, and more.
The table below shows types of nodes which can be added to various document types. The rows indicate which nodes in the left column can be added. The columns indicate which nodes at the top can contain.
| File | Article | Podcast | Sample node | File Plan | Kofax document | Content folder | Document folder | |
|---|---|---|---|---|---|---|---|---|
| File |

|
|
|
|
|
|
|
|
| Article |
|
|
|
| ||||
| Podcast |
|
|
|
|
|
|
|
|
| Sample node |
|
|
|
| ||||
| File Plan |
|
|
|
|
|
| ||
| Kofax |
|
|
|
|
|
|
| |
| Uploaded file |
|
|
|
|
|
|
|
|
| Content folder |
|
|
|
|
|
| ||
| Document folder |
|
|
|
|
|
|
Note
 indicates that the corresponding document can be added into.
A blank entry means that the corresponding document cannot be added into.
indicates that the corresponding document can be added into.
A blank entry means that the corresponding document cannot be added into.
Following the horizontal, you will know which nodes can be added.
Following the vertical, you will know which node can be included.
Select a folder from the left pane where you want to add a new document.
Click
![[ Add Document ]](./images/adddocumenticon.png) on the
Action
bar to open a list of content templates.
on the
Action
bar to open a list of content templates.
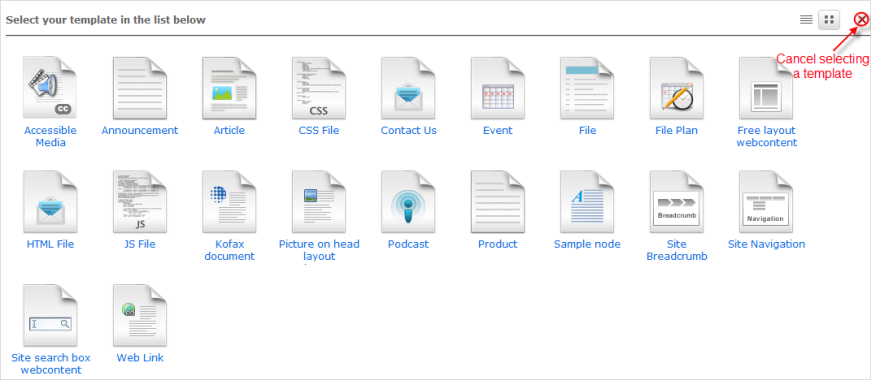
Click your desired template. See more details in Step 3 of the Add content section.
Each document (except Article) must be added to categories when being created.
Select a document or a folder that you want to attach files, and click
![[ Upload ]](./images/uploadicon2.png) on the
Action
bar.
on the
Action
bar.
The Upload File form will appear.
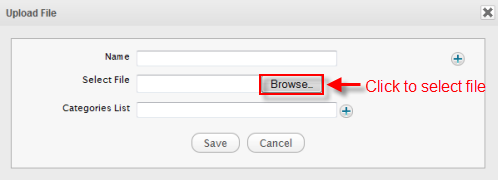
Enter a name into the Name field. If not, the Name field is automatically filled with the file name.
Click Browse... to select the attachment file. You can click
 to add more files.
Click Save to attach the files.
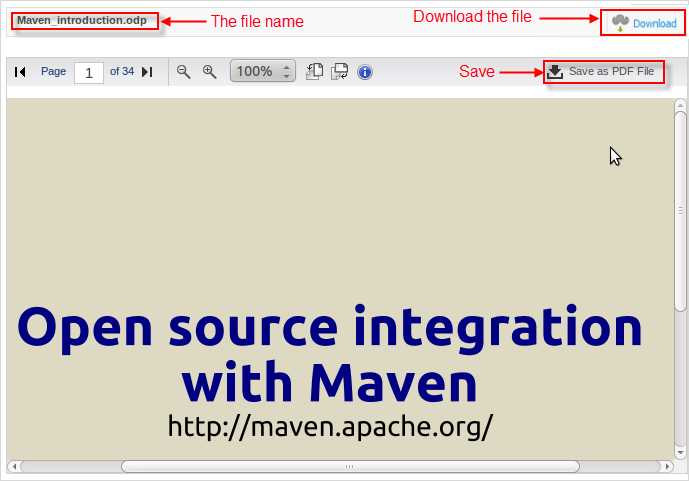
To view the attached file directly in Sites Explorer, simply click its name.
Note
eXo Platform enables you to view all types of documents, such as Open Office, Microsoft Office in the PDF format.
Follow the steps in the Add a new document section to open the corresponding form to add a File document.
Input a name for the file document in the Name field. Some special characters (@ # % & * ( ) “ ' : ; [ ] {} / !) cannot be used in the Name field.
Click the Mime Type field and select one type. There are three types of File document:
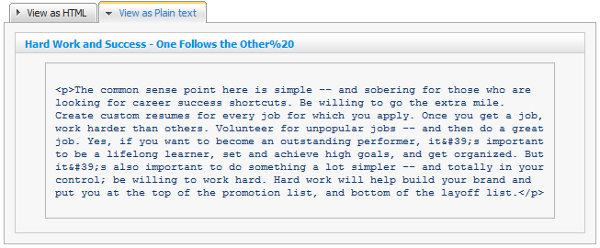
text/html: when creating a text/html File document, you can input values like source code (HyperText Markup Language HTML) in the Content field . After being created, it will generate the content you want, then you can see both the input source code and the generated content in that document.
text/plain: after a text/plain File document is created, it will display exactly what you input in the Content field.
application/x-groovy+html: it indicates your file as a groovy file.
Input a value in the Content field:
text/html or application/x-groovy+html: if you want to create a File document with a source code and generated content, click the
![[ Source ]](./images/sourceicon.png) button in the Editor bar.
button in the Editor bar.
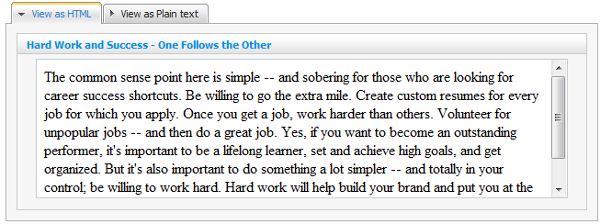
text/plain: if you select text/plain type, the content field will be displayed like the following illustration.
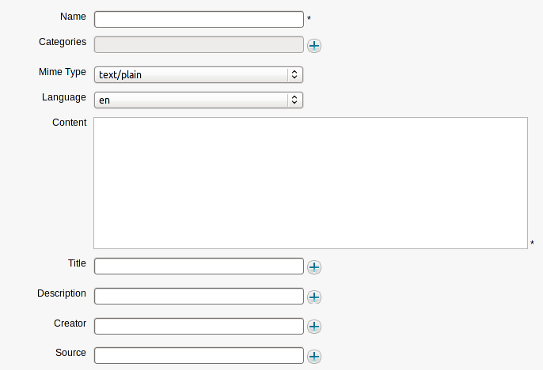
Optionally, fill values in all the rest fields, including Title, Description, Creator and Source.
Click
to open more fields.
Click Save or Save & Close to accept creating a new file document.
After being created successfully, a file document with the text/html type will be displayed like the illustration below.
Follow the steps in the Add a new document section to open the corresponding form to add a new Article document.
Input name and title of the Article in the Name and Title fields. Special characters (@ # % & * ( ) " ' : ; [ ] {} / !) are not allowed in the Name field.
Input values for both fields: Summary and Content.
Click Save or Save & Close to accept the inputted values.
After being created, your newly added Article document will be shown as below.
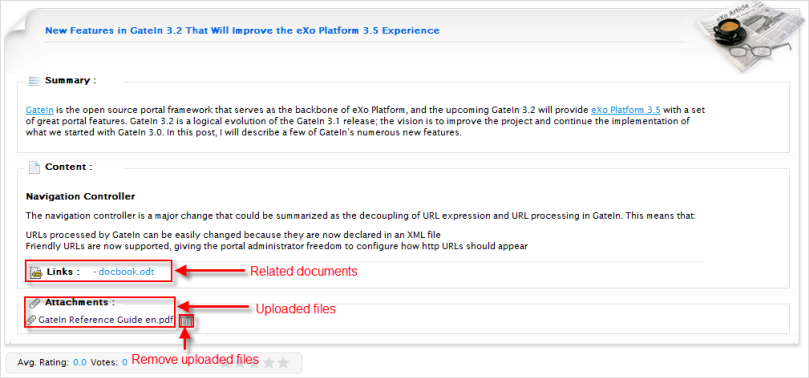
The Links area lists all its related documents. After adding relations to a document, Article will be displayed. You can click these links to view the content of the related documents. For more details about how to add a relation to a document, refer to the Add a relation section.
The Attachments area lists all its uploaded files/documents which are attached with the Article. You can remove
the attachments by clicking
 .
.
For more details about how to add an attachment, see the Attach files to a document section.
Note
The name of document may be as the same to that of the existing one. When a new document is created with the same name as other existing document, a numeric index will be added to the name (for example, test [2]).
Follow the steps in the Add a new document section to open the corresponding Podcast form.
Details:
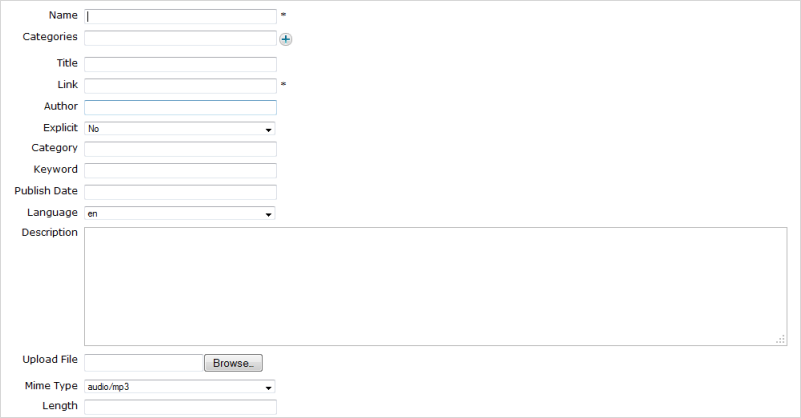
Field Description Name The document name which is required. Special characters (@ # % & * ( ) “ ' : ; [ ] {} / !) are not allowed in the Name field. Categories Categories of a document. Title The display name of a document. Link The link to the source path of the uploaded media file that is required. Author The author of the uploaded media file. Explicit It is used to indicate if your Podcast episodes contain an explicit content or not.
Category The category of the uploaded media file, for example music, film, or short clip. Keyword This field allows you to search your Podcast files more quickly. You can use commas to separate between keywords. Publish Date The date when an episode was released. Description Information about the uploaded media file. Mime Type The type of the uploaded media file. Length The length of the uploaded media file. Input values for fields. To upload a media file, click Browse... and select the media file from your device.
Click Save or Save & Close to finish.
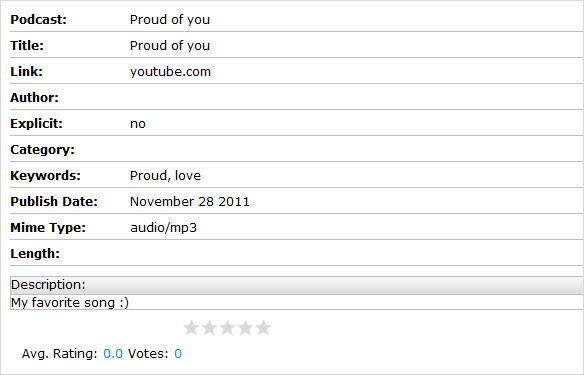
Once being created, a Podcast will be displayed.
Follow the steps in the Add a new document section to open the Sample node form.
Complete the appropriate fields.
Click Browse... to locate your desired image, and upload it.
Click Save or Save & Close to finish.
After being created, a new sample node will be displayed.

The Relations area is used to list all its related documents. See the View a relation section.
You can click the links to view content of the related document.
The Attachments area is used to list all its uploaded files. See the Attach files to a document section for more details.
Follow the instructions in the Add a new document section to open the corresponding form to add a File Plan document.
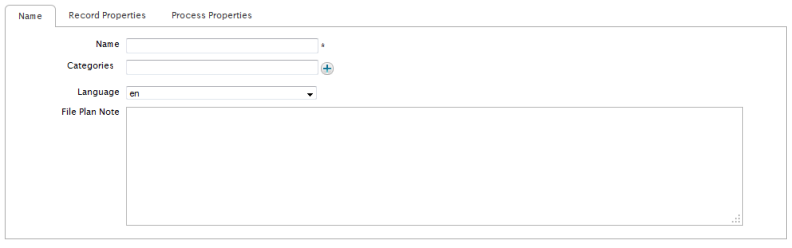
The Name tab
Field Description Name The name of the file plan. Categories Categories of your file plan. Select the categories for your file plan by clicking .
Language The language of the File Plan document. File Plan Note Note for presenting any other information for users. The Record Properties tab
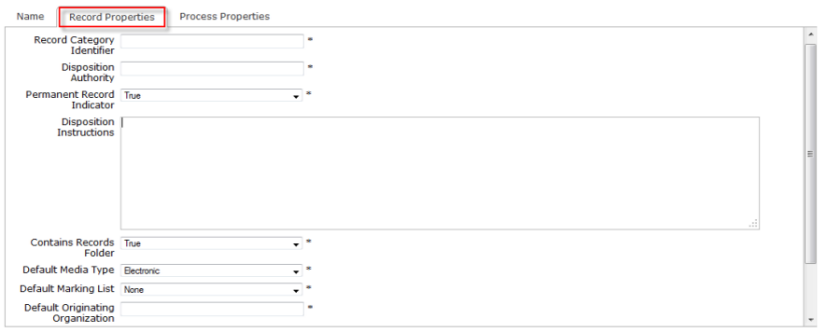
Field Description Record Category Identifier The alphanumeric identifier indicates a unique record category. This must be a unique ID. If this field is left blank, it will be created automatically by the system. Disposition Authority A reference number to the regulations that govern the disposition. Permanent Record Indicator A type of record indicators which should never be deleted. Disposition Instructions A readable guideline on how to handle the records associated with the file plan. Contains Records Folder The confirmation is about whether the records folder is contained or not. Default Media Type The choice for preset media types which are made available to simplify the data entry for the record. The frequently-chosen value is "electronic" or paper. Default Marking List Handling and classifying information that is printed at the bottom of the record, such as UNCLASSIFIED, or NOCONTRACT. Default Originating Organization This option is to enter the original arrangement as default which is made available to simplify the data entry for the record and to assume that originating organizations are the same for the information in the file plan. Vital Record Indicator This flag is to allow tracking or reminding you of the record as essential or not. Vital Record Review Period The choice for the interval of time between vital record reviews. The Process Properties tab

Field Description Process Cutoffs The Boolean data type is used to break a process. If the process cutoff flag is set in the file plan, the record is cutoff after the expiration, or after it has been obsolete or superseded, depending on the information in the file plan. Event Trigger The text data type is an automatic executing code which is used to tell the event to perform some actions. Cutoff Period The duration for the record cutoff performance. Cutoff on Obsolete The record is cutoff when it is obsolete. Cutoff on Superseded The record is cutoff when it is removed or replaced. Process Hold This boolean data type is used when a record process may be held before the further disposition is handled. Hold Period The duration when a record may be held after cutoff which is normally measured in Years. Discretionary Hold The Boolean data type is used when a hold may be discretionary, such as after a command change. So, the discretionary hold flag allows the records management module to track these manual checks. Process Transfer The boolean data type is used to determine how a record process will be transferred. Default Transfer Location The text data type is used to determine where a record is transferred by default. Transfer Block Size The float data type is used to determine in what size blocks for organizational purposes that is normally measured in Years. Process Access The Boolean data type is flagged when a record, which is held permanently, must be ultimately transferred to the national records authority. Access Location The text data type is flagged to specify an area for the access transfer. Access Block Size The text data type is flagged to determine the blocks size for organizational purposes which is normally measured in Years. Process Destruction The Boolean data type is flagged if there is any record to be destroyed. After that, the record is marked in the Alfresco system to be permanently destroyed so that all information, metadata and physical traces are removed and cannot be recovered.
Fill in the appropriate fields of the tabs in the form.
Click Save or Save & Close to finish.
Follow the instructions in the Add a new document section to open the Add Kofax Document form.
Input a name for a Kofax document in the Name field which is required. Special characters (@ # % & * ( ) “ ' : ; [ ] { } / !) are not allowed in this field.
Select categories for a Kofax document by clicking
.
Click Save or Save & Close to finish.
After being created, a Kofax document will be displayed.

The File View tab is used to display all added nodes in that Kofax. Besides, all added files in Kofax are also displayed in the Document View tab.
Follow the instructions in the Add a new document section to open the Add an event document form.
Enter a title for the event.
Input the location where the event will take place in the Location field. Select the Google Maps checkbox if you want the location of the event to be shown on Google Maps.
Enter the Start and End Date/Time of the event.
Fill the Summary and Content fields.
Click Save or Save & Close to finish.
After being created, the event will be displayed like the illustration bellow.

Follow the instructions in the Add a new document section to open the content template list, and select the Accessible Media template.

Details:
Field Description Name The document name which is required. Special characters (@ # % & * ( ) “ ' : ; [ ] {} / !) are not allowed in the Name field. Categories The name of the selected categories. Language The language of the media. Content The content of the media which is required. Title The display name of the media. Creator The creator of the media. Source The source of the media. Captions Provide the text of the dialogue and important sounds. Audio description Provide the narrate track of the media. You can browse and upload another media file from your local device to set it as the audio description. Alternative text Provide the descriptive information about the media. Input the information in the fields, and attach existing files from your local device to the following fields:
Content: It must be a .flv or .mp3 file.
Captions: It must be a .srt or .mp3 file.
Audio description: It must be a .flv or .mp3 file.
Click Save or Save & Close to finish.
The accessible media can be played right after being created.
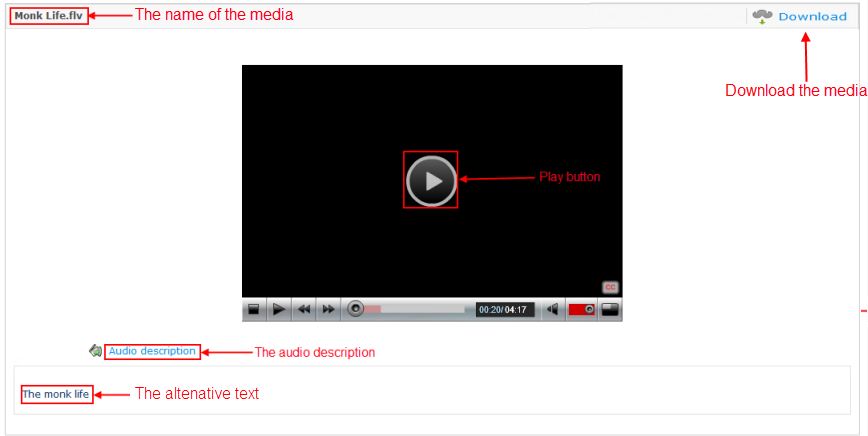
Details:
| Button | Function |
|---|---|
 | Stop the media. |
  |
Play the media. After clicking this button, will become
 and vice versa. and vice versa.
|
 | Play the previous media. |
 | Play the next media. |
 |
Listen to the audio description. This icon only appears if you attach another media with the audio description to the
Audio description field. After opening the audio description, to back to the original media, click
 . .
|
 | Activate/Deactivate the media caption. If you attach an .srt or .xml file to the Captions field, the caption will appear when you clicking this button. |